| Chapter 6. Define | ||
|---|---|---|

|
 |
|
| Chapter 6. Define | ||
|---|---|---|
|
|
|
|
Table of Contents
In the Define section, Projects, Iterations, Requirements, Test Environments, Systems under Test, Test Segments, Test Cases and Test Suites can be created and edited. There is a menu entry on the left-hand side for each of these object types.
A project collects all objects needed and created in a test project, such as test cases, test runs and test results. This chapter shows how to create and edit projects.
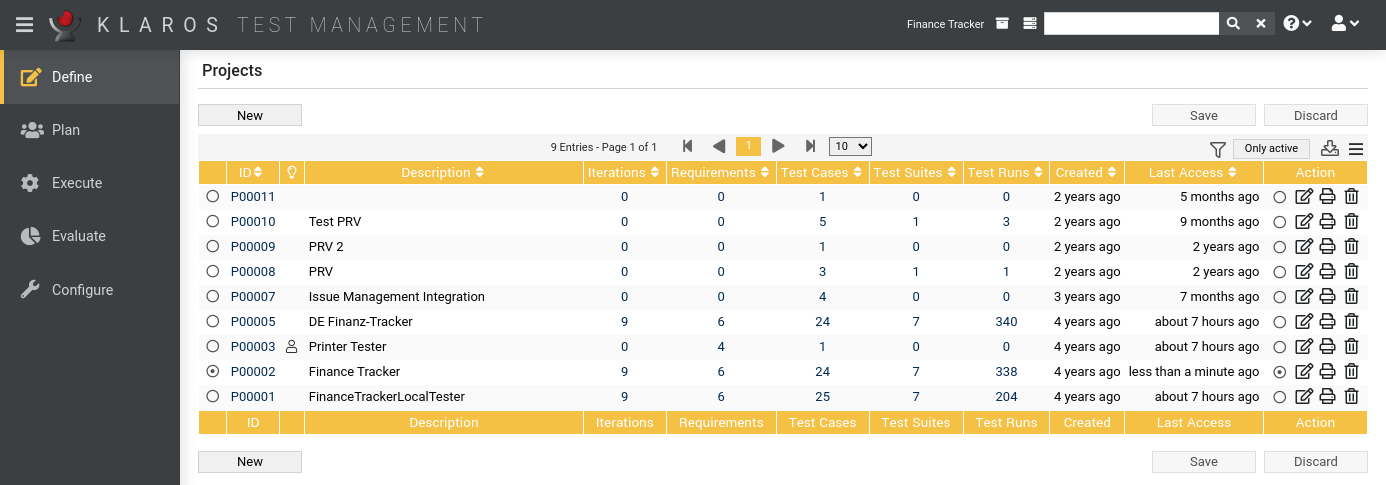
The overview page displays all existing projects in the selected project in a table. New projects are created here.
The table shows the following values:
|
ID |
Assigned automatically. |
|
Additional Information |
A tooltip appears when the cursor is placed over the icon shown here. |
|
Description |
The description of the project. |
|
Iterations |
The number of iterations in this project. |
|
Requirements |
The number of requirements in this project. |
|
Test Cases |
The number of test cases in this project. |
|
Test Suites |
The number of test suites in this project. |
|
Test Runs |
The number of test runs in this project. |
|
Created |
The date on which the project was created. |
|
Actions |
The executable actions. |
The Description entry can be edited directly in the table rows with one click.
By clicking on the button a a new empty table row will appear. Now, the Description can be defined.
With the new project is created and saved. The ID of the project (P00001) is automatically assigned by Klaros-Testmanagement. Click on the ID P00001 to get to the detail page of the project.
With several table rows can be created and edited at the same time. Only when clicking on the data is stored in the database.
With all changes are undone.
![[Note]](images/note.png) |
Red IDs |
|---|---|
|
All rows with red IDs have been changed and are not yet saved! |
The following actions can be performed in the action column:
If a project has been deleted, it is initially marked with a deletion marker and is only visible to administrators. For deleted projects, the following actions are available instead of Activate and Delete:
The following operations can be performed in the line above the table on the right:
All operations are described in detail in Section 5.2.3.1, “Overview Page”.
To quickly switch between projects, a quick selection is also available in the page header (see Figure 6.2, “Quick Selection of Projects”).
Each project has its own detail page with several additional tabs. Clicking on the ID of the respective project or on the icon on the right in the action column takes you to the tab that was selected last. When called for the first time, this is the Overview tab.
The following tabs are available: Properties, User Defined, Copy Objects, Access, Integration, Results and Changes.
|
Open print view |
A print-ready view of the project can be created here. With a click on the icon this opens in a new browser tab. Print views are described in detail in Section 5.2.3.2.1, “Print Pages”. |
|
Browse |
Use the green arrows at the very top right to switch between the projects present on the previous page. |
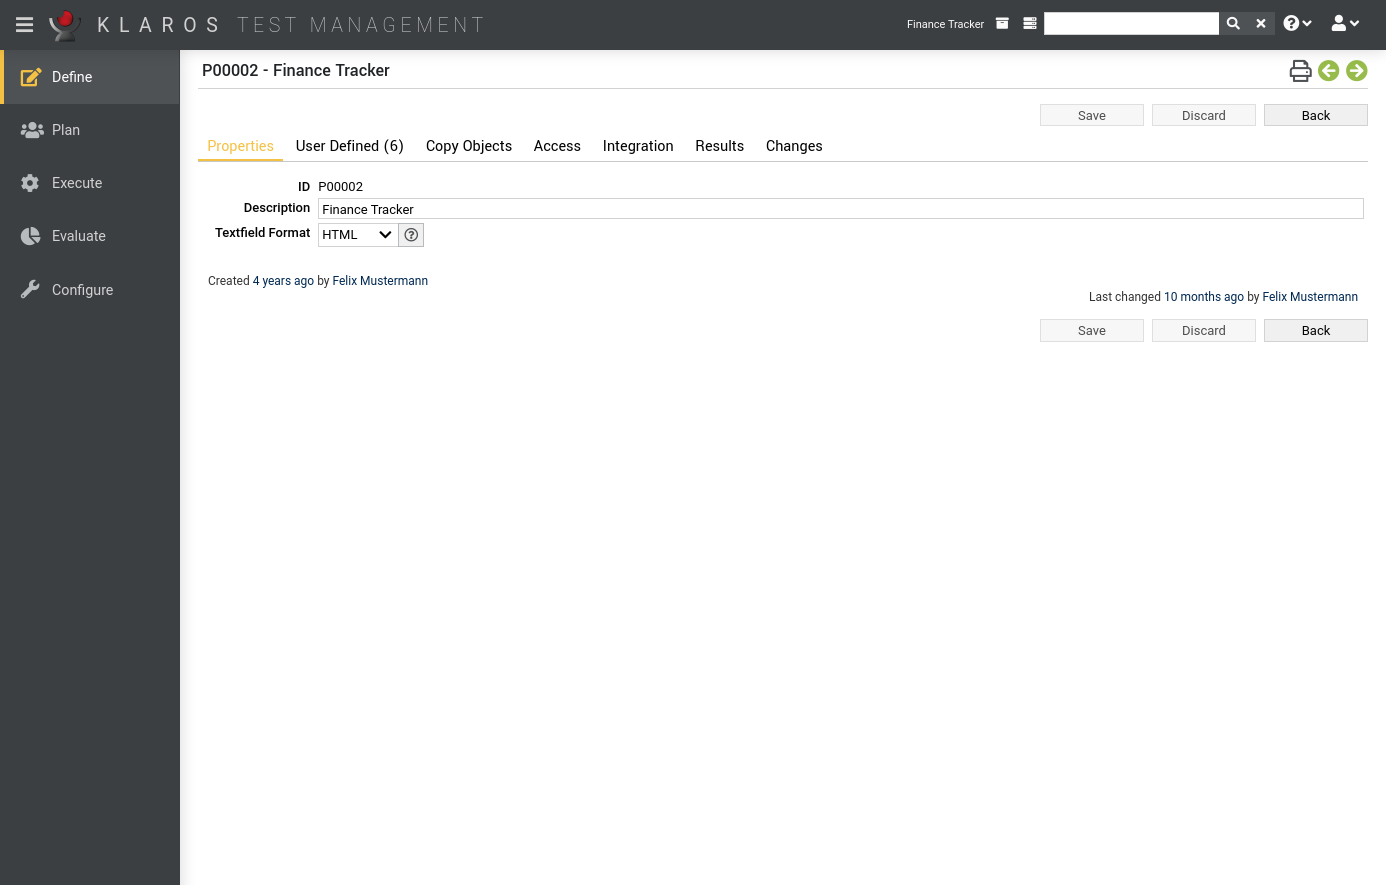
This tab ( Figure 6.3) allows the user to view or change the following attributes of the project:
|
Description |
The description of the project. |
|
Textfield Format |
Multiline text fields can contain HTML content or plain text. This is set here for the entire project. |
![]() Only available in Klaros-Testmanagement Enterprise Edition
Only available in Klaros-Testmanagement Enterprise Edition
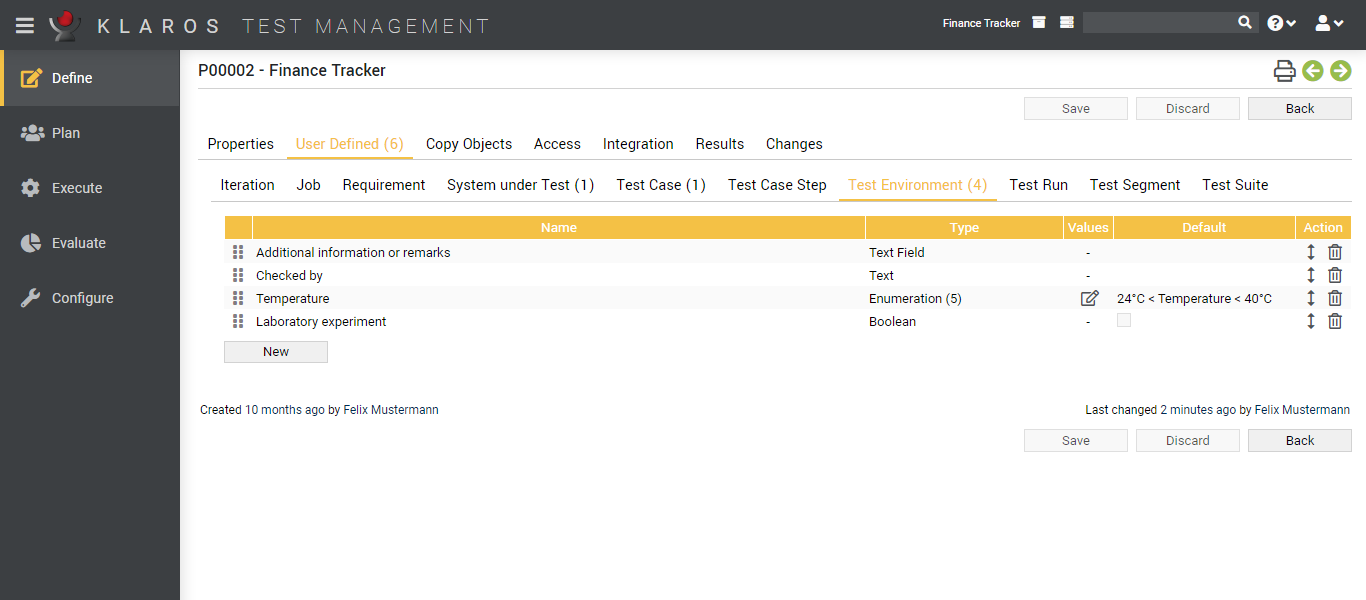
A project can be adapted to specific requirements by defining additional fields for objects such as test cases. For further information please refer to Section 5.2.3.2.4, “User Defined Properties”.
![]() Only available in Klaros-Testmanagement Enterprise Edition
Only available in Klaros-Testmanagement Enterprise Edition
Objects can be copied or synchronized between projects. The Copy objects tab displays a drop-down list of all source projects that the user can access to and that contain at least one copyable object. The Transfer user defined fields checkbox determines whether user defined properties should be copied as well.
Once a source project has been selected, the lists of objects that can be copied (Requirements, Test Environments, test systems, test cases, test segments and test suites) appear, as well as a radio button to select the mode (Copy or Synchronize).
Two modes are available.
Copied objects have no reference to their source object, so subsequent changes to the source object are not propagated to the copies.
Synchronized objects have a reference to their source object and can not be edited. Changes to the source objects can be transferred to the copies at any time.
![[Tip]](images/tip.png) |
What are synchronized objects needed for? |
|---|---|
|
Synchronized objects allow you to manage frequently used test cases in a reference project and reuse them in other projects. |
Already synchronized objects are hidden and can be displayed by clicking the button. If there are changes to the source object for a synchronized object, the icon is displayed in the Additional notes column. Clicking on it opens a dialog with which it can be synchronized.
|
Synchronization Mode |
|---|---|
|
Currently only test cases and test suites are supported in synchronization mode. |
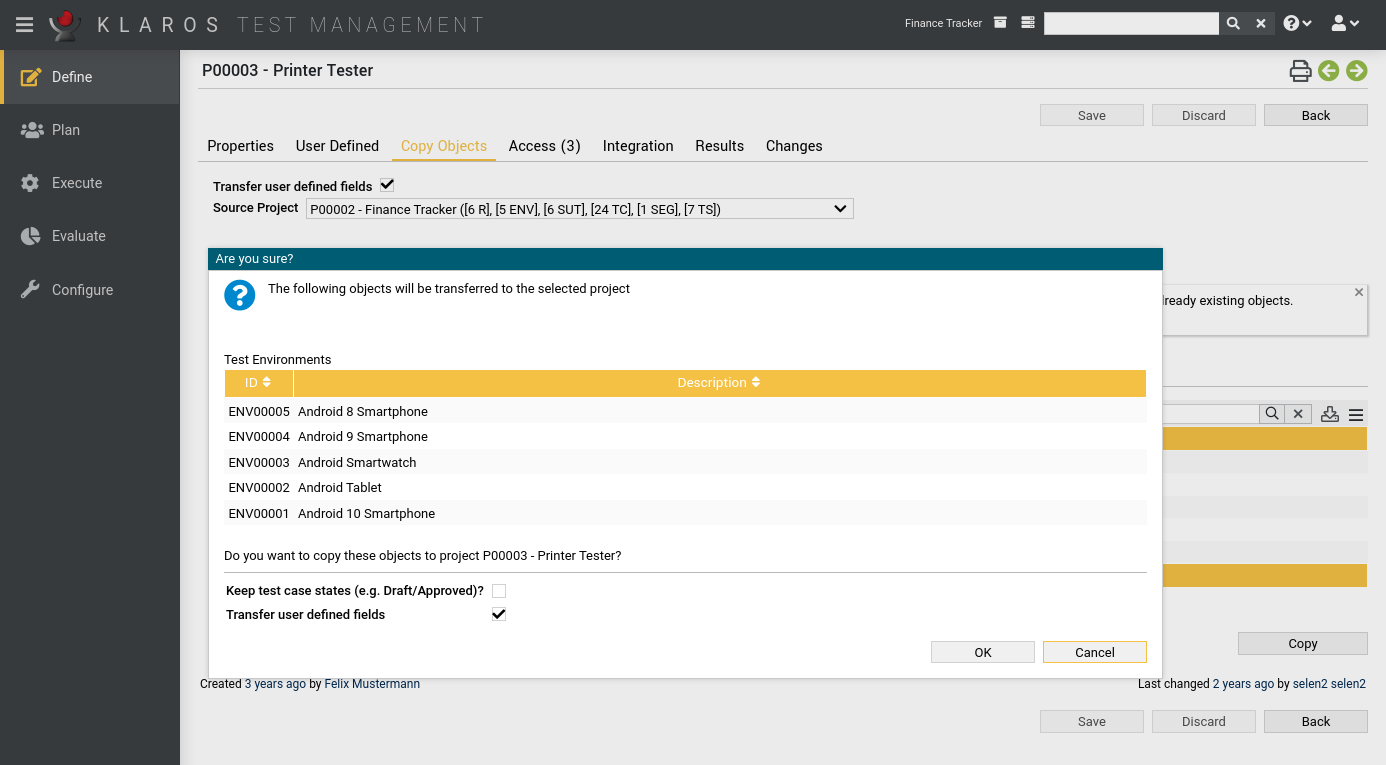
After one or more objects have been selected, clicking the ( ) button opens a dialog in which all objects are shown in a list. Clicking the starts the copy process (see Figure 6.6, “The “Copy Objects” Dialog ”).
The Keep test case status checkbox determines whether the defined test case statuses should be copied as well or whether the Draft status should be set for all test cases instead.
|
Note |
|---|---|
|
When a test suite is copied, all contained test cases are automatically copied as well. |
A project can be secured against outside access by enabling the Disable anonymous project access option.
When this option is enabled, a user must always be logged in to Klaros-Testmanagement to view pages referenced via bookmarks. For more information on bookmarking, see Section 5.2.3.2.2, “Bookmarks”.
If this option is disabled, a page referenced via bookmarks is accessible to everyone even without logging in. As soon as the user then tries to switch to another page, he is redirected to the login screen. If a user is not yet logged in, this is indicated by a corresponding icon in the Section 5.2.2.4, “The User Menu” at the top right.
![]() Only available in Klaros-Testmanagement Enterprise Edition
Only available in Klaros-Testmanagement Enterprise Edition
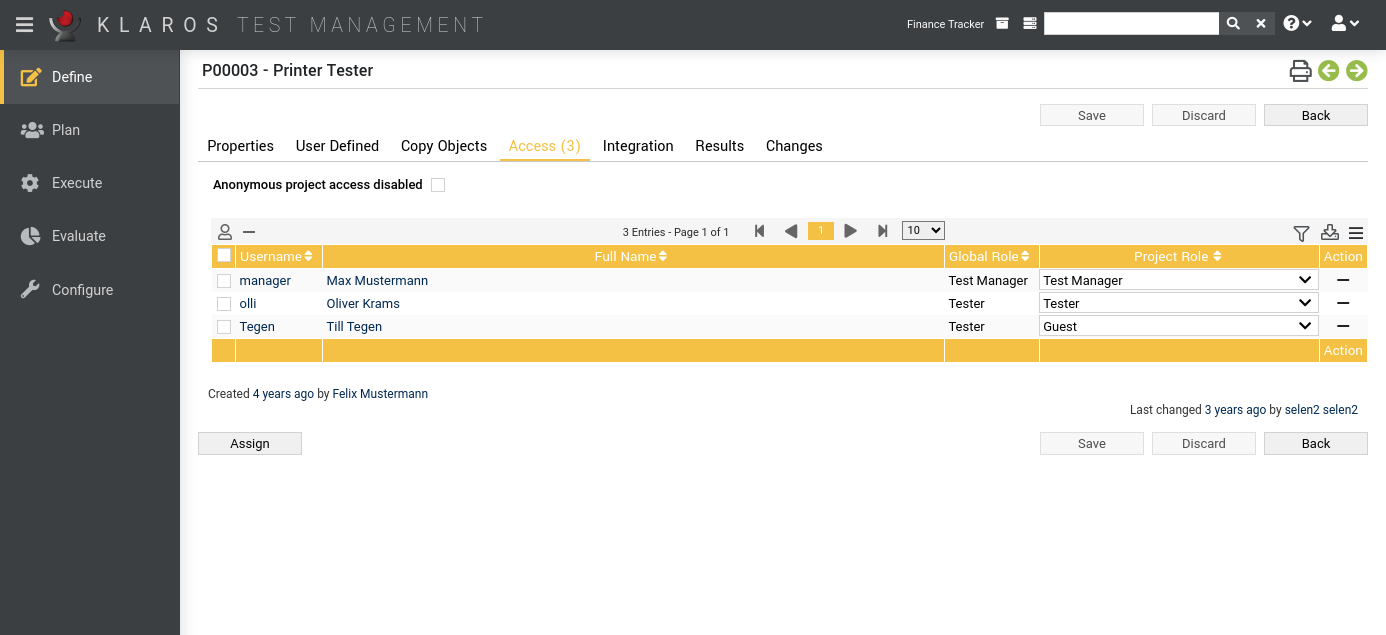
Klaros-Testmanagement Enterprise Edition features a global role based access system (see Section 10.3, “Users”). In the Access tab, administrators and test managers can change the global role of a user to an individual project role. For example, a user with the global role tester can be assigned to one project as a tester and to another project as a test manager.
Initially, every project is accessible by every user. If at least one test manager has been assigned to a project, access to this project is restricted for all other users not explicitly assigned.
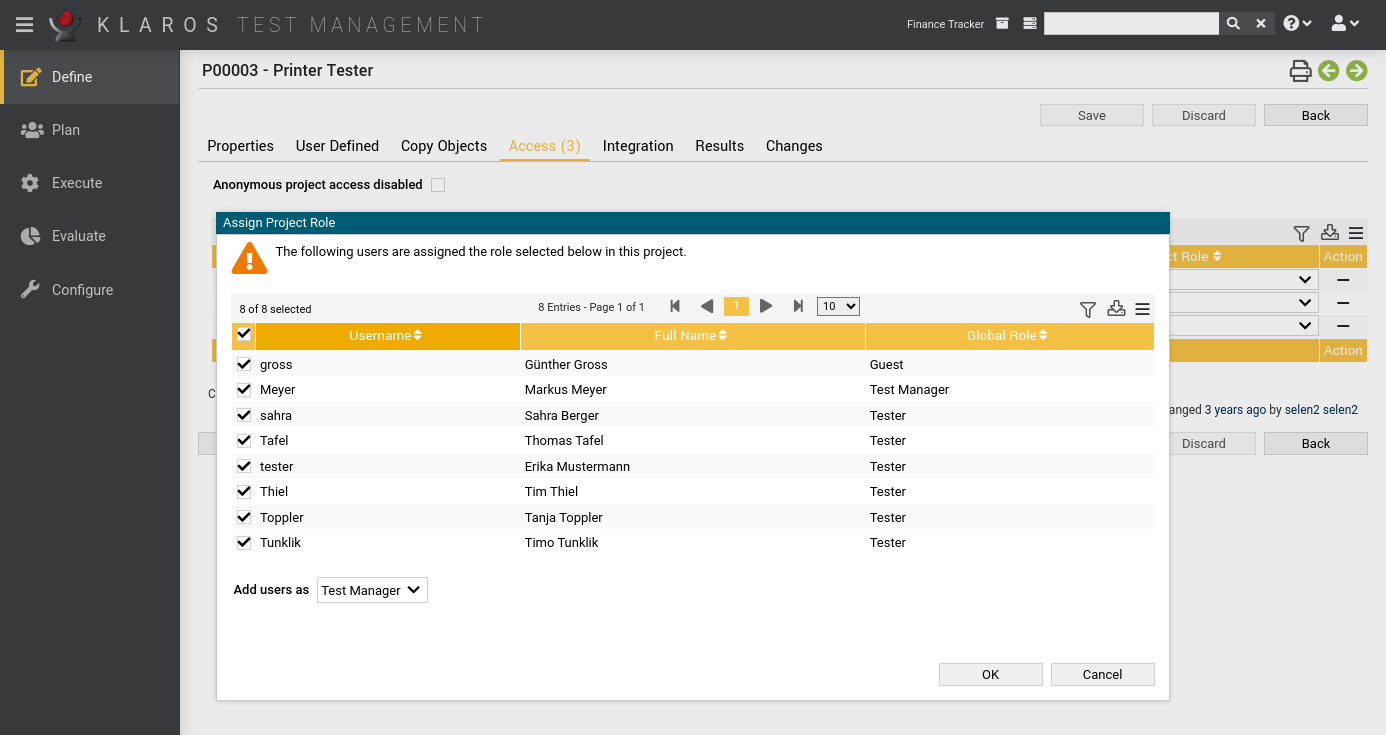
Pressing the button opens up a dialog (see Figure 6.8, “The “Assign Project Role” Dialog ”) where new users can be added to the project.
|
Every project needs at least one test manager! |
|---|---|
|
A project needs at least one assigned test manager. When trying to save a project which has no test manager assigned, a warning message will be displayed in the log panel (see Section 5.2.2.2, “The Log Panel”). |
The following collection actions can be performed here:
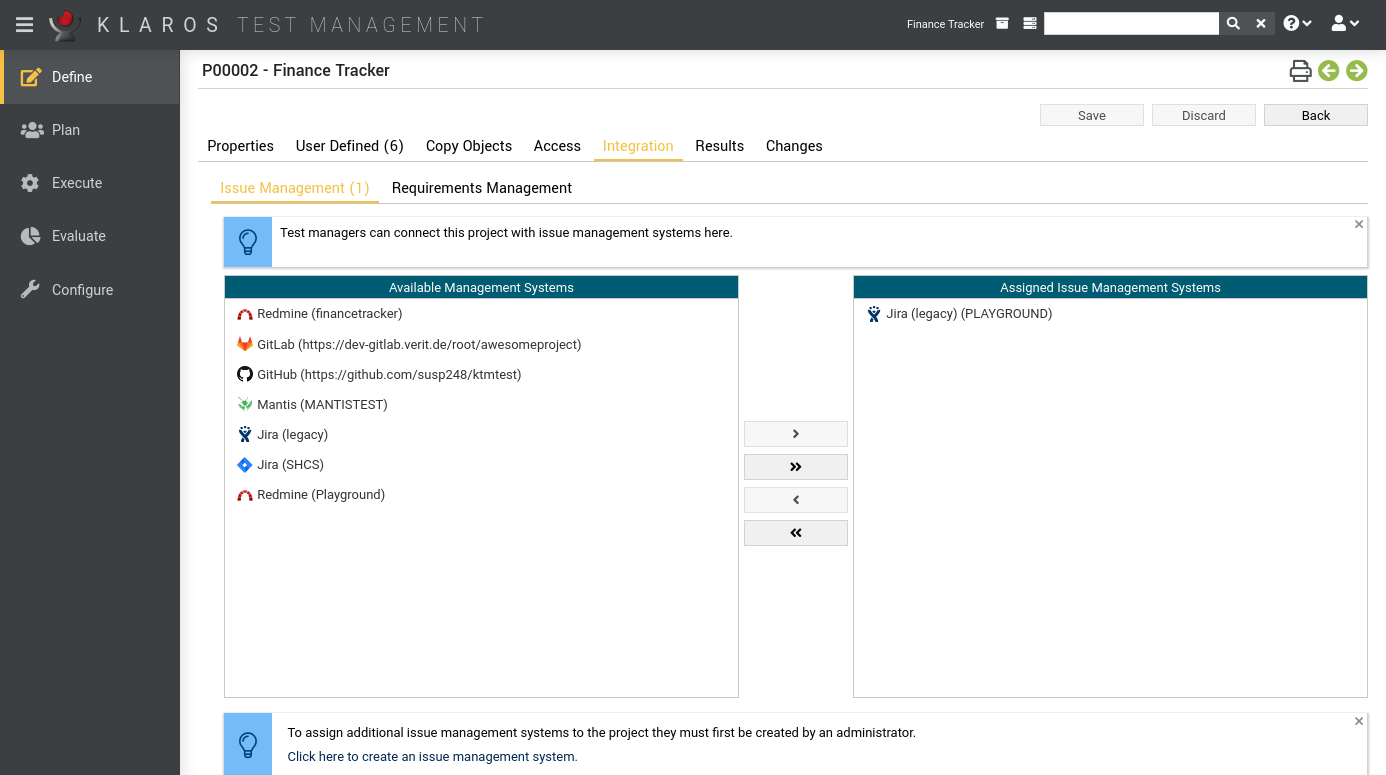
In this view, external systems such as issue management and requirements management can be linked with Klaros-Testmanagement.
The issue management systems that are in use in the project can be edited here.
|
Creating an Issue-Management-System |
|---|---|
|
Before an issue management system is available on this page, it must first be created by an administrator. For instructions on the creation of issue management systems, see Section 10.5.1, “Issue Management”. |
The tab shows two tables: The left table contains the issue management systems that are available, while the right table shows the issue management systems that are already assigned to the project. Pressing the icon adds the corresponding issue management system to the project. To add all issue management systems press the icon. The and are used in the same way to unassign issue management systems. It is also possible to drag and drop an issue management system to a list.
The icons in the center can be used to perform the following actions:
![]() Only available in Klaros-Testmanagement Enterprise Edition
Only available in Klaros-Testmanagement Enterprise Edition
See Section 10.5.2, “Requirements Management” for more information about how to connect remote requirement management systems to Klaros-Testmanagement.
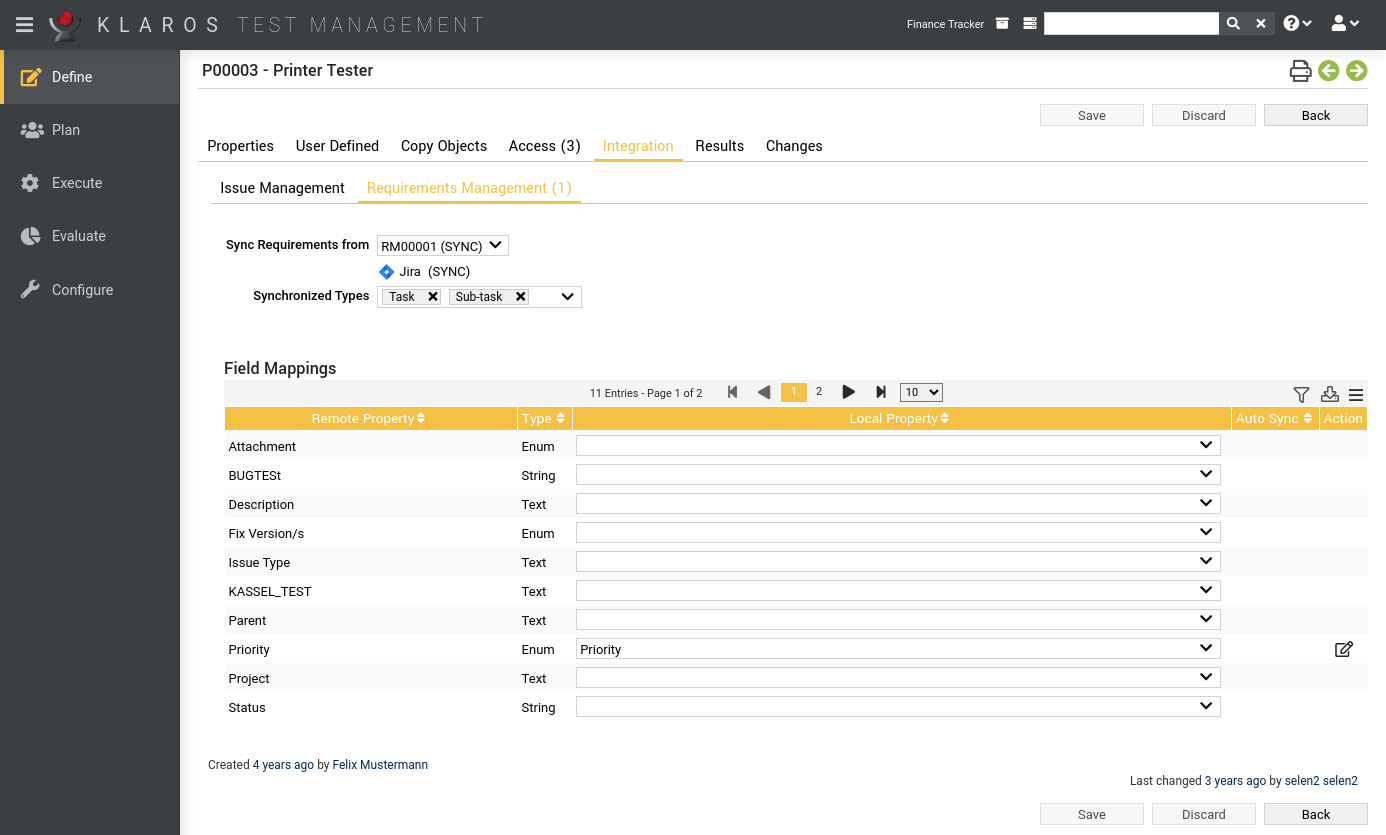
A project can be connected to a requirement management system via the Requirements Management tab on the project detail page. This tab will show a dropdown list of all available requirement management systems.
![[Important]](images/important.png) |
Important |
|---|---|
|
In order to connect an RMS to a project, the RMS has to be configured in the Configure section first (see Section 10.5.2, “Requirements Management”). |
After pressing the button, a background synchronization will start that will load all requirements from the configured RMS and stores them locally.
|
Note |
|---|---|
|
Synchronizing requirements can take up a huge amount of time depending on the number of requirements on the remote side. A built-in scheduler will synchronize all requirements of all connected requirement management systems for all enabled projects in specified intervals. |
![[Warning]](images/warning.png) |
Warning |
|---|---|
|
When enabling a remote RMS any local requirements that have already been created will be disabled. Switching back to local requirement management will enable those requirements again. |
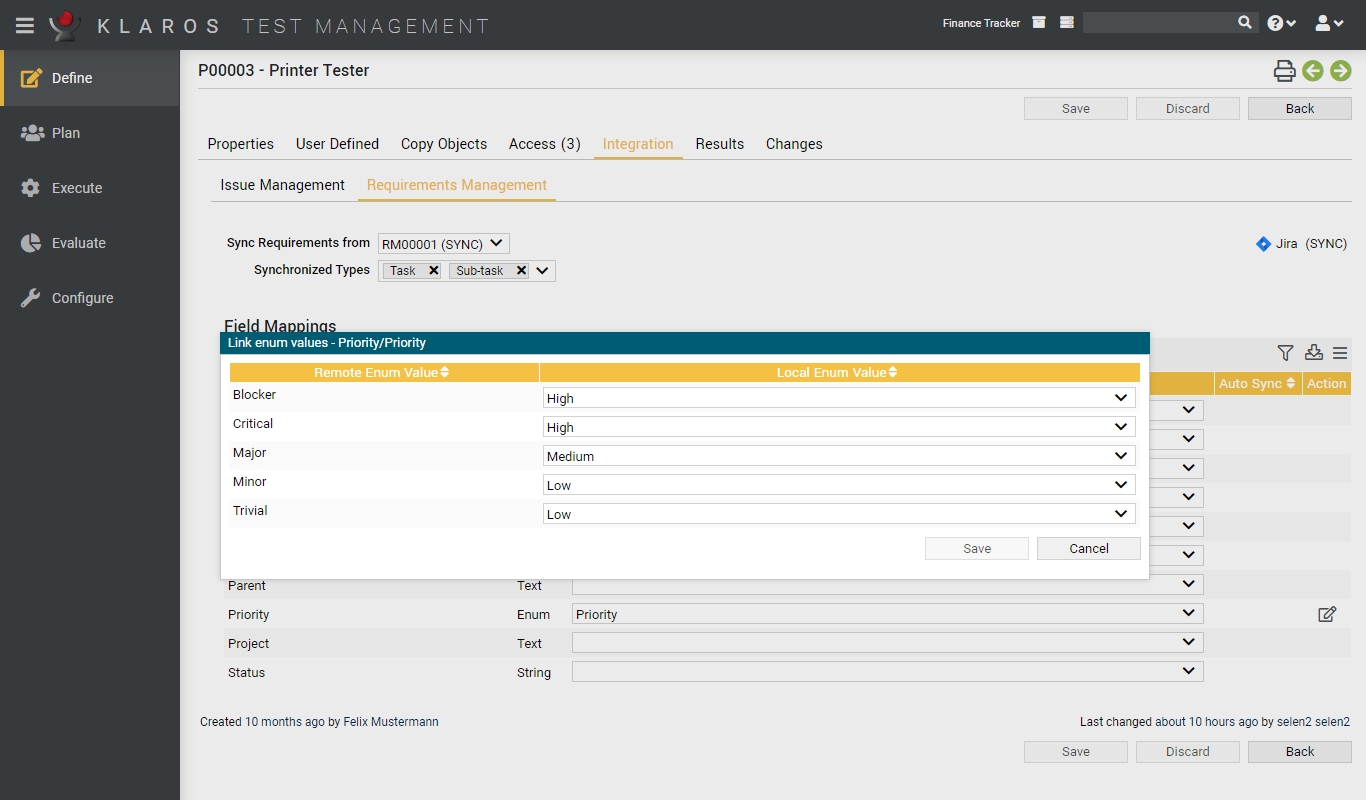
After selecting a requirement management system from the dropdown list, a list of issue types appears. Per default all types are selected, so a background synchronization will synchronize requirements of any type.
Administrators and project managers can link individual fields between the remote requirement management system and Klaros-Testmanagement. When using Jira, as per default, the Description, Priority and Summary fields from the remote RMS (if they are available) are linked to the Description, Priority and Name fields in Klaros-Testmanagement. In addition to that, the Jira Status field is automatically mapped to a dedicated Status field that is only displayed if RMS synchronization is enabled.
Fields can be one out of three types: String, Enum and Boolean.
|
Note |
|---|---|
|
An enum field in Klaros-Testmanagement can only be linked to an enum field of the remote RMS, but an enum field of the RMS can be linked to either a string or boolean field in Klaros-Testmanagement. |
When linking enum fields, it is necessary to indicate which enum values should be linked together. Otherwise, all values of the RMS will be mapped to the default enum value of the Klaros-Testmanagement field.
Clicking the icon of an enum linking opens up a dialog where individual values can be linked.
|
Note |
|---|---|
|
Multiple enum values of a remote enum field can be linked to the same enum value of a field in Klaros-Testmanagement. |
When linking enum fields, it is often tedious to keep the list of selectable values in sync. For this, an automated synchronization mechanism for enumeration values is available using the Auto Sync column.
Using AutoSync requires that the remote field is an enum field. In addition, the local field must be set to a user defined requirement enum property. Once this is satisfied, the Auto Sync field will be displayed with a check mark in the list.
|
Note |
|---|---|
|
It is not necessary to specify all the enum field values. Once the Auto Sync flag is set, the remote system is queried for available values and values for the local field are automatically changed accordingly. |
The results tab is further divided into a Test Runs, Test Case Results and a Test Suite Results tab, showing the test results related to this project as described in Section 5.2.3.2.7, “Test Runs and Results”.
The tab Changes shows the change history of this project.
For a detailed description of the Changes view, see Section 5.2.3.2.8, “Change History”.
|
|
|
|
| 5.3. Main Functions |  |
6.2. Iterations |