| 6.8. Test Suites | ||
|---|---|---|

|
Chapter 6. Define |  |
| 6.8. Test Suites | ||
|---|---|---|
|
|
Chapter 6. Define | |
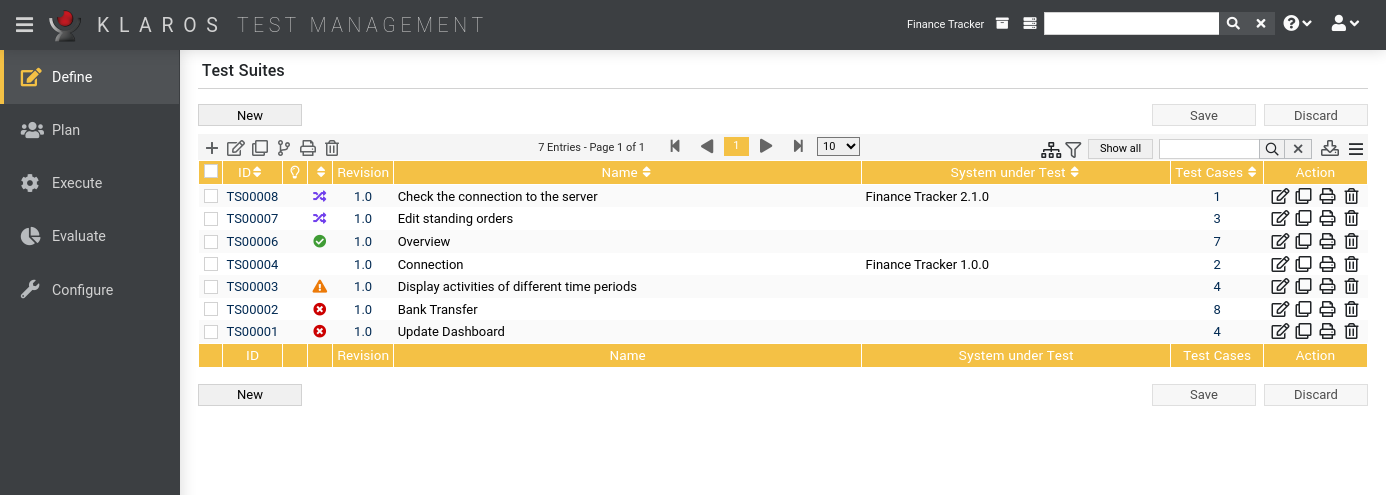
A test suite is a collection of test cases that are to be executed together. The results of a test suite execution can be used to verify and ensure that a system meets certain specifications or requirements.
The overview page displays all existing test suites in the selected project in a table. New test suites are created here.
The table shows the following values:
|
ID |
Assigned automatically. |
|
Additional Information |
A tooltip appears when the cursor is placed over the icon shown here. |
|
Revision |
The revision of the test suite. |
|
Name |
The name of the test suite. |
|
System under Test |
The systems under test assigned to this test suite. |
|
Test Cases |
The number of test cases that this test suite contains. |
|
Action |
The actions that can be performed. |
Name and System under Test can be edited directly in the table rows.
By clicking on the button a new empty table row will appear. Now, Name and System under Test can be defined.
With the new test suite is created and saved. The ID of the test suite (TS00001) is automatically assigned by Klaros-Testmanagement. Click on the ID TS00001 to get to the detail page of the test suite.
With several table rows can be created and edited at the same time. Only when clicking on the data is stored in the database.
With all changes are undone.
![[Note]](images/note.png) |
Unsaved Changes |
|---|---|
|
All rows marked with red IDs contain changes that have not yet been saved. |
The following actions can be performed in the action column:
If a test suite has been deleted, it is initially marked with a deletion marker and is only visible to administrators. For deleted test suites, the following actions are available instead of Delete:
On the Test Suite page, one or more test suites can be selected for bulk actions. Bulk actions are described in Section 5.2.3.1.5, “Bulk Actions”.
The following bulk actions are supported for test suites:
For additional information, see Section 5.2.3.1.5, “Bulk Actions”.
The following operations can be performed in the line above the table on the right:
All operations are described in detail in Section 5.2.3.1, “Overview Page”.
Each test suite has its own detail page with several additional tabs. Clicking on the ID of the relevant execution definition or on the icon on the right in the action column takes you to the tab that was selected last. When called for the first time, this is the Overview tab.
The following tabs are available: Overview, Properties, User Defined, Attachments, Revisions, Jobs, Results and Changes.
|
Warning Sign in the ID Column |
|---|---|
|
A manual test case which that contains no steps is not executable. To indicate this, a warning sign ( ) is displayed in the ID column. |
On the detail pages there are additional icons in the upper right corner. The following actions can be performed here:
|
Review |
Creates a review job. |
|
Open print view |
Here, a print-ready view of all entries of the respective test suite can be created. Click on the icon to open it in a new browser tab. For more information, see Section 5.2.3.2.1, “Print Pages”. |
|
Create Bookmarks |
Each individual detail page can also be reached directly via a hyperlink. By clicking on the icon this link is copied to the clipboard. The creation of bookmarks is described in detail in Section 5.2.3.2.2, “Bookmarks”. |
|
Browse |
Use the green arrows at the very top right to switch between the test suites present on the previous page. |
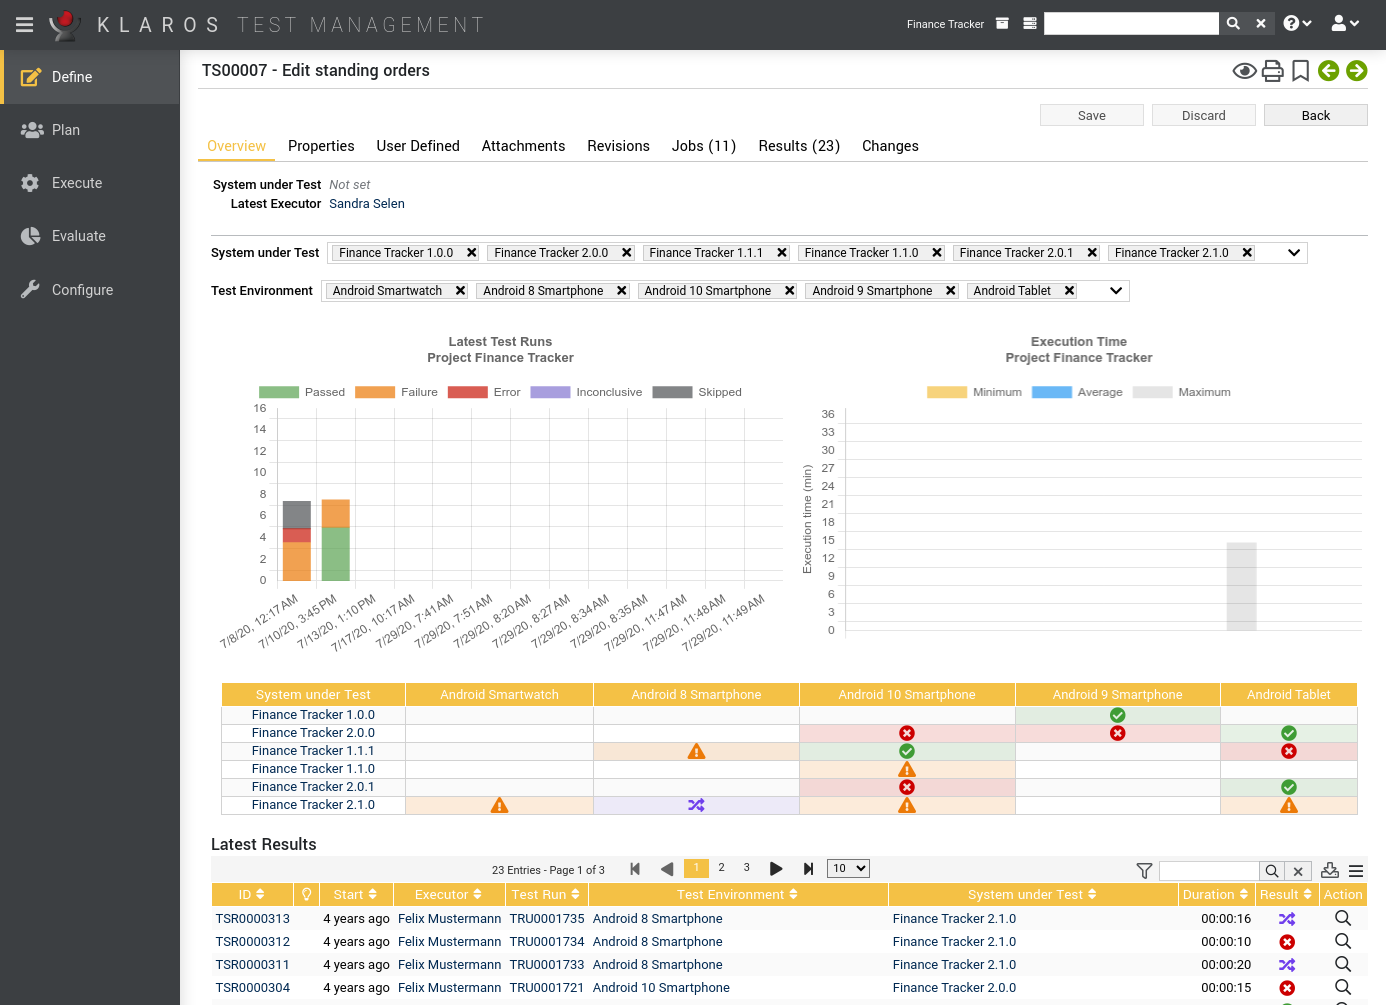
The following values are displayed on the overview tab:
|
Assigning a System Under Test |
|---|---|
|
The assignment of a test suite to a system under test only indicates this to the user. Assigned test-suites can still be executed with other systems under test. |
|
Latest test runs |
This graph shows the number of passed, failed, erroneous, inconclusive and skipped test case results for the latest five test runs for this test suite. |
|
Execution Times of this Test Suite |
This graph shows the minimum, maximum and average execution times for this test suite. |
|
System under Test Overview |
This table shows the latest result of this test suite for every system under test and test environment this test suite has been executed in. Hovering the mouse cursor over a single result will show a more detailed overview of the individual test case results of this test suite. Clicking on a result takes you to the test case result detail page. |
In this tab ( Figure 6.22) the following attributes of the test suite are displayed:
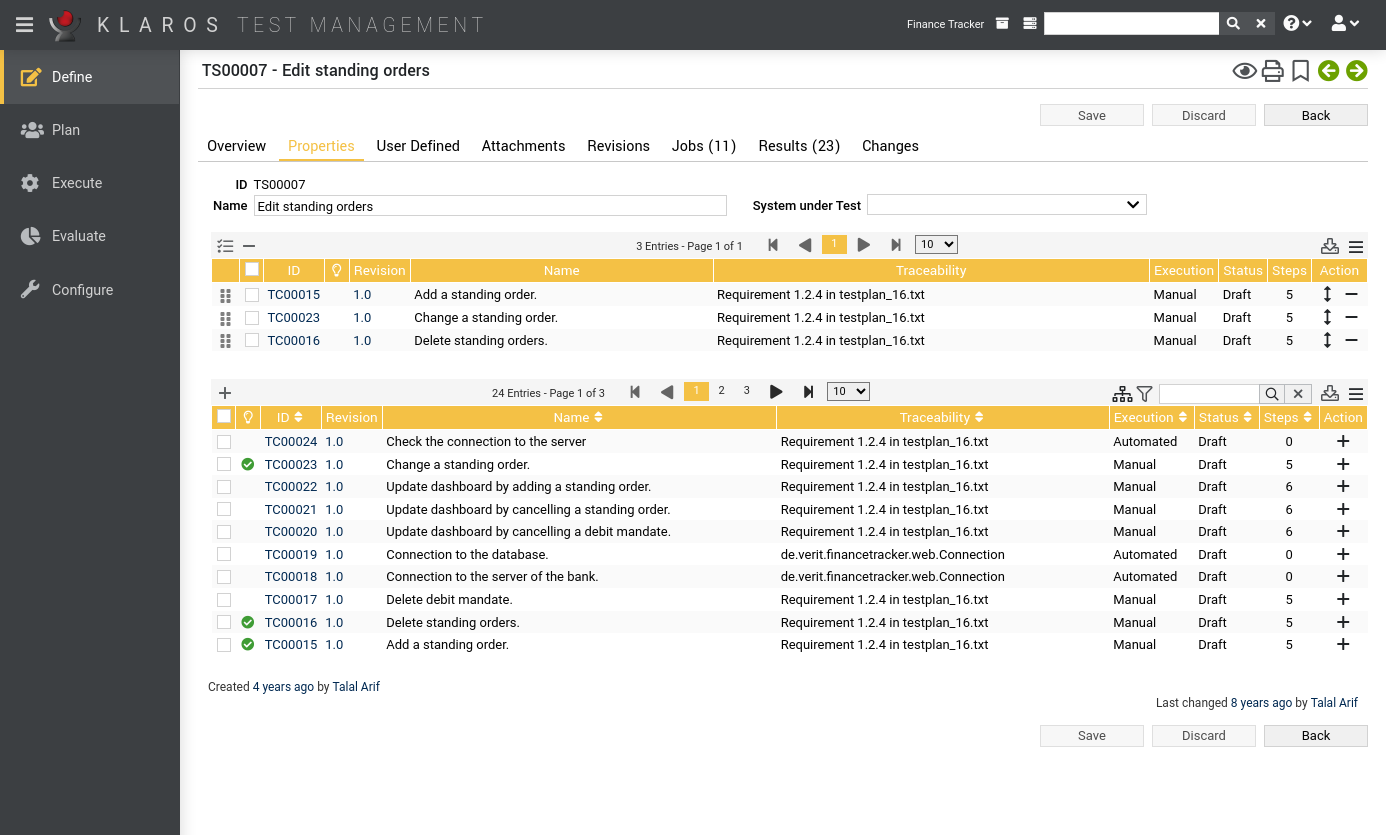
In this view, test cases can be added to or removed from the test suite. The upper table displays the test cases contained in the test suite, it supports reordering via drag and drop operations. The lower table shows the available test cases.
The following bulk actions are supported for the list of test cases in the test-suite:
This tab allows the user to view following attributes of the test cases:
|
ID |
Assigned automatically. |
|
Name |
The name of the test case. |
|
Traceability |
Die Anforderung, die dieser Testsuite zugeordnet ist. |
|
Execution |
Manual oder Automated. |
|
State |
The state of the test case. Possible values are Locked, Approved, Draft and Skip. |
|
Steps |
The number of associated test steps. |
|
Action |
Entfernt oder fügt den Testfall zur Testsuite hinzu. |
You can create your own fields to meet individual requirements. For further information please refer to Section 5.2.3.2.4, “User Defined Properties”.
You can add any files as attachments to a test suite. For more information, see Section 5.2.3.2.6, “Attachments”.
Test suites may exist in different revisions. For more information, see Section 5.2.3.2.5, “Revisions”.
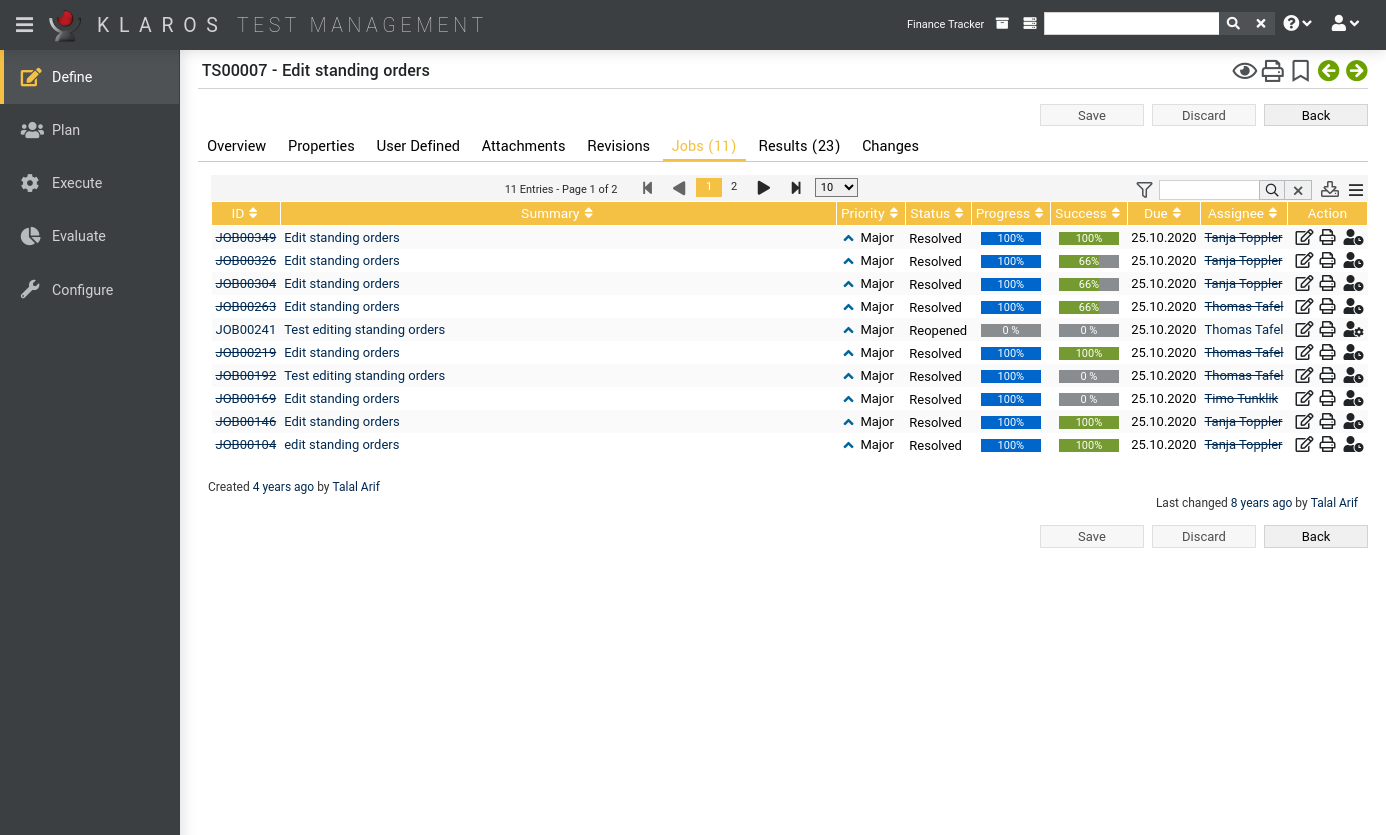
This view lists all the jobs in which this test suite is included. These jobs can be executed directly from this view. For more information on managing jobs, see Section 7.1, “Jobs”.
The results tab is further divided into a Test Runs, Test Case Results and a Test Suite Results tab, showing the test results related to this test suite as described in Section 5.2.3.2.7, “Test Runs and Results”.
The tab Changes shows the change history of this test suite.
For a detailed description of the Changes view, see Section 5.2.3.2.8, “Change History”.
|
|
 |
|
| 6.7. Test Cases |  |
Chapter 7. Plan |