| 6.4. Test Environments | ||
|---|---|---|

|
Chapter 6. Define |  |
| 6.4. Test Environments | ||
|---|---|---|
|
|
Chapter 6. Define | |
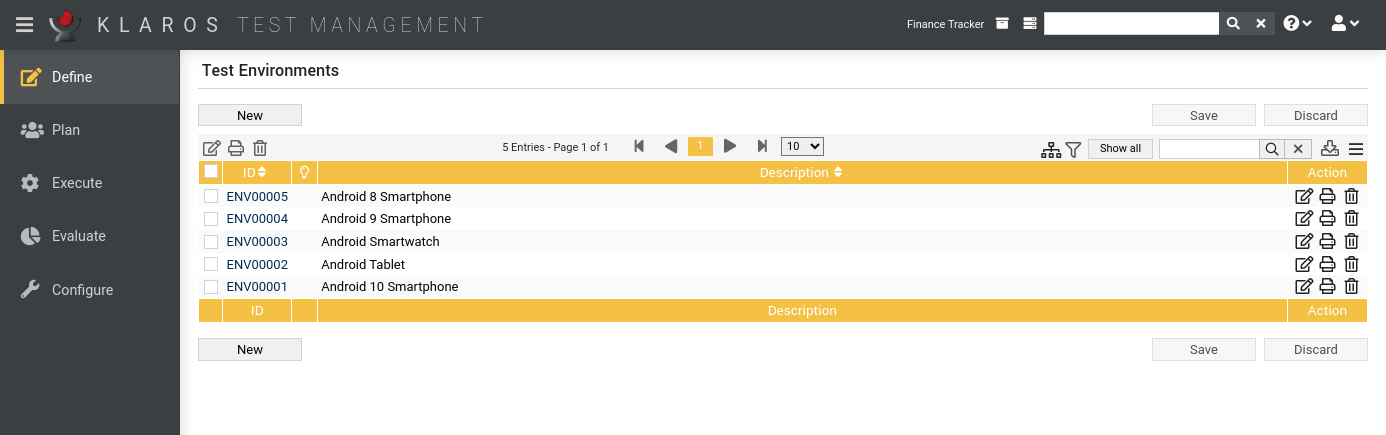
A test environment summarizes the external circumstances that can influence a test result. This can be the operating system, the physical environment, or the version of a client system, web browser, or application server. This chapter shows how to create and edit test environments.
The overview page displays all existing test environments in the selected project in a table. New test environments are created here.
The table shows the following values:
|
ID |
Assigned automatically. |
|
Additional Information |
A tooltip appears when the cursor is placed over the icon shown here. |
|
Description |
The description of the test environment. |
|
Actions |
The executable actions. |
The Description entry can be edited directly in the table rows by clicking in the corresponding field.
By clicking on the button a a new empty table row will appear. Now, a Description can be defined.
With the new test environment is created and saved. The ID of the test environment (ENV00001) is automatically assigned by Klaros-Testmanagement. Click on the ID ENV00001 to get to the detail page of the test environment.
With several table rows can be created and edited at the same time. Only when clicking on the data is stored in the database.
With all changes are undone.
![[Note]](images/note.png) |
Red IDs |
|---|---|
|
All rows with red IDs have been changed and are not yet saved! |
The action column is located on the far right of the table. The following actions can be performed here:
If a test environment has been deleted, it is initially marked with a deletion marker and is only visible to administrators. For deleted test environments, the following actions are available instead of Delete:
Some actions can be applied to multiple test environments at the same time. To do this, select the test environments to which the action is to be applied in the leftmost column.
The following bulk actions are supported for test environments:
Bulk actions are described in detail in Section 5.2.3.1.5, “Bulk Actions”
The following operations can be performed in the line above the table on the right:
All operations are described in detail in Section 5.2.3.1, “Overview Page”.
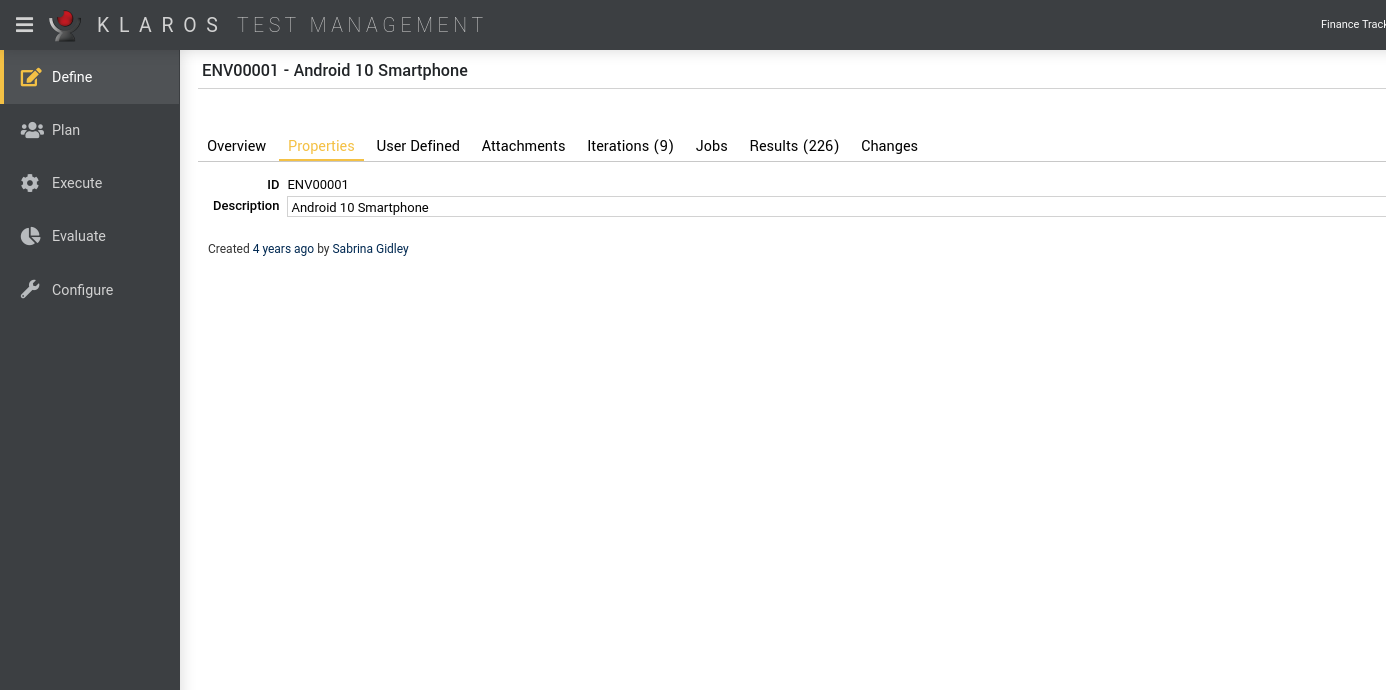
Each test environment has its own detail page with several additional tabs. Clicking on the ID of the respective test environment or on the icon on the right in the action column takes you to the tab that was selected last. When called for the first time, this is the Overview tab.
The following tabs are available: Overview, Properties, User Defined, Attachments, Jobs, Results and Changes.
On the detail pages, there are additional icons in the top right corner of the header. The following actions can be performed here:
|
Open print view |
A print-ready view of the test environment can be created here. With a click on the icon this opens in a new browser tab. Print views are described in detail in Section 5.2.3.2.1, “Print Pages”. |
|
Create Bookmarks |
Each individual detail page can also be reached directly via a hyperlink. By clicking on the icon this link is copied to the clipboard. The creation of bookmarks is described in detail in Section 5.2.3.2.2, “Bookmarks”. |
|
Browse |
Use the green arrows at the very top right to switch between the test environments present on the previous page. |
All data displayed here always refer to the currently displayed test environment.
The following values are displayed on the overview tab:
|
Success |
The overall success rate of all test cases. A success rate of 100% means that the latest test run for every test case has been successful. Even if a test case has been successfully executed in the past, only the latest result is considered for the success rate. |
|
Progress |
The progress rate shows how many test cases have been executed. In contrast to the success rate, the progress rate only takes into account whether a test case was executed at least once, regardless of its result. |
|
Compliance |
The compliance rate shows how many test cases assigned to requirements have been successfully executed. |
|
Coverage |
The coverage rate shows how many test cases assigned to requirements have been executed at least once. In contrast to the compliance rate, the coverage rate considers only if a test case has been executed at least once in the iteration, regardless of its result. |
|
Automation Rate |
The automation level indicates the percentage of test cases that can be executed automatically. |
|
Success History Diagram |
This chart shows the historical evolution of the success, progress, conformance, and coverage rate of this test environment for the selected system under test. The timeline is automatically adjusted to the existing data. |
In the lower area you find a table with the key figures of this test environment broken down by system under test.
This tab ( Figure 6.28) allows the user to view or change the following attributes of the test environment:
|
Description |
A description of the Testumgebung. |
You can create your own fields to meet individual requirements. For further information please refer to Section 5.2.3.2.4, “User Defined Properties”.
You can add any files as attachments to a test environment. For more information, see Section 5.2.3.2.6, “Attachments”.
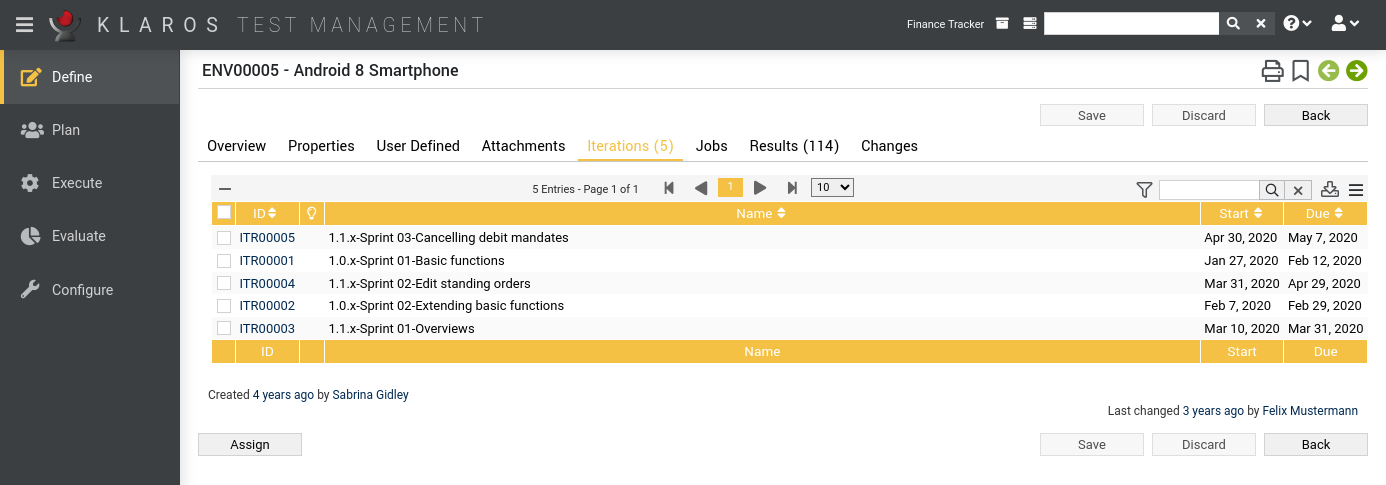
This page lists all iterations to which this test environment is assigned.
This test environment can be assigned to one or more iterations by clicking the button. This opens up a dialog, where multiple iterations can be selected at once.
The following bulk actions are supported for iterations:
The detail page of an iteration shows a list of all test environments that are assigned to it, as shown in section Section 6.2.2.6, “Test Environments”.
The tab Changes shows the change history of this test environment.
For a detailed description of the Changes view, see Section 5.2.3.2.8, “Change History”.
|
|
 |
|
| 6.3. Requirements |  |
6.5. Systems under Test |