| 2.6. Executing Tests | ||
|---|---|---|

|
Chapter 2. Quick Start Guide |  |
| 2.6. Executing Tests | ||
|---|---|---|
|
|
Chapter 2. Quick Start Guide | |
Now that we have created some test cases and a test suite, we are ready for the first test execution.
In this section, we will execute a single test case multiple times with different parameters.
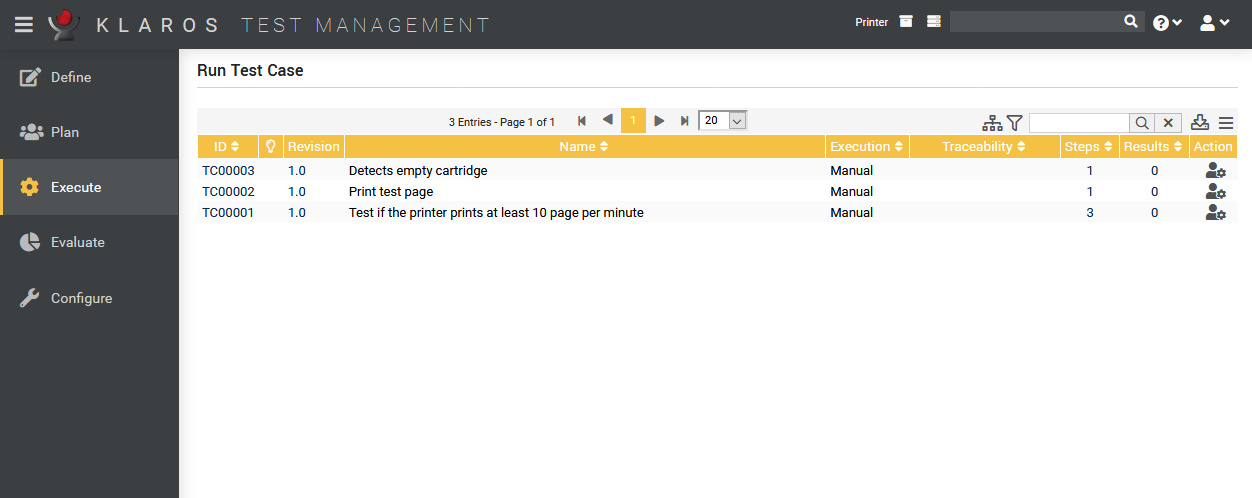
Under Execute, select Run Test Case from the side menu bar.
Now the page Run Test Cases is displayed. For all existing test cases it displays an execution icon in the column Action. The appearance of the icon can vary, for manually executable tests the is displayed here.
Click on the icon for the test case
Test if the printer prints at least 10 pages per minute.
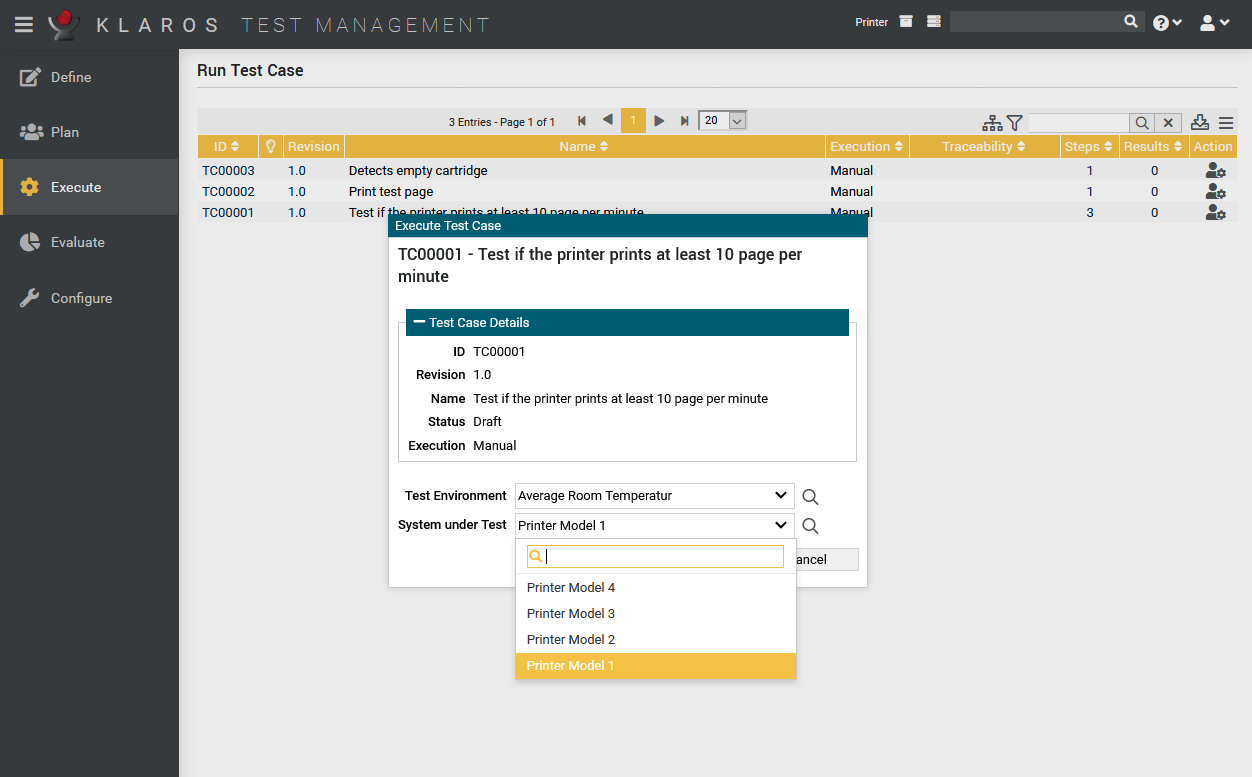
On the next screen, select Average Room Temperature
as the Test Environment
Select Printer Model 1 as the System Under Test.
Click the button.
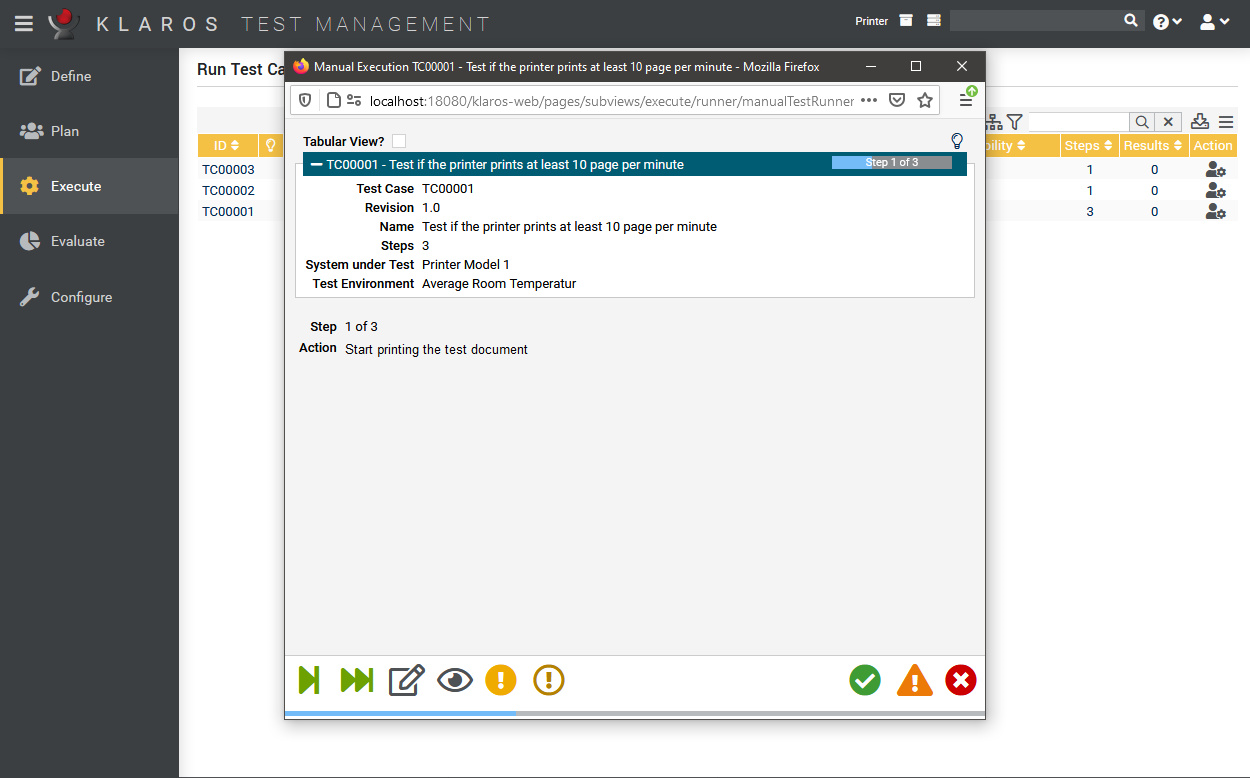
A new browser window will open after a message about the current execution. If this does not happen, please check if your browser uses a popup blocker and add the web URL to the exceptions if necessary.
In the new window the tester is guided step by step through the test procedure. On the first page you can see an overview of the test case. The previous browser window is not required for the test execution and can be minimized.
The manual test runner will now show the first step. Action shows what we as a tester are supposed to do. Let's assume our printer will start printing the test document with no problems, so the first step is passed.
Press the .
Now the second step is displayed. Also mark the further steps as passed. Another dialog will appear in which you confirm that you want to end the test execution. Click the button.
Now the overview of the completed Test Run appears. Since all steps passed without complications, it is not necessary to create an issue/defect.
Click the button. Now return to the overview page with the three test cases.
Now we will execute the same test case using a different system under test and test environment.
Again click the icon on the
Test if the printer prints at least 10 pages per minute
test case.
On the next screen, select Maximum Operating Temperature as the Test Environment.
Select Printer Model 2 as the System Under Test.
Press the button.
Press the green icon.
Press the green icon.
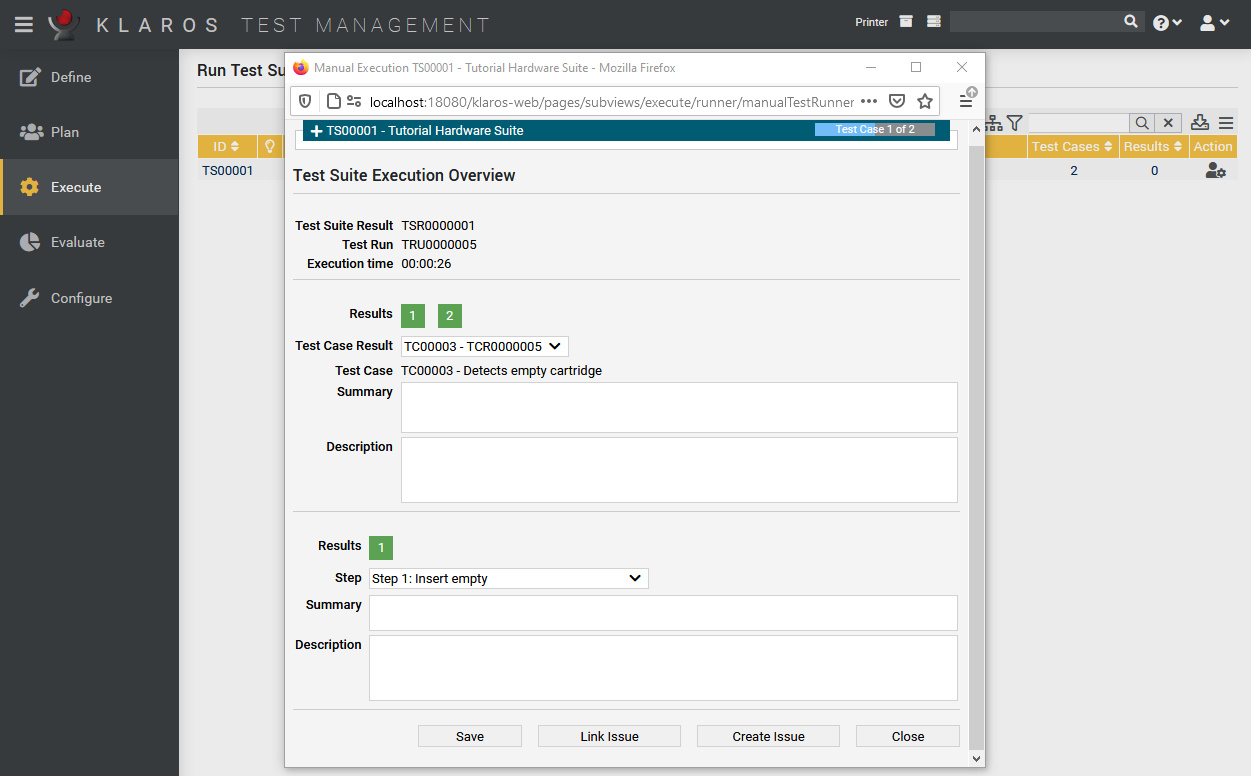
Printer Model 2 uses the Model 2 printer heads, which have an overheating problem, so this test step will fail in an environment with a high ambient temperature.
Press the orange icon.
Enter Too many pause cycles due to overheating
in the Summary field.
These comments will help to reproduce the failure.
Click on the button. A dialog appears in which you confirm the completion of the test case execution with .
If you have set up an issue management system, you can create or link an issue from this page. This process is described in Section 3.6, “Issues”.
Press the button.
|
|
 |
|
| 2.5. Creating Test Suites |  |
2.6.2. Executing Test Suites |