| 10.4. System | ||
|---|---|---|

|
Chapter 10. Configure |  |
| 10.4. System | ||
|---|---|---|
|
|
Chapter 10. Configure | |
This page contains the settings for the appearance and behavior of Klaros-Testmanagement. It contains four tabs, Miscellaneous, Notifications, Interface and Languages.
Clicking the button persists the changes to the Klaros-Testmanagement properties file, and clicking discards all changes.
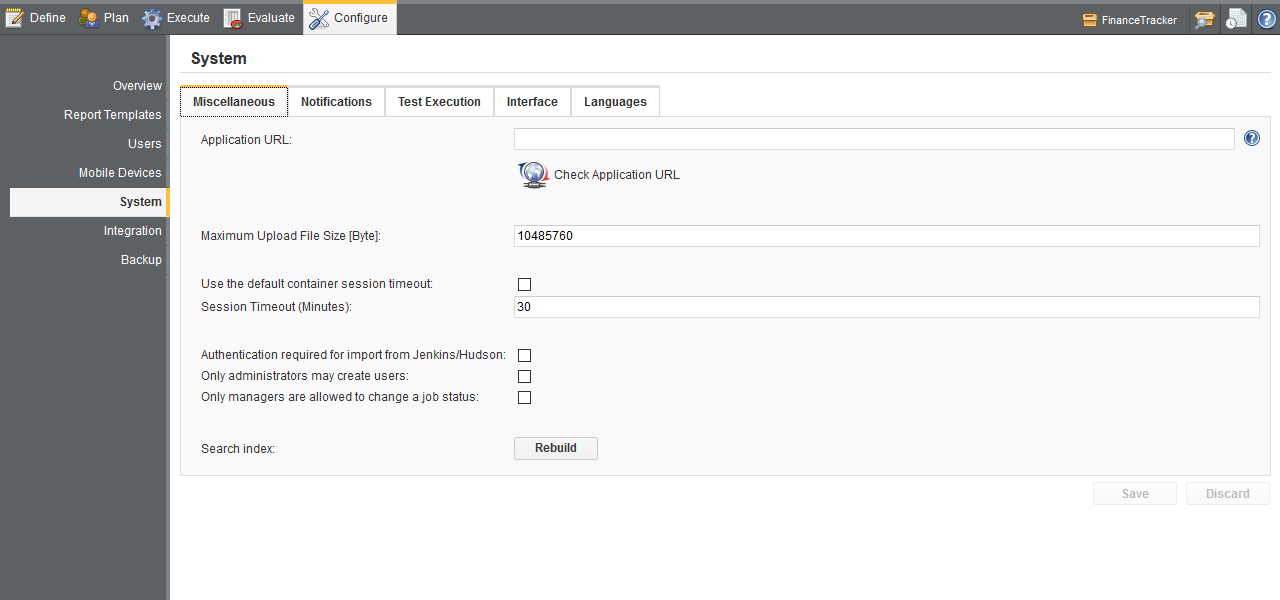
This tab contains settings which govern the behavior of Klaros-Testmanagement. The following settings can be controlled here:
Application URL
This URL must only be provided if the application is accessed through a proxy server. The proxy is responsible to redirect the user request to a physical URL. The URL specified in the proxy must be entered here. More information about rewriting URLs can be found at http://httpd.apache.org/docs/2.0/mod/mod_proxy.html.
Press the Check Application URL link to test if the URL has been entered correctly.
Maximum Upload File Size [Byte]
The maximum attachment size which can be uploaded. Changing this value requires a restart of the application server.
Use the default container session timeout
If checked, the default tomcat session timeout will be used (30 minutes).
Session Timeout (Minutes)
If the checkbox above is unchecked, this value is used as the session timeout.
![[Note]](images/note.png) |
Note |
|---|---|
|
A newly set session timeout will not be applied to currently running sessions. |
Authentication required for import
If true, user credentials are required to import results (e.g. using Jenkins/Hudson plugin). See also Section 12.5.2.1, “Jenkins Plugin for Klaros-Testmanagement”.
Only Administrators can create Users
If checked, only administrators can create users. If unchecked, managers can also create users.
Only Managers and Administrators can see other users in the user management
If this option is set, testers and guests will only see their own user entry. Turn on this option if you like to hide user information from the eyes of your testers and guests.
Only managers are allowed to change a job status:
If checked, only users in the role of Manager or higher may change the status of jobs.
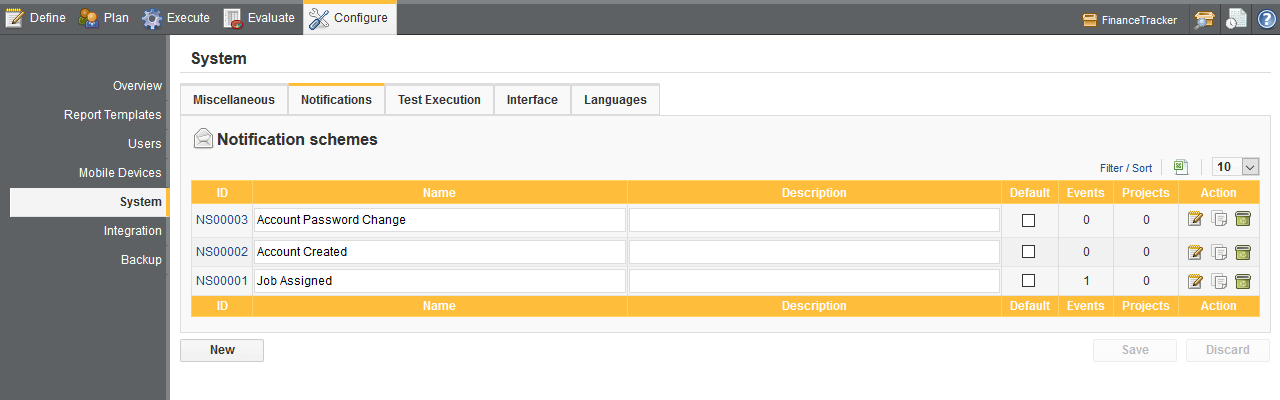
Notifications will be sent by the system via email for various events like creating a user account or assigning a job. This section allows to configure the conditions under which these notification emails will be sent.
Sets of notifications can be defined in a notification scheme and reused for various projects. If a notification scheme is declared as the default notification scheme, it will automatically be assigned to every existing project unless a different scheme is defined for this project.
Figure 10.11 shows the notification scheme definition tab.
![[Caution]](images/caution.png) |
Email-Configuration required! |
|---|---|
|
For notifications to work properly it is required to both configure the email server settings as described in Section 10.5.3, “E-Mail” and make sure that all user accounts contain a valid email address. |
Clicking the button creates a notification scheme. The Name and Description fields can be set here directly. If the Default check box is activated this notification scheme will be the default notification scheme which is per default applied to every project.
By pressing the
![]() icon the notification edit tab is shown where the notifications
and project assignments can be defined.
Clicking the
icon the notification edit tab is shown where the notifications
and project assignments can be defined.
Clicking the
![]() icon causes the notification scheme to be sceduled for deletion.
icon causes the notification scheme to be sceduled for deletion.
When the button is clicked the notification scheme will be saved. The discards the changes made.
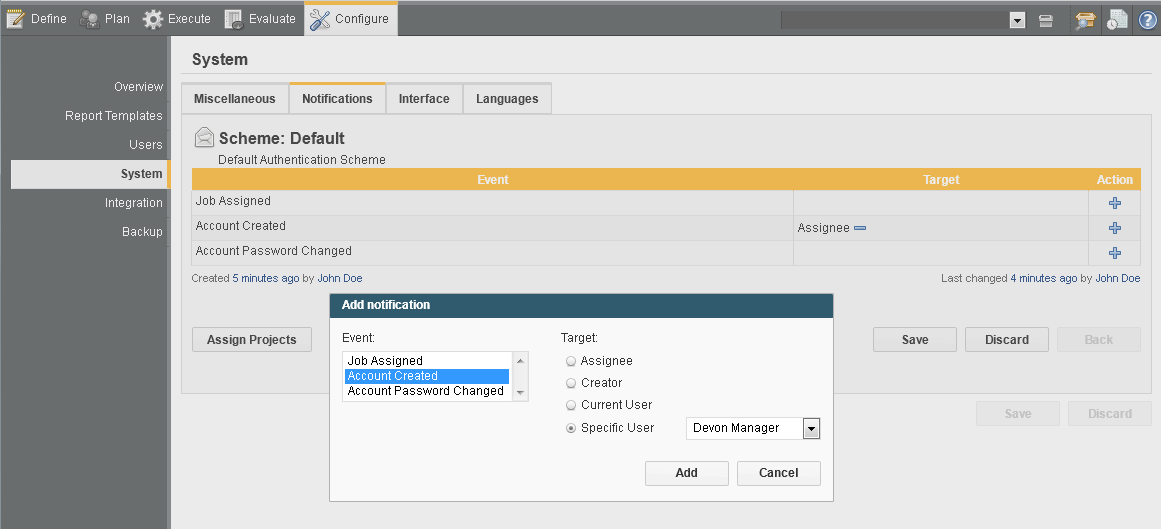
Figure 10.12 shows the edit options for a notification scheme.
The list shows the notifications already defined for the notification scheme currently edited. For creating a notification, the user may individually assign events from a predefined set of available notification events to one or more notification targets (user accounts).
The available notification events are:
Job Assigned
This event is triggered once a Job is saved with a new assignee.
Account Created
This event is triggered once a user account has been created.
Account Password Changed
This event is triggered once an account password has been changed in the local user database.
Test execution failed
This event is triggered if a test case step gets marked as failed or error during execution.
Job ready for execution
This event is triggered whenever a non-executable job becomes executable, because all dependencies of the job are fulfilled (See Section 7.1.5.4, “Dependencies”).
The available notification targets are:
Assignee
The assigned user account for a job assignment or the currently created/changed user account.
Creator
The user responsible for triggering the notification event, e.g. by assigning a job.
Current User
The user account currently active.
Specific User
A specific user account.
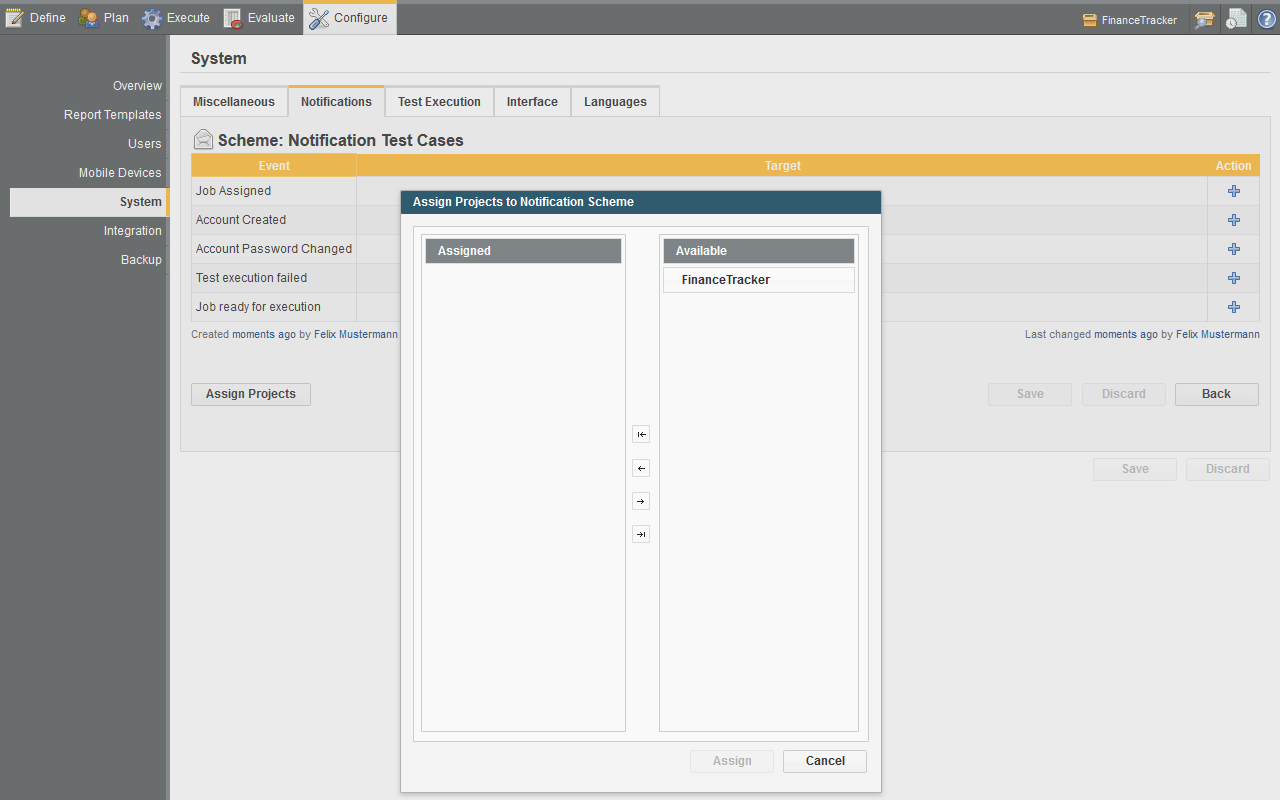
Using the button the user may assign a notification scheme to a limited set of projects, thus overriding the default notification scheme.
Figure 10.13 shows the dialog for project assignement.
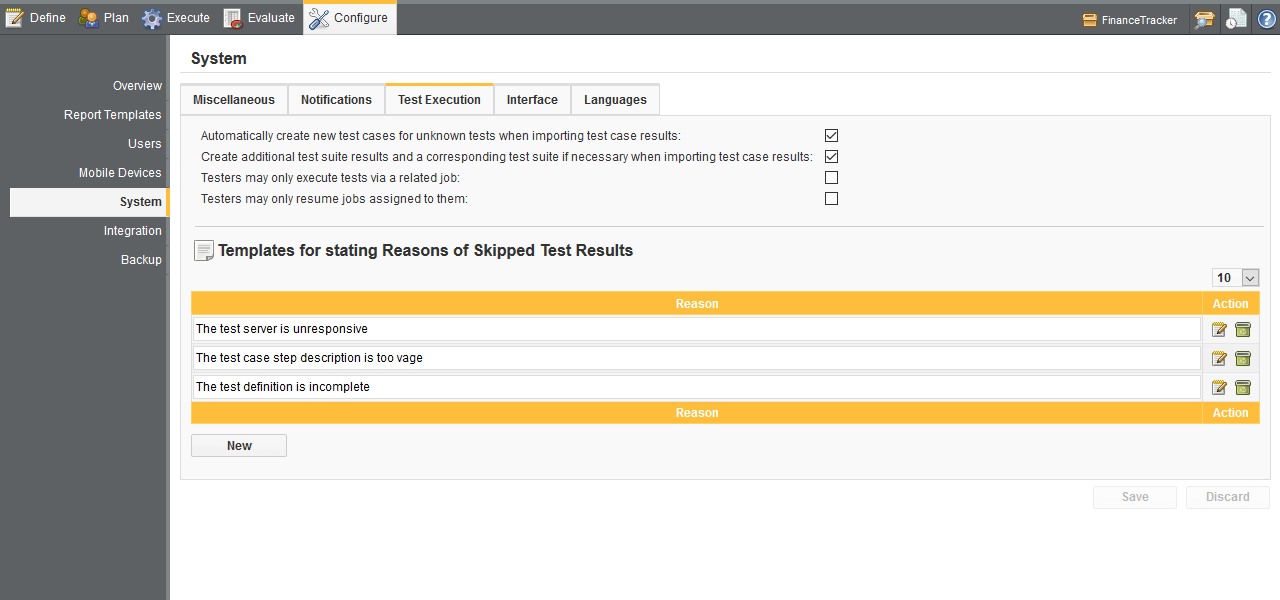
This tab contains settings regarding the test execution. The following settings can be changed here:
Create test suite results when importing test case results
If true, test suite results are automatically created for the corresponding test suite information contained in the result file. This information may vary with the import format. Additionally a corresponding test suite is created for the test suite result if it did not yet exist.
Testers may only execute tests via a related job
If checked, users in the role of Tester may only execute tests by executing a Job.
Testers may only resume their own test runs
If checked, users in the role of Tester may only resume test runs they have started. If a test run has been started via a job, they can execute it only if the job is assigned to them.
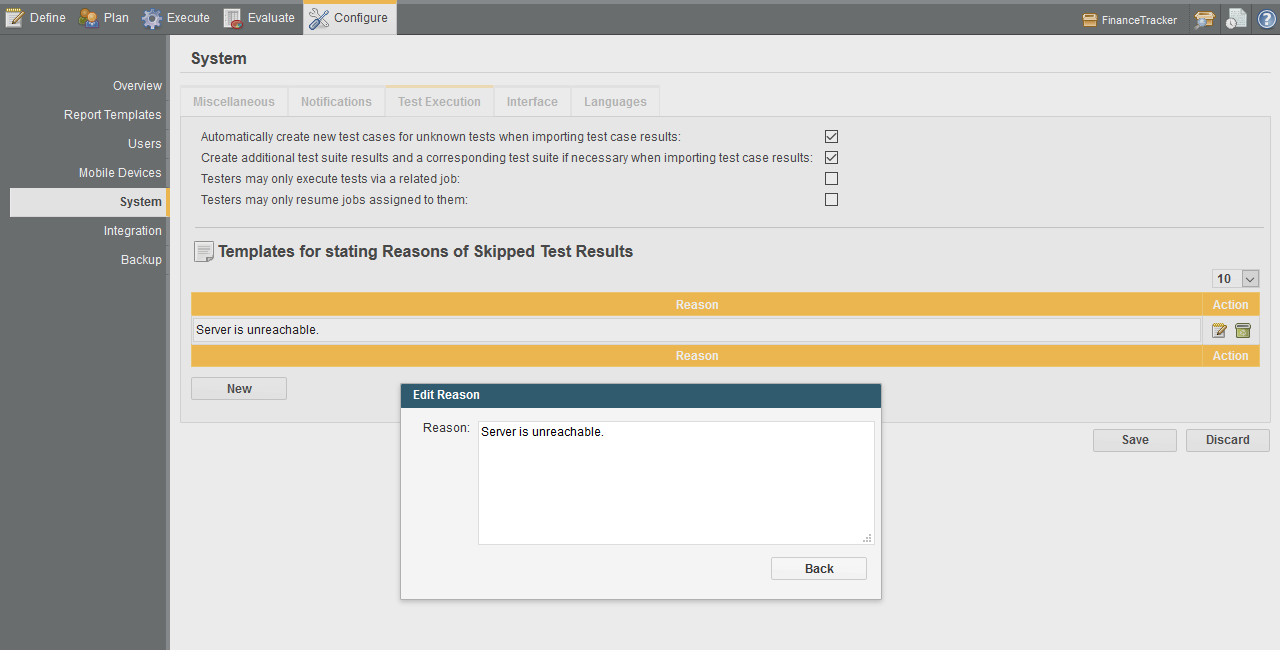
This table (initially empty) contains all defined templates for reasons for skipping test results. When skipping a test case during manual test execution, testers are asked for a reason for skipping the test case and can choose from those templates in addition to providing their own notes (see Section 8.4, “Permanently Skipping Test Cases”).
To create a new reason template, press the button, which will insert a new entry
into the table. To modify a reason template, press the
![]() icon, to remove it, press the
icon, to remove it, press the
![]() icon.
icon.
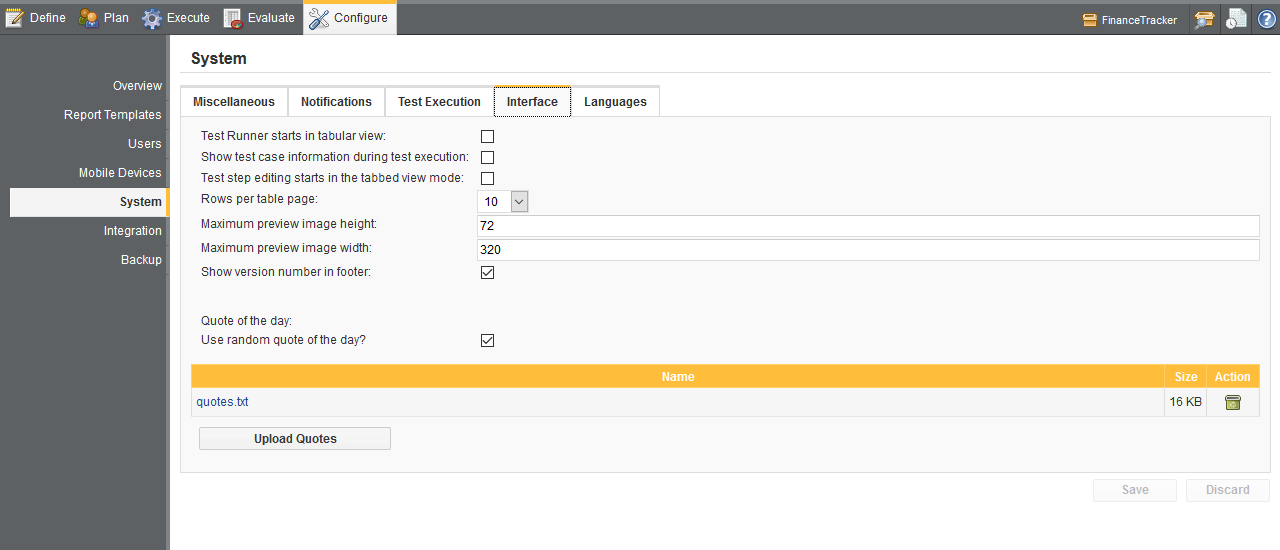
This tab contains settings which govern the behavior of the user interface in Klaros-Testmanagement.
The following settings can be controlled here:
Test Runner starts in tabular view
If true the testrunner will per default show the tabluar view.
Show test case information during test execution
If true, the test case detail information panel is always expanded per default when launching or executing tests.
Test step editing starts in the tabbed view mode
If true, the default view in the Steps tab in the Test Case Details section will be the tabular view.
Rows per table page
With this option, the number of rows per table page can be set.
Maximum preview image height
This option sets the maximum height of the preview images of attachments during test case execution (see Figure 6.32, “An Attachment Reference replaced by a Preview of the Attachment”).
Maximum preview image width
This option sets the maximum width of the preview images of attachments during test case execution (see Figure 6.32, “An Attachment Reference replaced by a Preview of the Attachment”).
Quote of the day
The message to display on the login screen.
Use random quote of the day
If true, a line from the file uploaded below will be displayed as the quote of the day.
Upload quotes
This allows the user to upload a quotes file to be used for the random quote of the day. This should be a text file named quotes.txt with one quote per line. The details of the current quotes file are shown below, including a download link for the file itself, and a delete button, which causes the default quotes file to be restored.
|
Caution |
|---|---|
|
Please refer to Section 4.2, “Custom Quotes” for detailed information on the file format. |
Klaros-Testmanagement supports the addition of custom languages. The available languages can be set in the Languages section of the system parameters section. The language settings page is shown in Figure 10.17, “The Languages Tab”.
Up to 5 languages can be enabled at once. Enabled languages are added to the
language selection panel at the top of the screen in Klaros.
To enable a language, click the
![]() icon in the Available Languages
table and to disable a language, click the
icon in the Available Languages
table and to disable a language, click the
![]() icon in the Enabled Languages table.
icon in the Enabled Languages table.
|
Caution |
|---|---|
|
Please refer to Section 4.1, “Languages” for detailed information on the file format. |
|
|
 |
|
| 10.3. Users |  |
10.5. Integration |