| 8.2. Run Test Case | ||
|---|---|---|

|
Chapter 8. Execute |  |
| 8.2. Run Test Case | ||
|---|---|---|
|
|
Chapter 8. Execute | |
Executing a test case consists of running a test on a specific version of the system under test in a selected test environment.
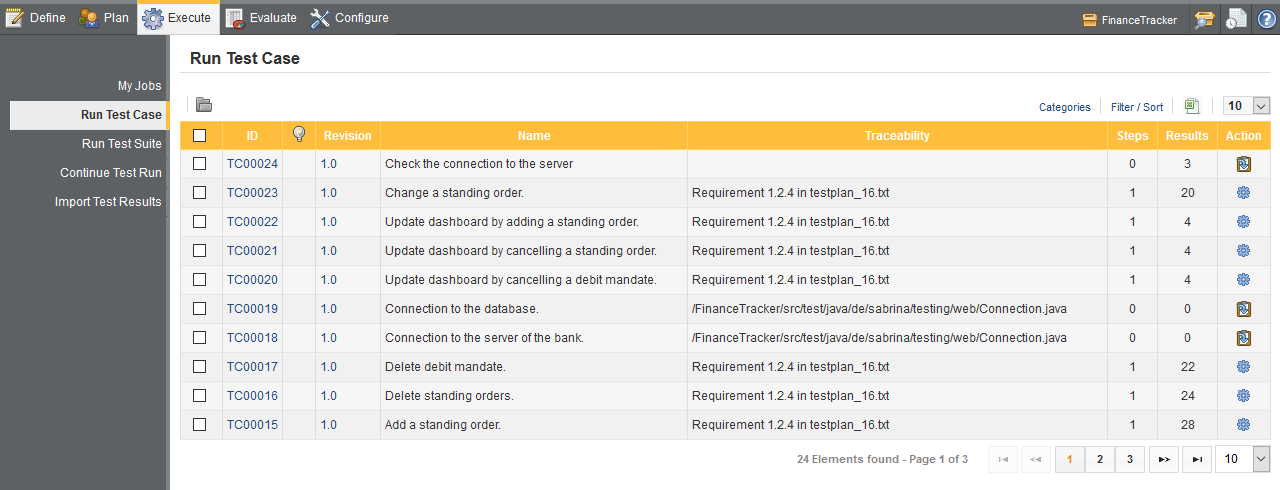
The Run a Single Test Case page shows all test cases in a list. To get a better overview of the available test cases, the sorting and filtering functionality of the Filter / Sort panel can be used, as described in Section 5.2.6, “Filtering and Sorting”.
Clicking on the
![]() icon of a test case executes that
Test Case
( Figure 8.2).
icon of a test case executes that
Test Case
( Figure 8.2).
![[Warning]](images/warning.png) |
Warning |
|---|---|
|
Only test cases with the states Draft, Approved and Skip can be executed. |
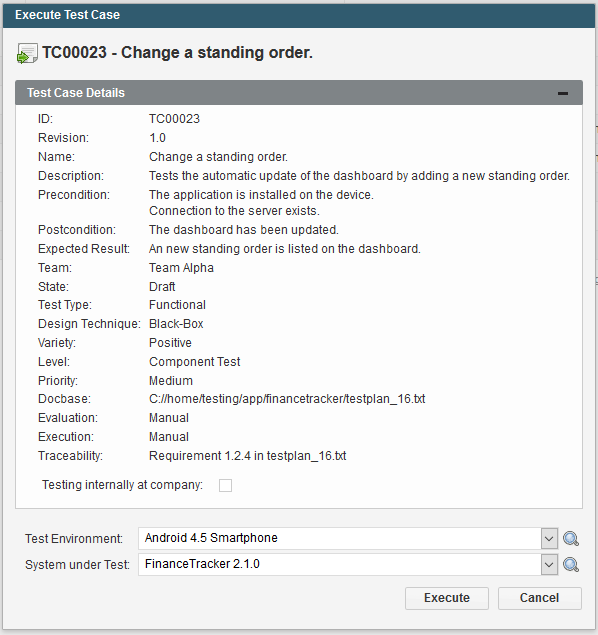
A dialog showing information about the test case will be displayed ( Figure 8.3). Clicking the plus icon on the right side of the dialog displays more detailed information about the test case.
Before a test run can be started, the test environment the test is run in and the system under test itself have to be defined. User defined properties may also be set for the test run here.
![[Tip]](images/tip.png) |
Creating Test Environments and Systems under Test |
|---|---|
|
For information on how to create a test environment or a system under test, please refer to Chapter 6, Define. |
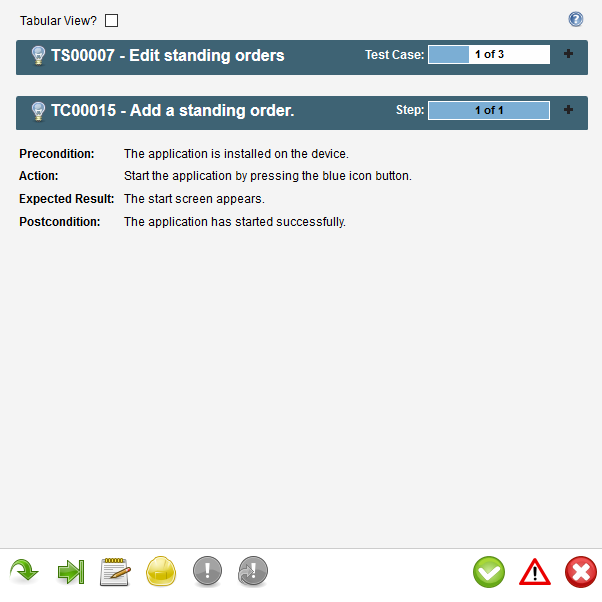
Press the button to run the test case. By default, the step-by-step instructions screen will open, but this can be changed to the tabular step instructions view by marking the tabular view checkbox.
![[Note]](images/note.png) |
Note |
|---|---|
|
Pop-ups must be enabled in your browser, or an exception must be added for Klaros-Testmanagement, in order to execute tests manually. |
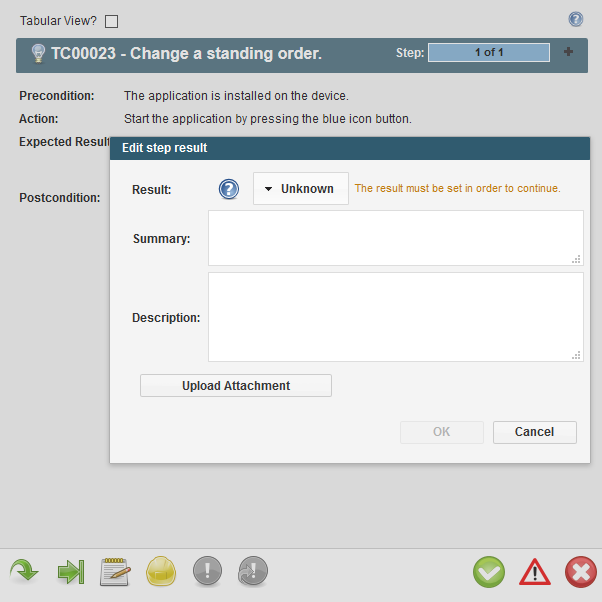
The step by step instructions screen shows the Action, Expected Result, Precondition and Postcondition values of the current test step. Depending on the results of the step, the user can click the following buttons:
Mark the test step as successfully completed.
Mark the test step result as Error.
Mark the test step result as Failure.
Skip the current test step without changing the result of the test case.
Skip all remaining test steps without changing the result of the test case.
Edit this test case step result.
Request a review for this test case.
Create an issue related to this test case in an issue management system.
Link an existing issue from an issue management system to this test case.
Go back to the last test step to repeat it again or to edit it.
The same process is applied for each test step of the test case.
After the last step of a test case is entered, a dialog is shown asking if it is ok to finish the execution and proceed to the next test case if any.
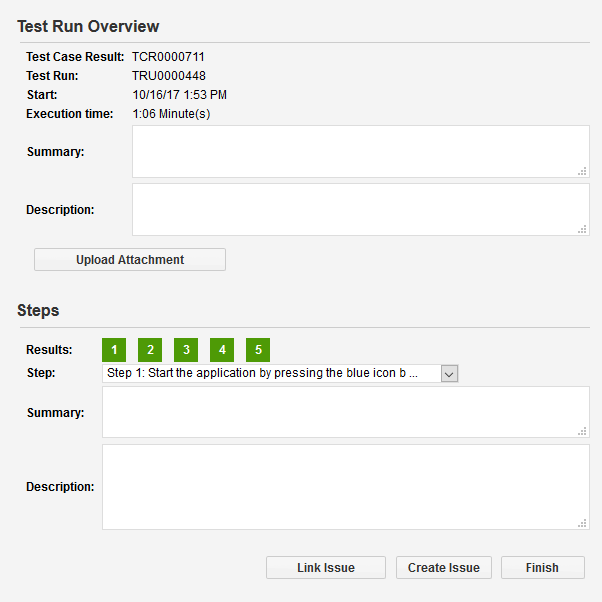
Clicking the button, causes Klaros-Testmanagement to show the test run result of the test case ( Figure 8.7).
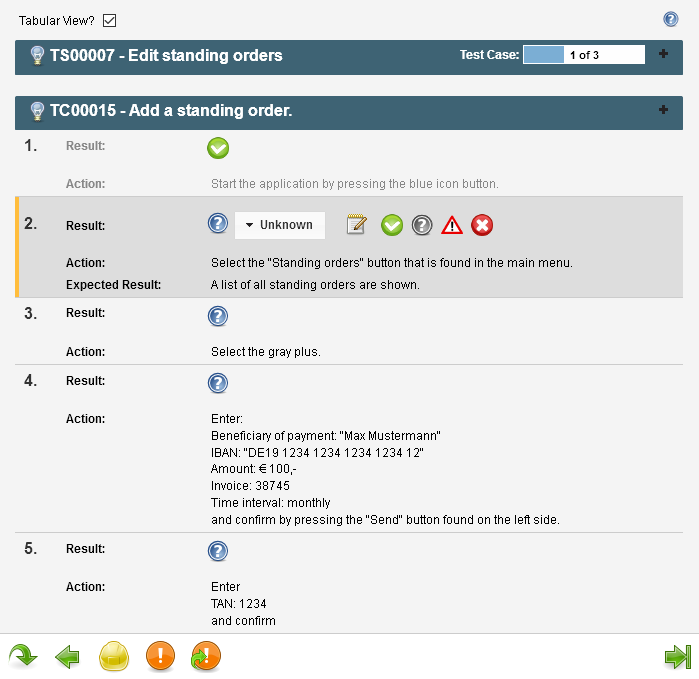
The tabular step instructions screen shows the Description, Expected Result, Precondition, Postcondition and result of all steps, the default result being Unknown.
The following actions are located in the lower bar and can be carried out at any time:
Skip the current test step without changing the result of the test case.
Go back to the last test step to repeat it again or to edit it.
Request a review for this test case.
Create an issue related to this test case in an issue management system.
![]() Finish test and mark all remaining steps as skipped
Finish test and mark all remaining steps as skipped
Finish the test run.
The following actions can be carried out at each step:
After the last step result of a test case is entered, a dialog is shown asking if it is ok to finish the execution and proceed to the next test case if any.
Clicking the button, causes Klaros-Testmanagement to show the test run result of the test case ( Figure 8.7).
|
What is the difference between a failure and an error? |
|---|---|
|
A failure is a discrepancy between a computed, observed, or measured value or condition and the true,specified, or theoretically correct value or condition. An error is the inability of the system to perform the test correctly. |
For each error or failure, Klaros-Testmanagement will show the following dialog ( Figure 8.6). The to the next step while the button saves the comment and completes the test case run.
|
Tip |
|---|---|
|
The Description and Summary fields appear in all comment dialogs. |
The test case results screen allows the user to write a description and summary for the test case run as well as for each individual test step in the test run. ( Figure 8.7).
|
Note |
|---|---|
|
If there are any issue management systems configured for this project, the button will be enabled. For details on creating an issue with Klaros-Testmanagement, see Section 8.7, “Creating Issues”. |
|
|
 |
|
| Chapter 8. Execute |  |
8.3. Run Test Suite |