| 6.7. Test Segments | ||
|---|---|---|

|
Chapter 6. Define |  |
| 6.7. Test Segments | ||
|---|---|---|
|
|
Chapter 6. Define | |
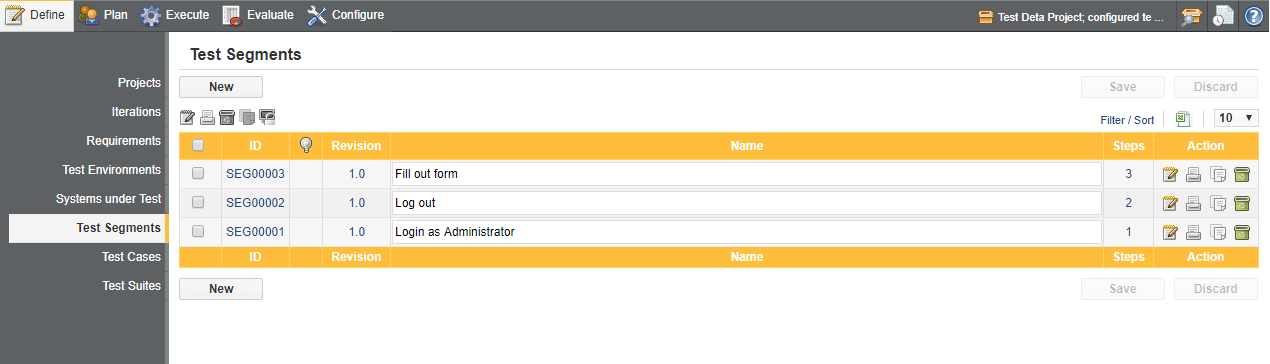
Test Segments are grouped, predefined and encapsulated test case steps that can be used and reused in test cases.
Test Segments may be created, removed, duplicated, updated on this page. The displayed test segments may be filtered and sorted as shown in Section 5.2.6, “Filtering and Sorting” .
The
Test Segments
screen shows a table with all of the test segments defined for the current project. Each
row of the table represents a test segment, the columns represent attributes of the test
segment.
The name of the test segment can be directly edited. More attributes of a test segment and its
steps can be edited in on the test segment details page by clicking on the
![]() Edit icon
(
Section 6.6.3, “Test Case Details”
).
Edit icon
(
Section 6.6.3, “Test Case Details”
).
The leftmost column allows test segments to be selected for bulk actions. The uppermost checkbox is a global select button, which selects or deselects all elements shown in the table. Please note that the displayed elements are subject to the current search criteria.
Test segments may be viewed on a printer-friendly page as described in Section 5.2.7, “Print Pages” as well as categorized as described in Section 5.2.8, “Categorization” .
Clicking on the
![]() delete icon removes the test segment.
delete icon removes the test segment.
![]() Feature only available in Klaros-Testmanagement Enterprise Edition
Feature only available in Klaros-Testmanagement Enterprise Edition
Some bulk actions are available on the Test Segment page. Bulk actions are described in Section 5.2.11, “Bulk Actions” .
The bulk actions available on this page are: Edit , Print , Delete , Duplicate and Create new Revisions . The bulk action buttons can be found above the table on the left.
Clicking the
button creates a new test segment
(
Figure 6.36
).
An empty row is added at the beginning of the table. The fields
Name
and
Traceability
of the test segment can be specified.
The test segment ID is automatically assigned by Klaros-Testmanagement.
The test segment is created in the currently selected project. Clicking the
![]() edit icon opens the test segment details page where more properties of the test segment
can
be set (
Section 6.7.3, “Test Segment Details”).
Clicking the
edit icon opens the test segment details page where more properties of the test segment
can
be set (
Section 6.7.3, “Test Segment Details”).
Clicking the
![]() duplicate icon allows the user to create a copy of the test segment.
duplicate icon allows the user to create a copy of the test segment.
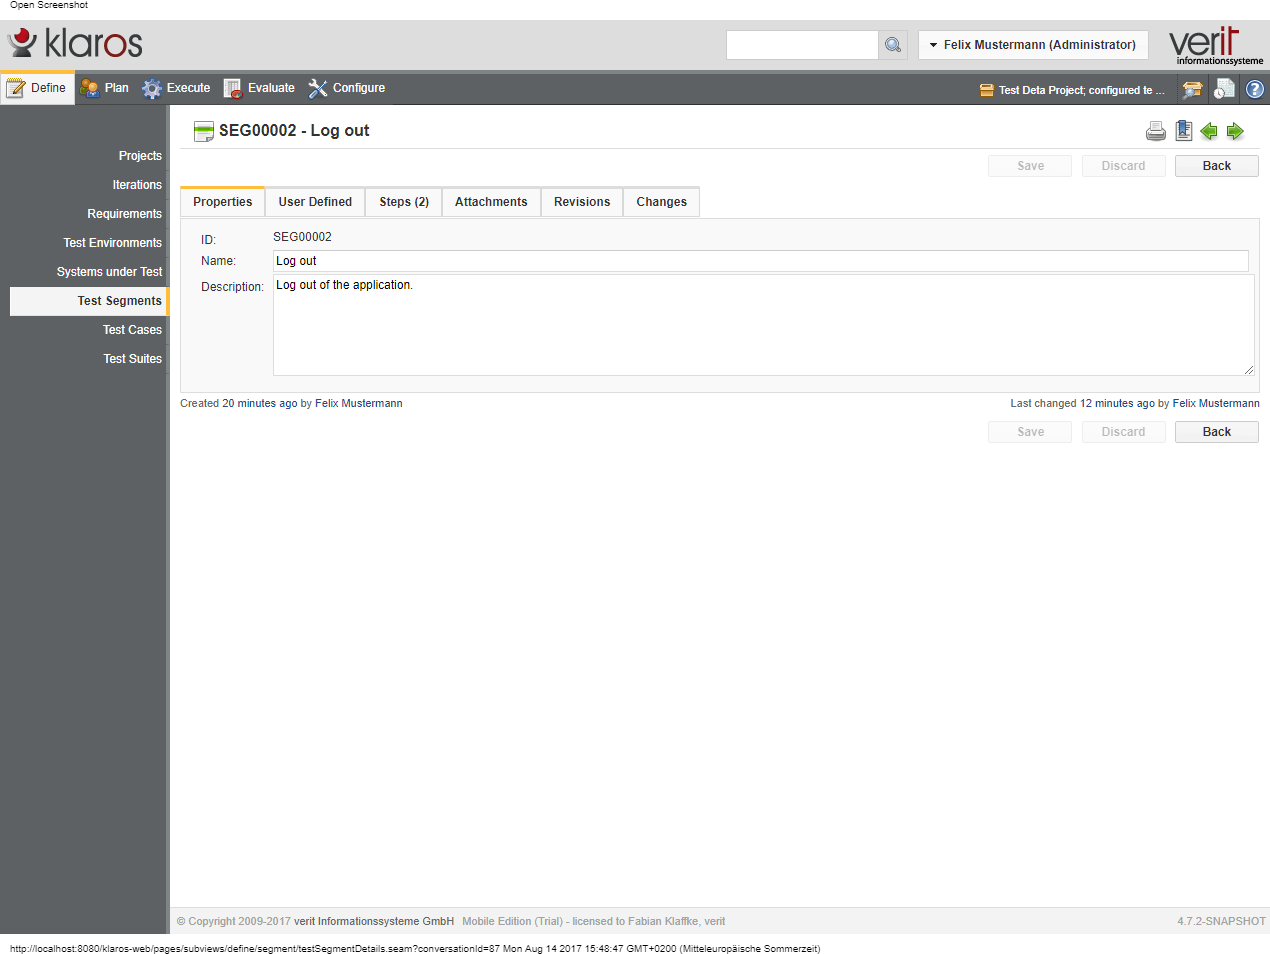
This page ( Figure 6.37 ) allows the user to view or change the following attributes of the selected test Segment:
![[Note]](images/note.png) |
How to create a new revision of a test Segment? |
|---|---|
|
Clicking the New Revision button creates a new revision of the test Segment. This button is disabled if there are any unsaved changes to the test Segment. |
ID
Assigned automatically.
Revision
Assigned automatically and incremented every time a test segment is changed.
Name
The editable name of the test segment.
Description
The textual description of the test segment.
Traceability
A reference to the corresponding requirement, use case or work package.
![]() Feature only available in Klaros-Testmanagement Enterprise Edition
Feature only available in Klaros-Testmanagement Enterprise Edition
User defined properties can be used to customize test Segment within Klaros-Testmanagement by adding custom fields. This process is described in Section 5.2.13, “User Defined Properties” .
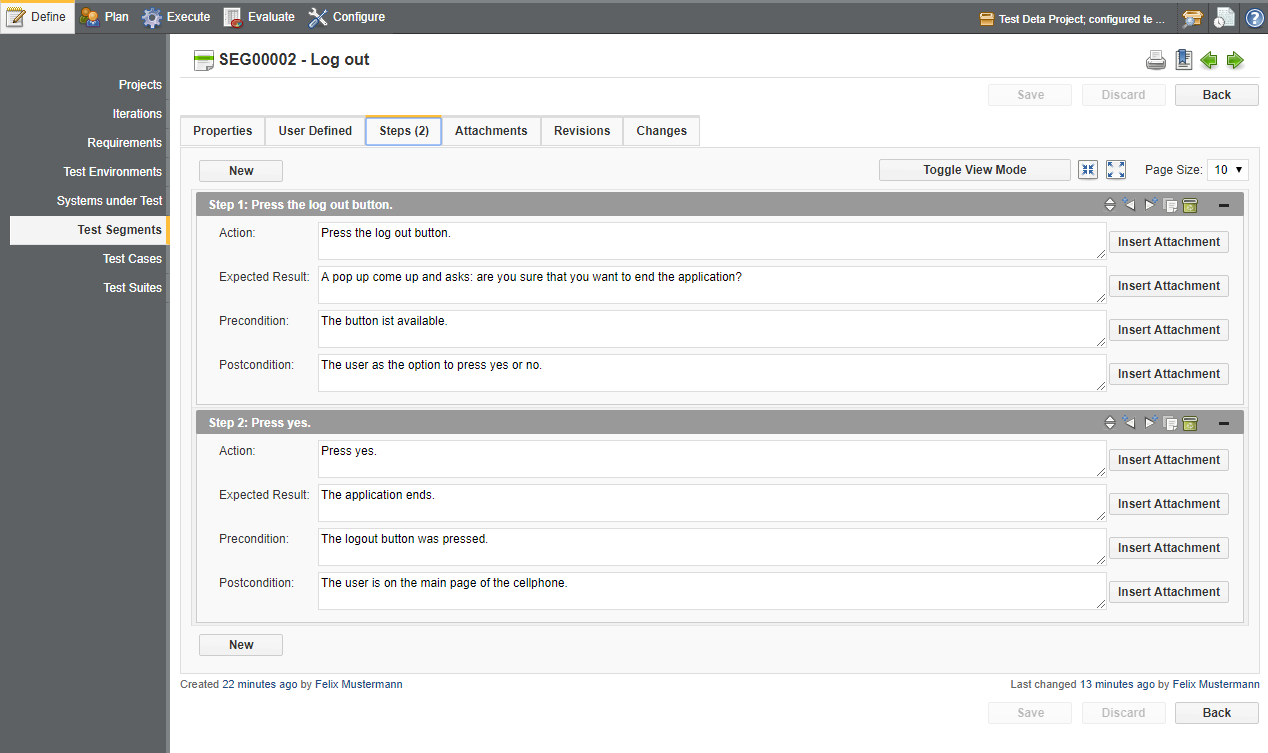
In the Steps tab, test steps may be added to or removed from the test Segment. The following attributes of single test steps may also be changed:
Description
The description of the action to take, e.g.
Enter name and password, and
                                                click the Login button.
Expected Result
The (visible) behavior of the system predicted while carrying out the test step
e.g.
The user recieves a message that the login succeeded
.
Precondition
Condition that must be fulfilled before the execution of the test step,
e.g.
The user is not yet logged in.
Postcondition
The environmental and state conditions that must be fulfilled after the
execution of the test case e.g.
The user is authenticated and has access to
                                                the system.
To change the order of the test steps the
![]() icon is used. This opens
a dialog which allows the test step to be inserted in another position in the list.
To add a new test step to the end of the list, click the
icon is used. This opens
a dialog which allows the test step to be inserted in another position in the list.
To add a new test step to the end of the list, click the
![]() icon.
Test steps are inserted before or after a given step using the
icon.
Test steps are inserted before or after a given step using the
![]() and
and
![]() icons.
The
icons.
The
![]() clone icon is used to duplicate a step at another position.
Individual steps may be minimized while editing to help to keep track of Steps which
are being edited.
clone icon is used to duplicate a step at another position.
Individual steps may be minimized while editing to help to keep track of Steps which
are being edited.
Pressing the
displays the individual test
case steps in a tabbed view to save space. The
![]() and
and
![]() icons can be used to expand or collapse all test case steps.
icons can be used to expand or collapse all test case steps.
Test steps are removed by pressing on the
![]() delete icon. The
button must be pressed to persist this change.
(
Figure 6.28
).
delete icon. The
button must be pressed to persist this change.
(
Figure 6.28
).
![]() Feature only available in Klaros-Testmanagement Enterprise Edition
Feature only available in Klaros-Testmanagement Enterprise Edition
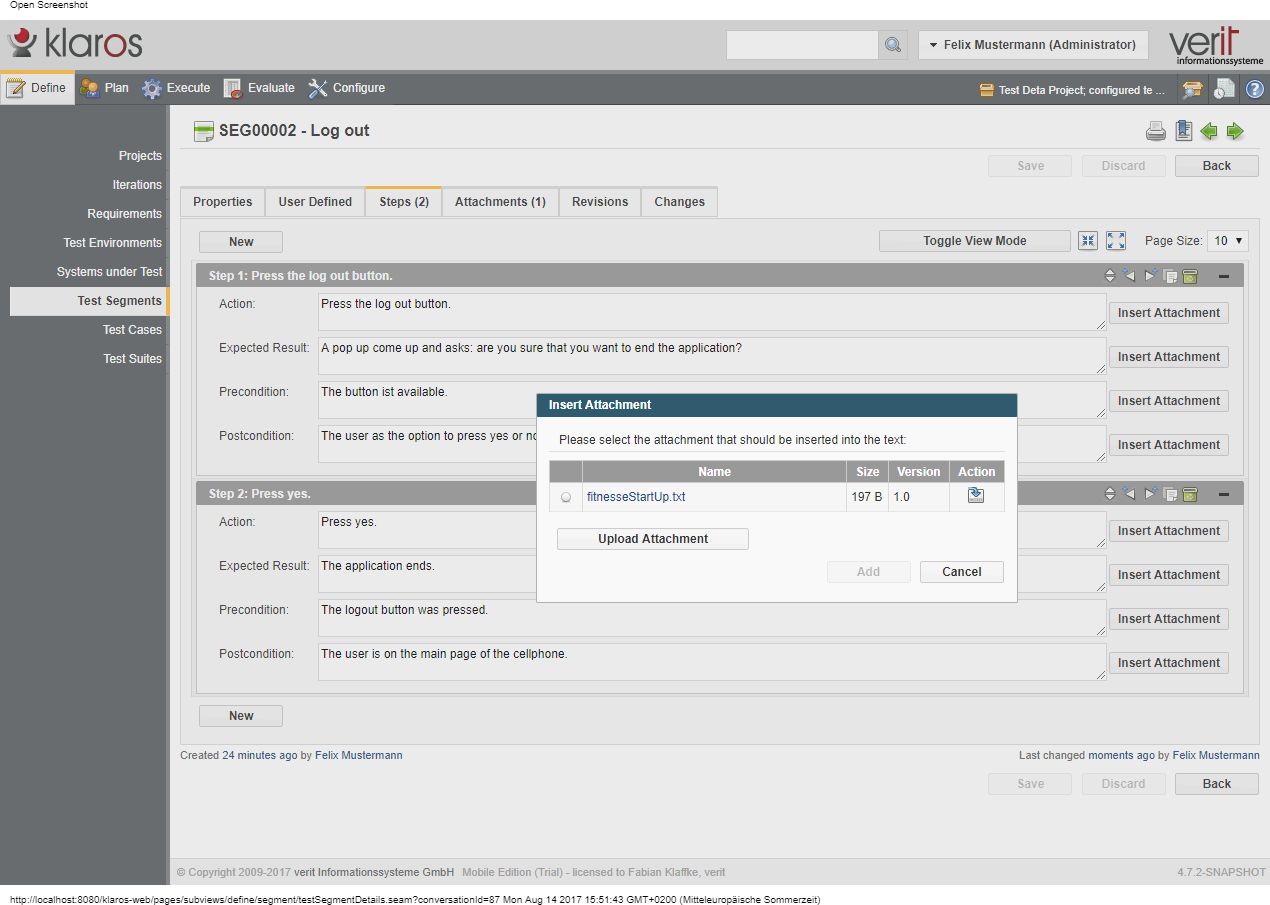
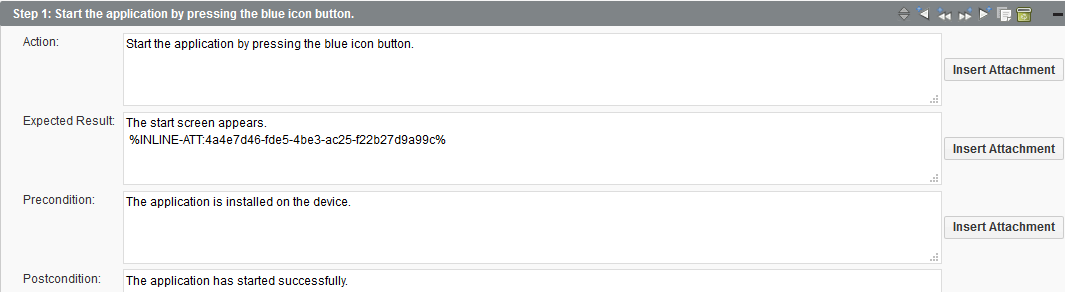
Pressing one of the the buttons next to the Description , Expected Result , Precondition and Postcondition text fields opens up a dialog which allows to embed an attachment into the text.
Pressing the button opens another dialog that allows to upload a new attachment to the test segment (see Section 5.2.12, “Attachments” ).
Pressing the button while having an attachment selected will insert a reference in the form of %inline-att:[attachment-identifier]% , e.g. %inline-att:9e3df155-359f-40e7-8c78-7ae9aac6a8ab% .
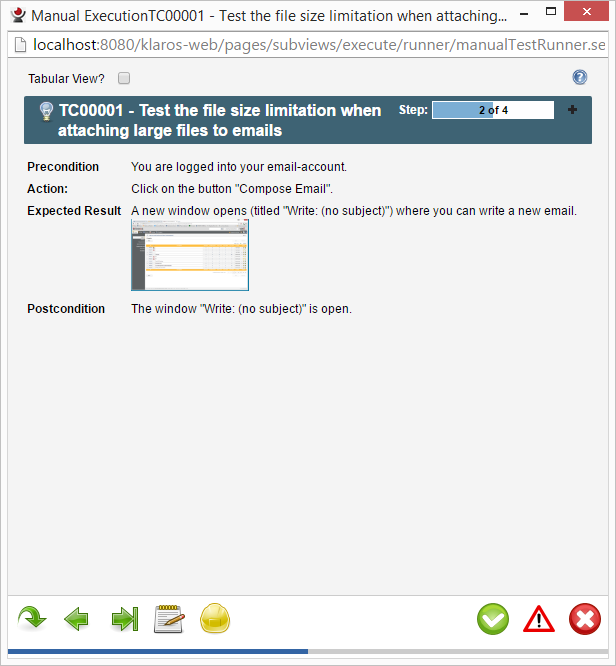
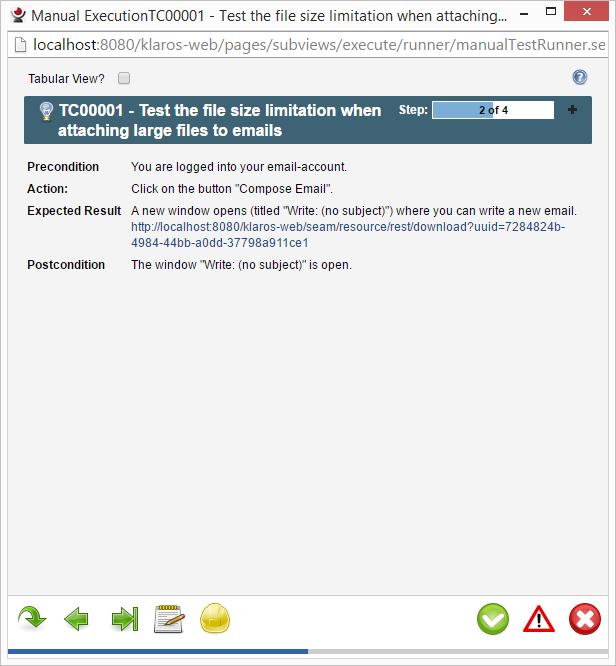
Depending on whether the attachment is an image, this reference will be replaced by a scalable preview image during the execution of the test segment. Otherwise, the reference will be replaced by a hyperlink that will open the attachment in a new browser tab.
Attachments may be added to test segment. This process is described in Section 5.2.12, “Attachments” .
Test segment are revisionable. The process of revisioning an object is described in Section 5.2.16, “Revisions” .
|
|
 |
|
| 6.6. Test Cases |  |
6.8. Test Suites |