| 2.4. Creating Test Cases | ||
|---|---|---|

|
Chapter 2. Quick Start Guide |  |
| 2.4. Creating Test Cases | ||
|---|---|---|
|
|
Chapter 2. Quick Start Guide | |
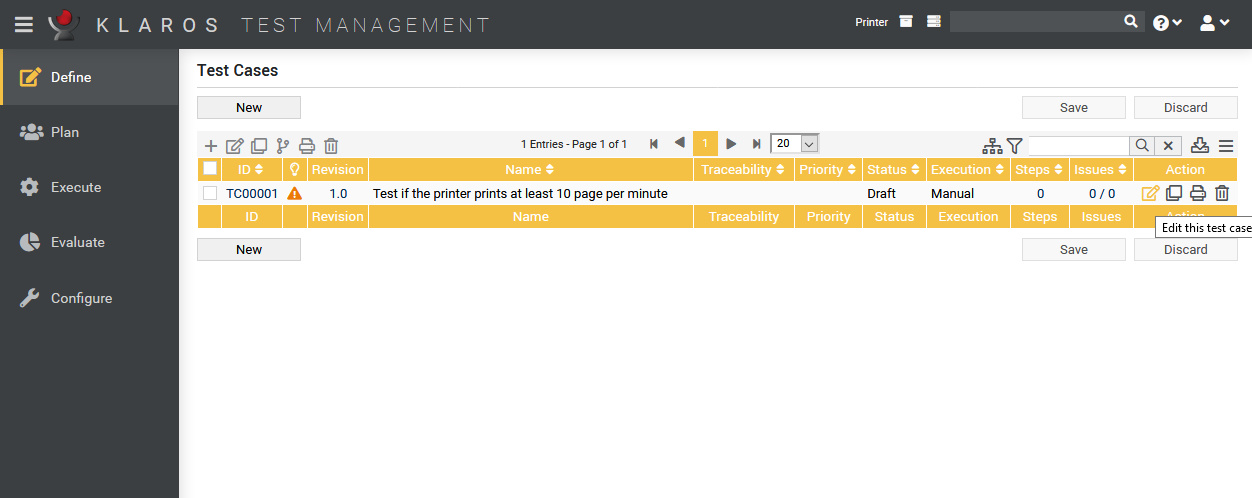
Now follows the creation of the test cases. We will create test cases for both the hardware and the software team. The first test for the hardware team is to verify that the printer meets the specifications regarding the minimum number of pages printed per minute.
Under Define, select Test Cases from the side menu bar.
Press the button.
Enter Test if the printer prints at least 10 page per minute
in the Name field.
The name provides information about the function/task of the test.
Press the button.
Click on the test case ID or on the icon in the action column.
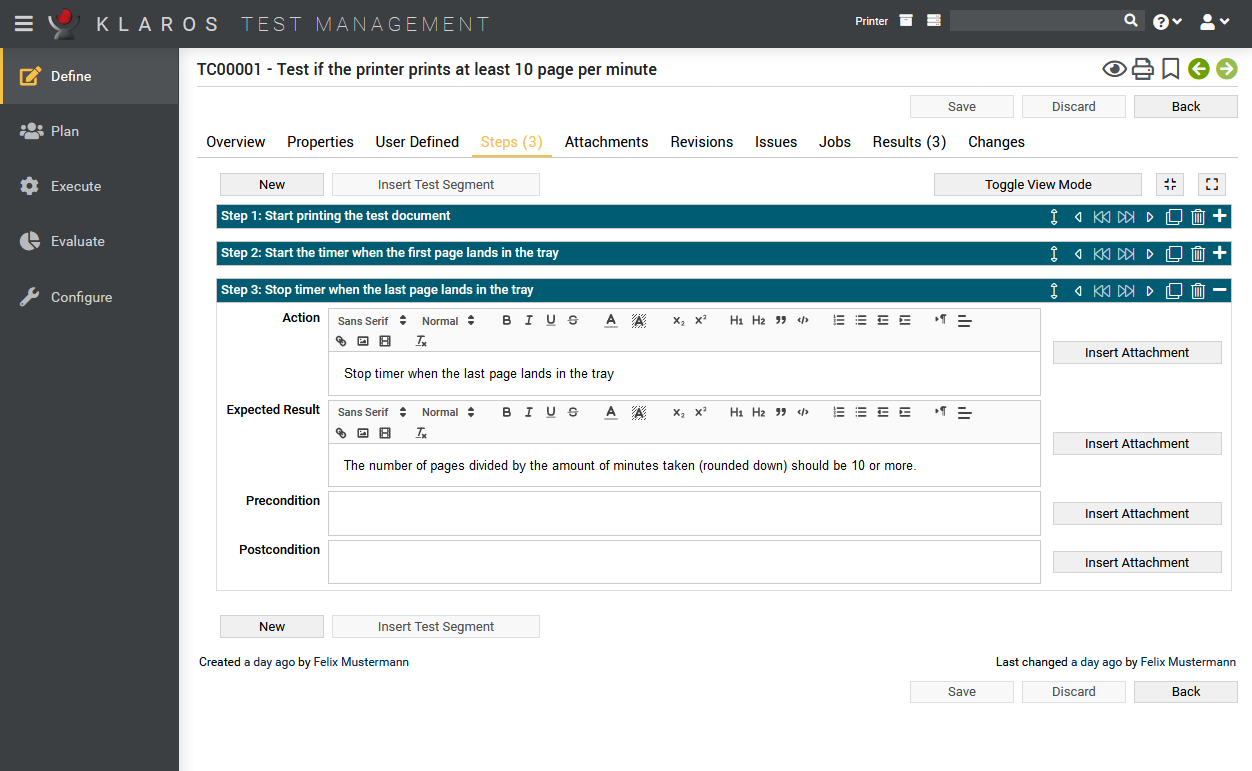
Select the Steps tab.
Create the following steps:
|
Description |
Expected Result |
|---|---|
|
|
|
|
|
|
|
|
Press the button.
Next, we create the following test cases, each with a single test case step. First click on the button to go back to the list of test cases.
|
Name |
Execution |
Step Description |
Step Expected Result |
|---|---|---|---|
|
|
Manual |
|
|
|
|
Manual |
|
|
You should now see three created test cases, one with two test steps and one with three test steps.
|
|
 |
|
| 2.3. Creating Test Environments |  |
2.5. Creating Test Suites |