| 6.3. Requirements | ||
|---|---|---|

|
Chapter 6. Define |  |
| 6.3. Requirements | ||
|---|---|---|
|
|
Chapter 6. Define | |
![]() Feature only available in Klaros-Testmanagement Enterprise Edition
Feature only available in Klaros-Testmanagement Enterprise Edition
Requirements are conditions which must be met in order for the product to be considered ready to be shipped. The Requirements section allows management of the requirements in the selected project.
Requirements may be linked to test cases. This enables users to quickly check the status of a given requirement.
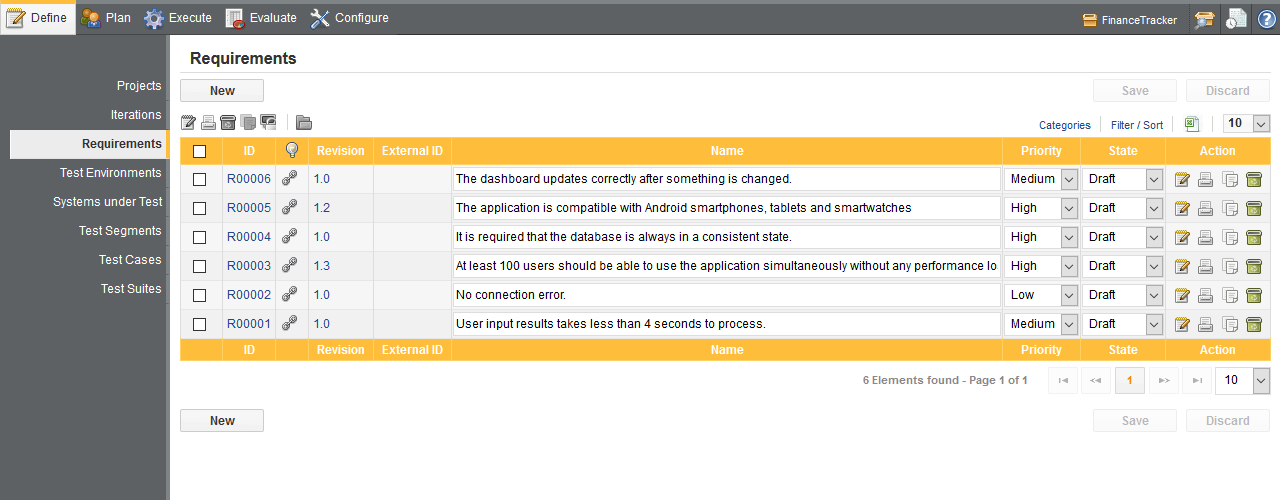
Requirements may be created, removed, updated and assigned to categories on this page ( Figure 6.16). The displayed requirements may be filtered and sorted as described in Section 5.2.6, “Filtering and Sorting”.
The Requirements page shows all of the requirements defined for the current project. Clicking on the table fields allows direct editing of the attributes.
The leftmost column allows requirements to be selected for bulk actions. The uppermost checkbox is a global select button, which selects or deselects all elements shown in the table. Please note that the displayed elements are subject to the current search and catagorization criteria.
Requirements may be viewed on a printer-friendly page as described in Section 5.2.7, “Print Pages” as well as categorized as described in Section 5.2.8, “Categorization”.
Clicking on the
![]() delete icon removes the requirement.
delete icon removes the requirement.
![[Note]](images/note.png) |
Why is the button sometimes disabled? |
|---|---|
|
Requirements that are referenced by test runs cannot be deleted, so their
delete icon is disabled (
|
Clicking on an
![]() edit icon displays the
Requirement Details page of the corresponding requirement.
edit icon displays the
Requirement Details page of the corresponding requirement.
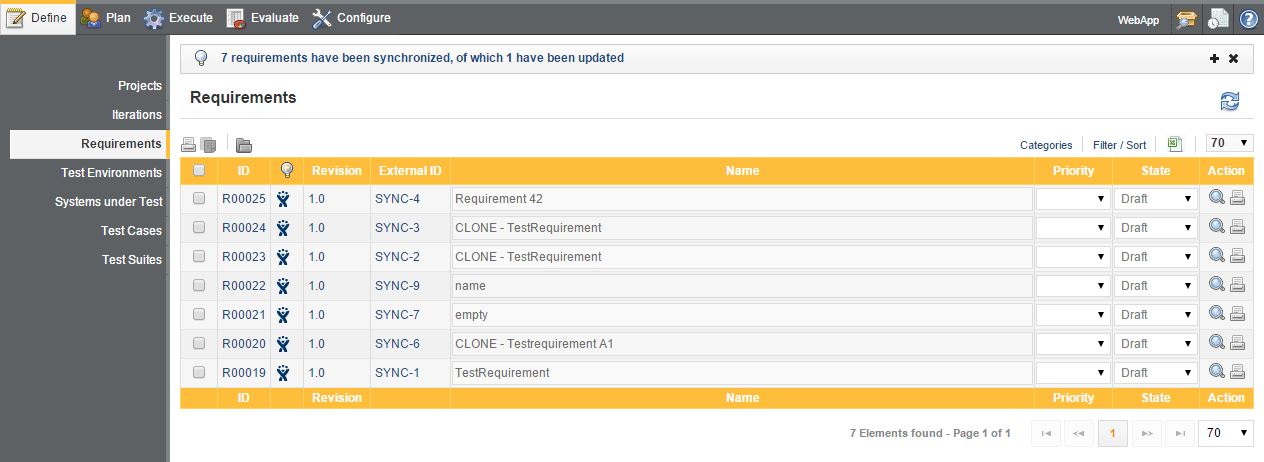
If the active project is connected to a remote requirements management system, editing of requirements
is disabled for all users. A
![]() icon will appear on the upper right side of the
requirements list screen. Pressing it will start a background synchronization of requirements between
the project and the requirements management system.
icon will appear on the upper right side of the
requirements list screen. Pressing it will start a background synchronization of requirements between
the project and the requirements management system.
Some bulk actions are available on the Requirements page. Bulk actions are described in Section 5.2.11, “Bulk Actions”.
The bulk actions available on this page are: Edit, Print, Delete, New Revision, Duplicate and Assign to category. The bulk action buttons can be found above the table on the left.
Clicking on the button creates a new Requirement in the currently selected project ( Figure 6.16). The Name and Priority fields can then be specified. The requirement ID is automatically assigned by Klaros-Testmanagement.
Priority
The priority of the requirement. This signifies how crutial the compliance of this requirement is.
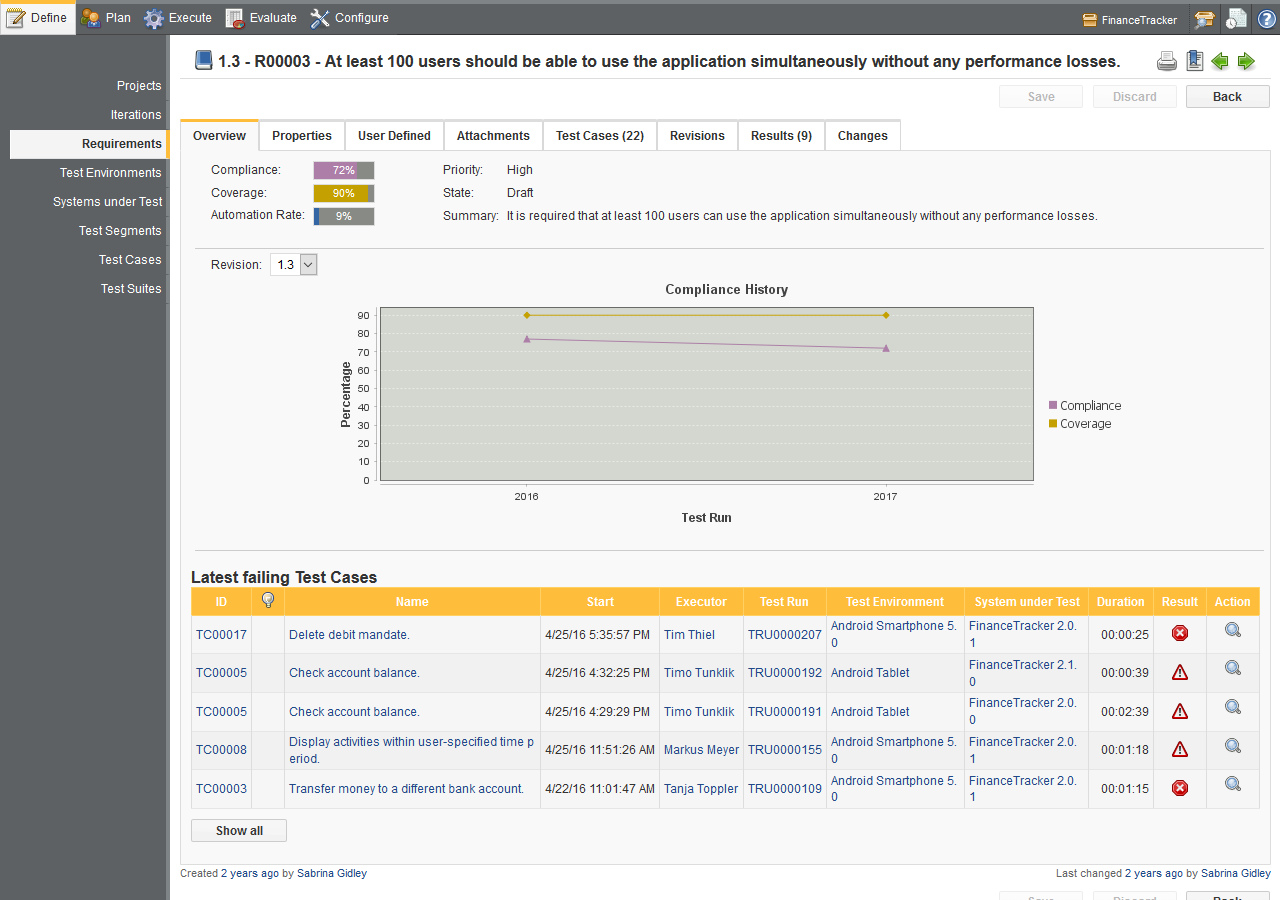
Compliance
The compliance rate shows how many test cases, which are part of this requirement, have been successfully executed.
Coverage
The compliance rate shows how many test cases, which are part of this requirement, have been executed at least once.
|
Note |
|---|---|
|
Note: In contrast to the success rate, the coverage rate considers only if a test case has been executed at least once in the iteration, regardless of the result (passed, failed, error). |
Automation Rate
This bar shows how many of the test cases of this requirement are automated.
![[Tip]](images/tip.png) |
Tip |
|---|---|
|
Manual test cases can often be converted to automated test cases if they are frequently executed to save time. |
Compliance History
This graph shows how the compliance and the coverage for this requirement have changed since the requirement has been defined. The timeline is automatically adjusted depending on the given timeframe.
Latest Failing Test Cases
This table lists the test cases which recently have been failed during a test run for this requirement alongside with the appertaining test case result.
|
Note |
|---|---|
|
This table is limited to five entries. The other test case results can be viewed by pressing the Show All button. |
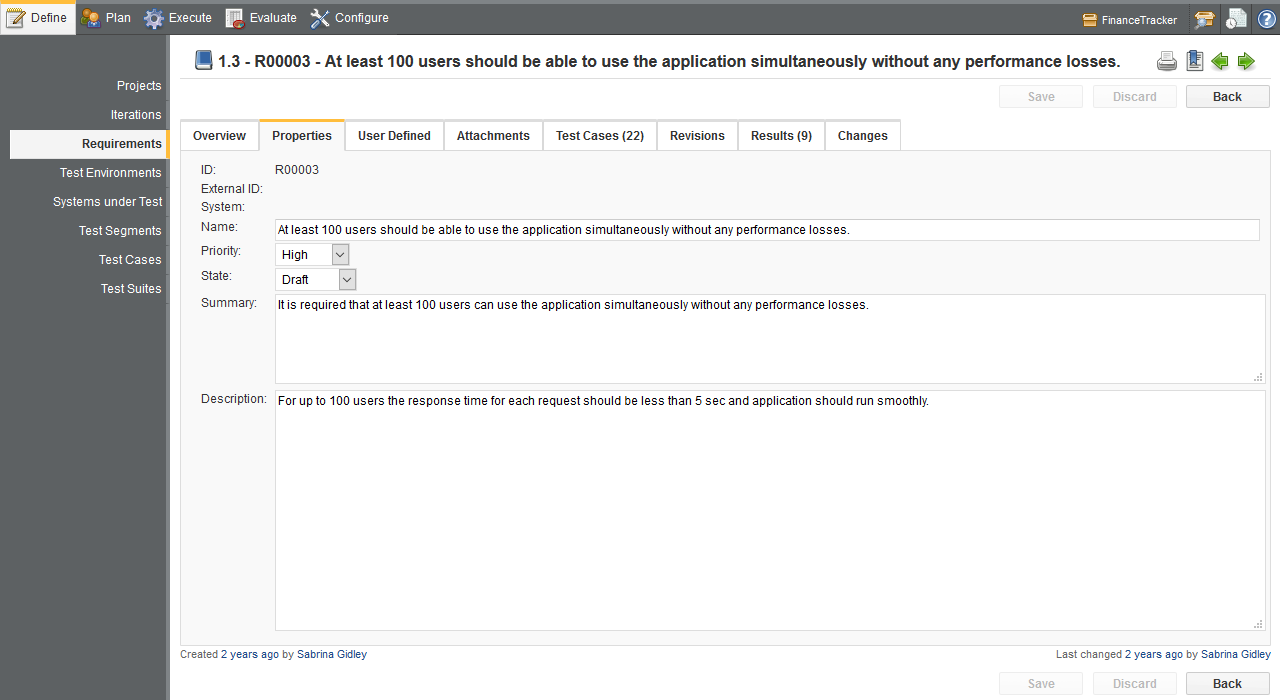
This page ( Figure 6.19) allows the user to view or change the following attributes of the selected requirement:
ID
Assigned automatically.
Name
The editable name of the requirement.
Priority
The priority of the requirement. Can be Low, Medium, High or empty.
State
The requirement state determines whether it is editable or visible in reports. Only requirement with the state Draft are editable. A requirement with the state Skip is not shown in any reports.
Summary
A short summary of the requirement.
User defined properties can be used to customize requirements within Klaros-Testmanagement by adding custom fields. This process is described in Section 5.2.13, “User Defined Properties”.
Attachments may be added to requirements. This process is described in Section 5.2.12, “Attachments”.
Coverage of requirements is tested by test cases. Users can link test cases to requirements in the Test Cases tab. The test results of linked test cases count towards the execution and success rates of the requirement.
Test cases may be assigned to the requirement by clicking the
button. This opens a dialog which allows Test Cases to be selected. Test cases may
be removed from the requirement one at a time by clicking the
![]() icon in the Action
column or in bulk by selecting test cases and clicking
the
icon in the Action
column or in bulk by selecting test cases and clicking
the
![]() icon above the table.
icon above the table.

The detail page of a Test Case shows a list of all Requirements that are covered by the Test Case. As shown in section Section 6.6.3.6, “Revisions”.
Requirements are revisionable. The process of revisioning an object is described in Section 5.2.16, “Revisions”.
|
|
 |
|
| 6.2. Iterations |  |
6.4. Test Environments |