| Chapter 8. Execute | ||
|---|---|---|

|
 |
|
| Chapter 8. Execute | ||
|---|---|---|
|
|
|
|
Table of Contents
This chapter describes the processes of executing test cases and test suites and jobs, continuing interrupted test executions and creating issues for failed tests.
![]() Only available in Klaros-Testmanagement Enterprise Edition
Only available in Klaros-Testmanagement Enterprise Edition
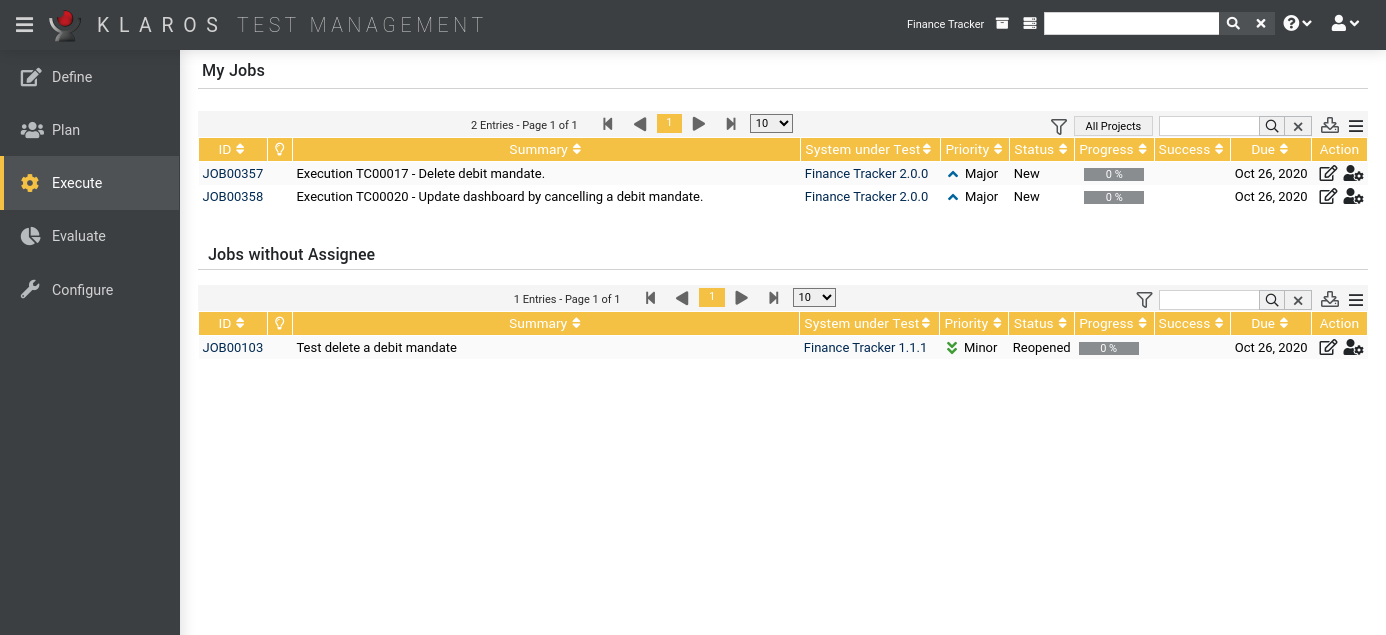
On the My Jobs page, the jobs of the active user as well as all unassigned jobs can be executed. ( Figure 8.1).
The My Jobs and Jobs without Assignee tables show the following values:
|
Project |
The project to which the job belongs to. |
|
ID |
The automatically assigned ID. |
|
Summary |
A summary of the job. |
|
System under Test |
The system under test assigned to this job. |
|
Priority |
The priority of the job. Possible values are Trivial, Low, HighCritical und Blocker. |
|
State |
The state of the job. Possible values are New, Reopened, In Progress, Resolved, Closed and Rejected. |
|
Progress |
The percentage of executed test cases of this job and its subjobs. |
|
Success |
The success rate of this job. |
|
Due Date |
The date on which this job is due to be finished. |
|
Action |
The actions that can be performed. |
The following actions can be performed in the action column:
The following operations can be performed in the line above the tables on the right:
All operations are described in detail in Section 5.2.3.1, “Overview Page”.
The available action for each job in the tables depends on the job type, whether it contains manual or automated test cases and whether it has dependencies on other jobs.
![[Note]](images/note.png) |
Non-executable Jobs |
|---|---|
|
If a job cannot be executed, the corresponding icon in the action column is grayed out. Hovering over this icon will display the reason in a tooltip. |
|
Execute |
The job is a task and it contains no test case and no test suite. |
|
Manually execute |
The job contains at least one manually executable test case. |
|
Reopen or update |
The job has already been completed. |
|
Execute review |
The job is a review job. |
|
Import results |
The job only contains automated executable test cases. |
|
|
|
|
| 7.4. Jobs by User |  |
8.2. Run Test Case |