| 8.3. Run Test Suite | ||
|---|---|---|

|
Chapter 8. Execute |  |
| 8.3. Run Test Suite | ||
|---|---|---|
|
|
Chapter 8. Execute | |
The execution of a Test Suite consists of the execution of a defined set of test cases on a specific version of the system under test in a selected test environment.
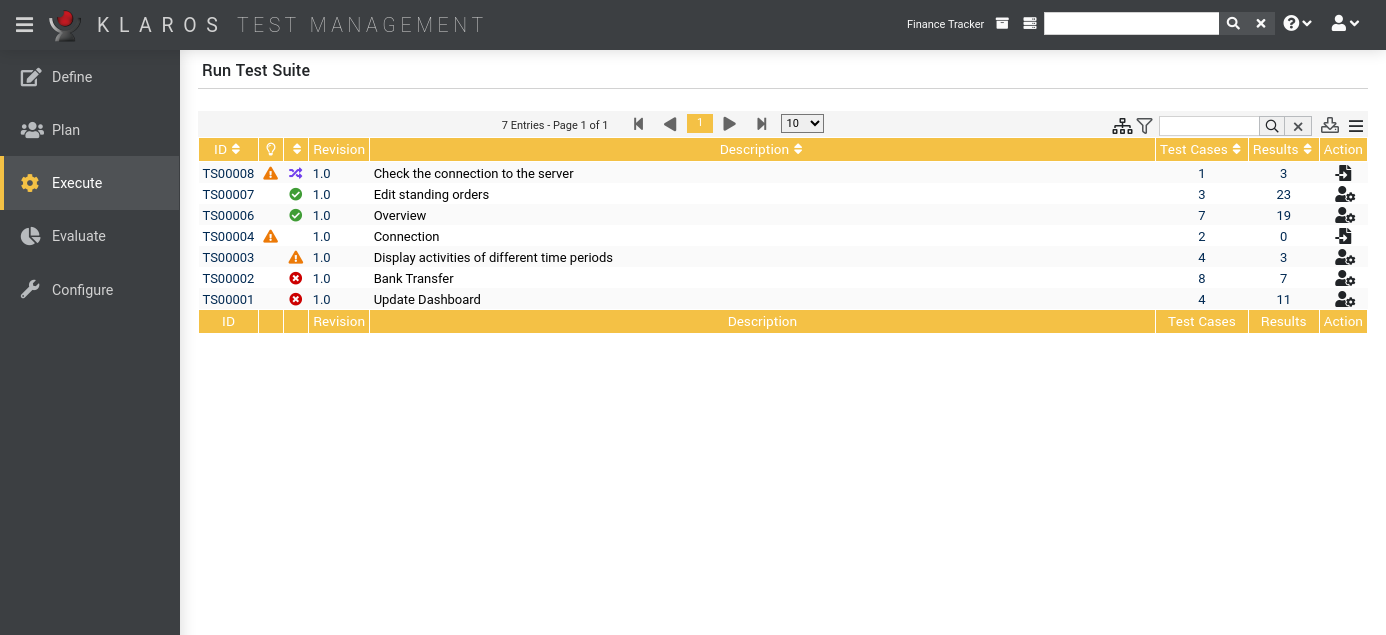
The Run Test Suite page shows all test suites of the selected project in a table.
The table shows the following values:
|
ID |
The automatically assigned ID. |
|
Additional Information |
A tooltip appears when the cursor is placed over the icon shown here. |
|
Latest result |
The result of the latest test suite execution. |
|
Revision |
The revision of the test suite. |
|
Description |
The description of the test suite. |
|
Test Cases |
The number of test cases in the test suite. |
|
Results |
The number of test case results. |
|
Action |
The executable actions. |
The action column is located on the far right of the table. The following actions can be performed in the action column:
The following operations can be performed in the line above the table on the right:
All operations are described in detail in Section 5.2.3.1, “Overview Page”.
![[Important]](images/important.png) |
Important |
|---|---|
|
A test suite with at least one test step in one of its test cases can be executed manually. For all other test suites, test result files can be imported (see Section 8.5, “Import Test Results”. for more information. |
![[Warning]](images/warning.png) |
Warning |
|---|---|
|
Test cases with the states Lockedand Skip or without any steps will be skipped when executing the test suite. |
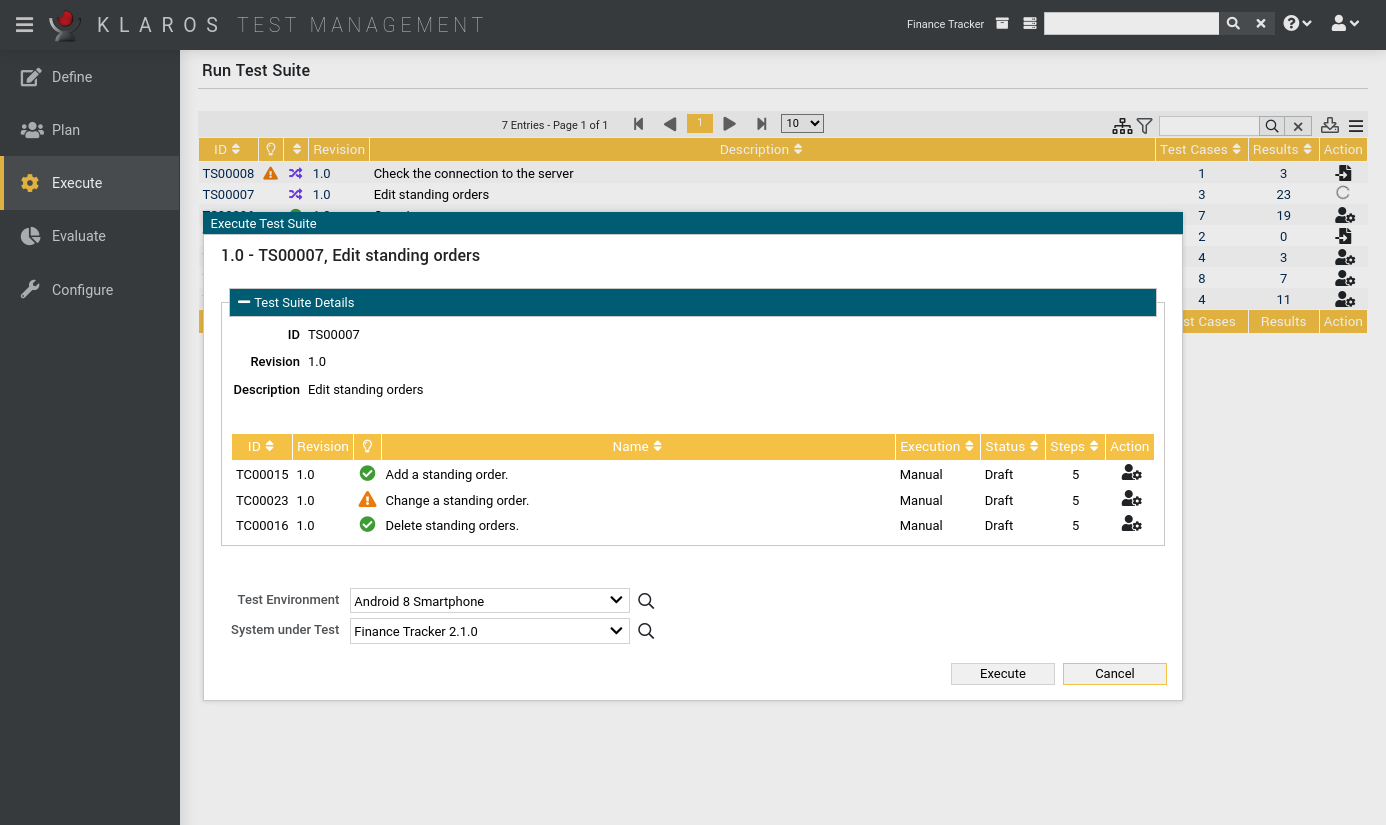
Clicking the button displays a dialog with information about the test suite ( Figure 8.10).
Before a test suite can be executed, the test environment the test suite is run in and the system under test itself have to be selected. In addition, the user-defined properties of the test run can be set here (for more information, see Section 5.2.3.2.4, “User Defined Properties”).
Clicking the button opens a second browser window where the test execution takes place. Make sure that pop-ups are allowed in your browser or add an exception for Klaros-Testmanagement.
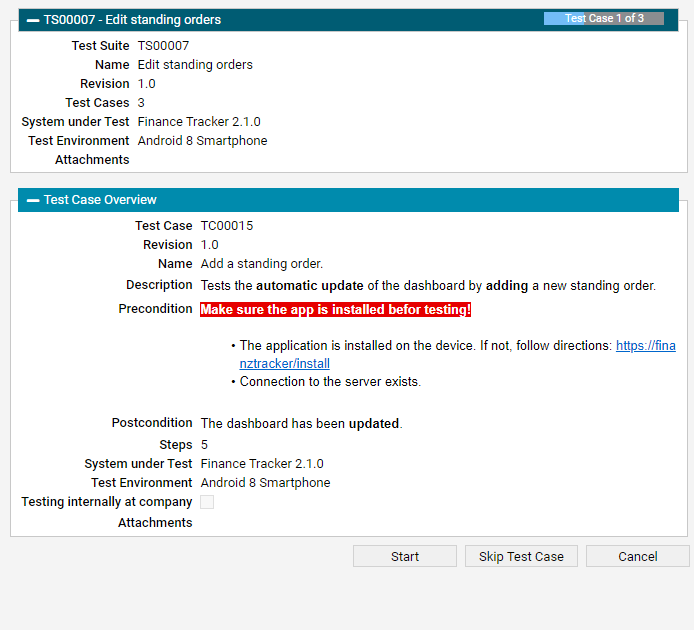
This view shows the overview of the next test case to be executed. Clicking the button starts the execution of the test case (the execution of a test case is described in detail in Section 8.2.3, “Executing a Test Case”).
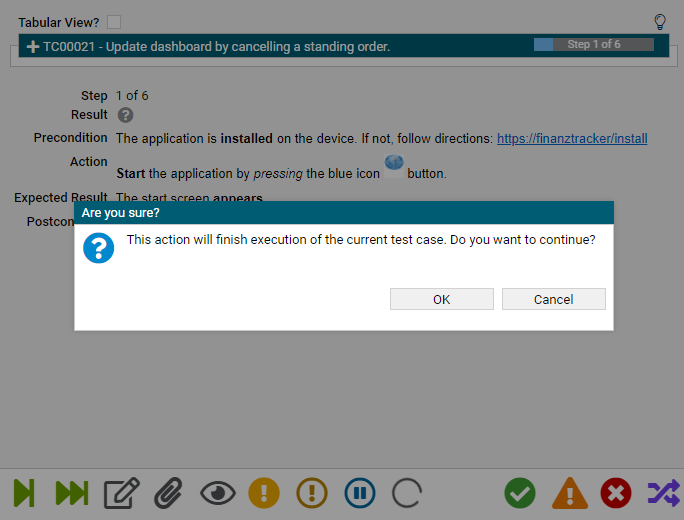
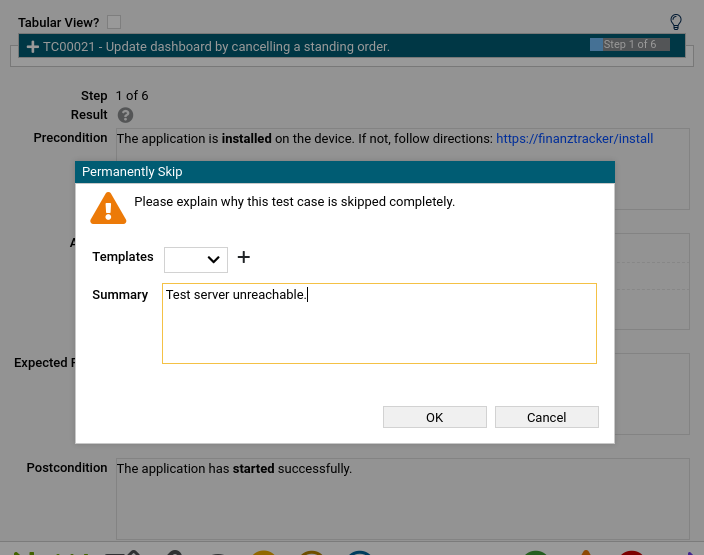
During the execution of a test suite, individual test cases can be postponed for later execution or permanently skipped.
After permanently skipping a test case, the tester is prompted to enter a reason why the test case was skipped. If explanatory templates are already defined (see Section 10.4.3, “Test Execution”), one of these templates can be selected.
By clicking on the icon, the selected template is copied to the test case result summary.
![[Note]](images/note.png) |
Note |
|---|---|
|
Skipping all steps of a test case will mark the whole test case as permanently skipped. |
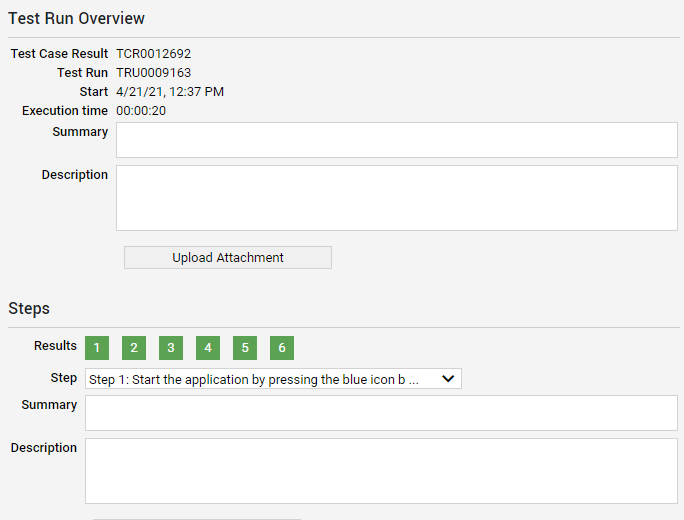
After finishing a test run, the tester can also edit the reasons for skipping test cases in the test run overview (see Figure 8.14).
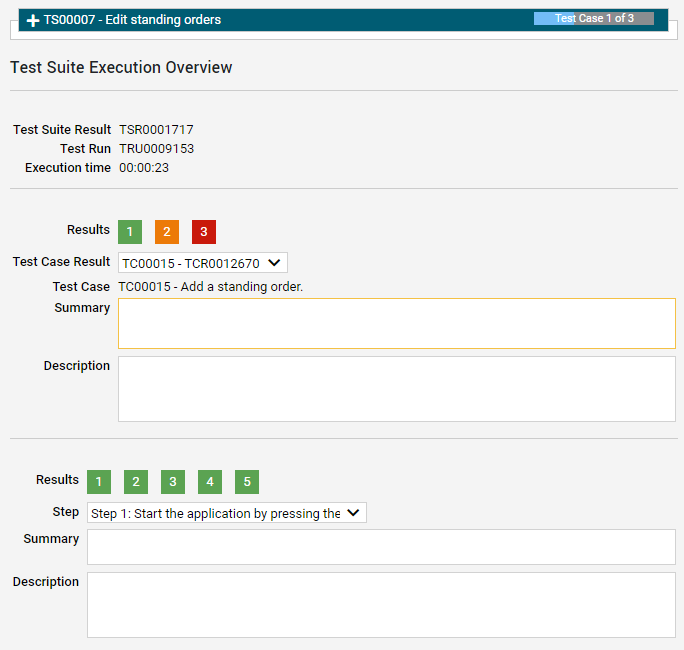
After all test cases have been executed, the Test Suite Execution Overview view is displayed. Here, a summary and description can be entered for each individual test case and test step of the test run ( Figure 8.15).
|
|
 |
|
| 8.2. Run Test Case |  |
8.4. Continue Test Run |