| Chapter 7. Plan | ||
|---|---|---|

|
 |
|
| Chapter 7. Plan | ||
|---|---|---|
|
|
|
|
Table of Contents
![]() Only available in Klaros-Testmanagement Enterprise Edition
Only available in Klaros-Testmanagement Enterprise Edition
This chapter describes the Plan section in Klaros-Testmanagement. Here Jobs can be created and edited.
A job is used to plan, organize and track a test activity. A job may consist of the execution or review of a test case or test suite or contain the textual description of any other possible activity. This chapter shows how to create and edit jobs.
The overview page displays all the jobs present in the selected project in a table. New jobs are created here.
The table shows the following values:
|
ID |
Assigned automatically. |
|
Summary |
The summary of the job. |
|
System under Test |
The test system assigned to this job. |
|
Priority |
The priority of the job. Possible values are Trivial, Low, HighCritical und Blocker. |
|
Status |
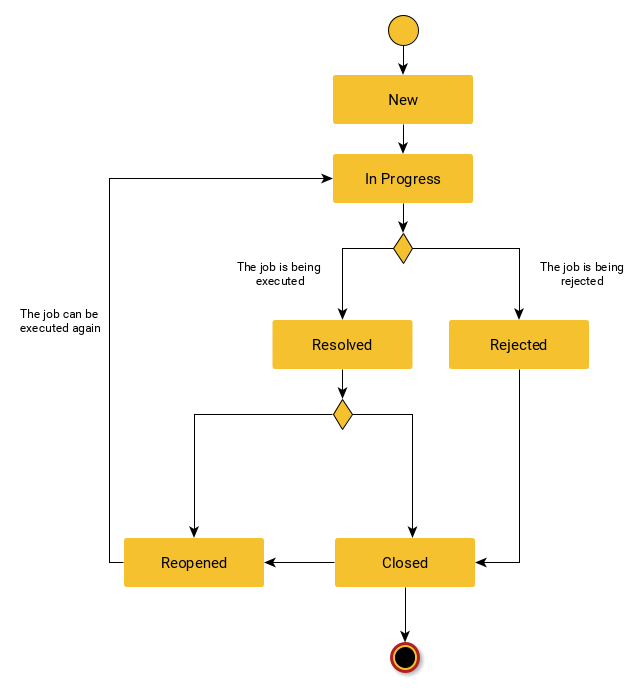
The status of the job. Possible values are New, Reopened, In Progress, Resolved, Closed and Rejected. |
|
Test Cases |
The number of test cases assigned to this job and its sub-jobs. |
|
Progress |
The percentage of executed test cases of this job and its sub-jobs. |
|
Success |
The success rate of the executed test cases of this job and its sub-jobs in percent. |
|
Due |
The date on which this job is due to be finished. |
|
Assigned |
The user to whom the job is assigned. |
|
Action |
The actions that can be performed. |
By clicking on the button a new empty table row will appear. Now, a Summary can be defined.
With the new job is created and saved. The ID of the job (JOB00001) is automatically assigned by Klaros-Testmanagement. Click on the ID JOB00001 to get to the detail page of the job.
With several table rows can be created and edited at the same time. Only when clicking on the data is stored in the database.
With all changes are undone.
![[Note]](images/note.png) |
Unsaved Changes |
|---|---|
|
All rows marked with red IDs contain changes that have not yet been saved. |
The action column is located on the far right of the table. The following actions can be performed here:
If a job has been deleted, it is initially marked with a deletion marker and is only visible to administrators. For deleted jobs, the following actions are available instead of Delete:
Some actions can be applied to multiple jobs at the same time. To do this, select the jobs to which the action is to be applied in the leftmost column.
The following bulk actions are supported for jobs:
Bulk actions are described in detail in Section 5.2.3.1.5, “Bulk Actions”
The following operations can be performed in the line above the table on the right:
All operations are described in detail in Section 5.2.3.1, “Overview Page”.
Sub jobs can be rearranged using the arrow icons in the Action column. The icon opens a dialog that allows the user to move the job to a new position. The and icons change the job hierarchy. The icon moves the job to the hierarchy level of the parent job. The icon opens a dialog where a new parent job can be selected.
Parent jobs have the following characteristics:
To subordinate a job to another job, click on the icon. Now you can select which job this job should be subordinated to. The number of subordinate jobs is then displayed next to the ID of the parent job. The displayed success and progress rate of the parent job is automatically derived from the test results of its sub jobs.
![[Warning]](images/warning.png) |
Warning |
|---|---|
|
Jobs that already have a test case or test suite assigned to them cannot contain sub jobs and are therefore not shown as possible targets in the New parent job dialog. |
|
Changes to parent jobs |
|---|---|
|
Changes to parent jobs regarding test environment, system under test and iteration using are automatically propagated to their sub jobs. |
For a detailed description on how to execute jobs, see Section 8.1.3, “Executing a Job”.
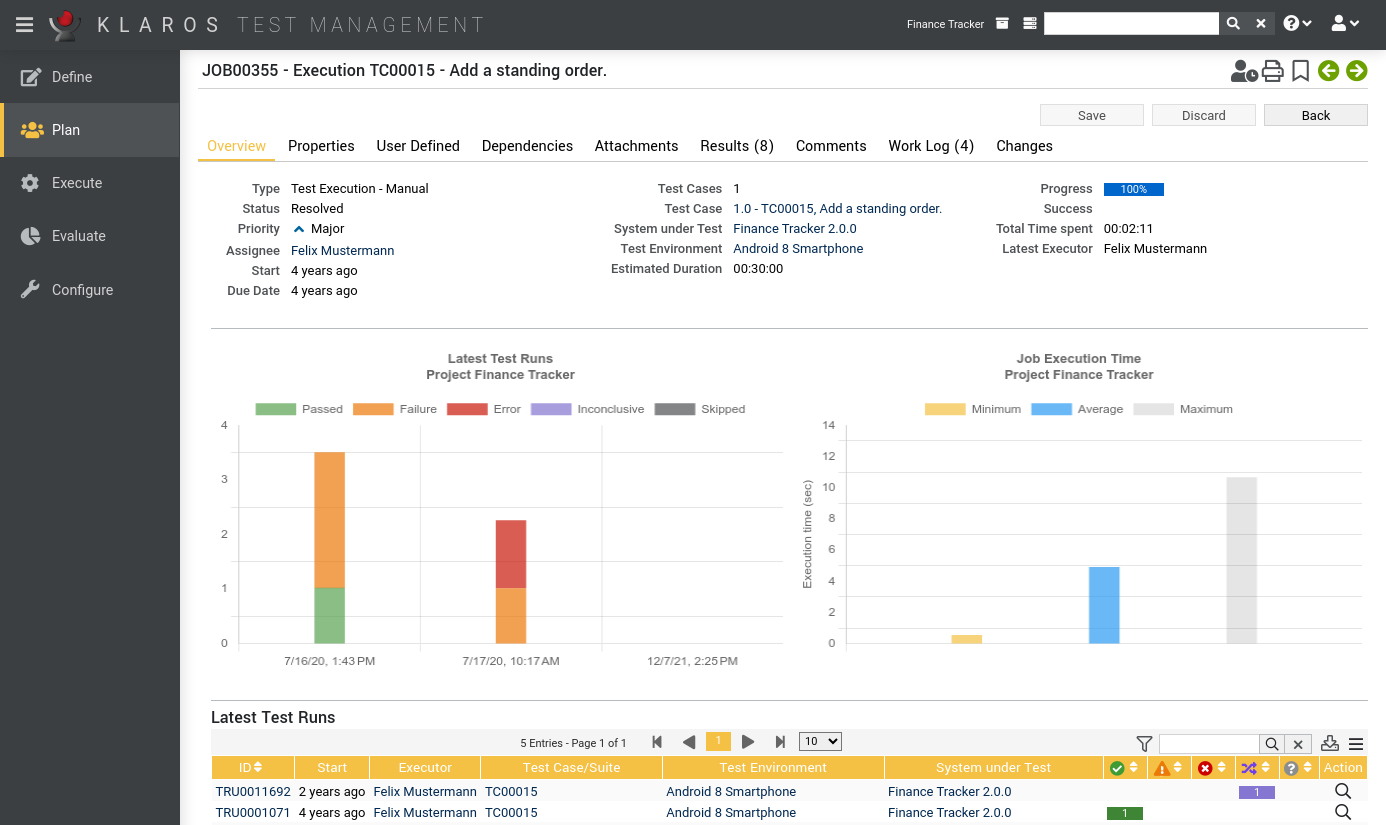
Each job has its own detail page with several additional tabs. By clicking on the ID of the relevant job or on the icon on the right in the action column, you can access the detail view that was selected last. When called for the first time, this is the Overview view.
The following tabs are available: Overview, Properties, User Defined, Dependencies Attachments, Results, Comments, Work Log and Changes.
On the detail pages there are additional icons in the upper right corner. The following actions can be performed here:
|
Execute |
Click on the displayed icon to execute the job. The execution of jobs is described in detail in Section 7.1.1.6, “Executing Jobs”). |
|
Open print view |
A print-ready view of the job can be created here. With a click on the icon this opens in a new browser tab. Print views are described in detail in Section 5.2.3.2.1, “Print Pages”. |
|
Create Bookmarks |
Each individual detail page can also be reached directly via a hyperlink. By clicking on the icon this link is copied to the clipboard. The creation of bookmarks is described in detail in Section 5.2.3.2.2, “Bookmarks”. |
|
Browse |
Use the green arrows at the very top right to switch between the jobs present on the previous page. |
|
Type |
The job type ( Test Execution - Automated, Test Execution - Manual, Review or Task(if neither a test case nor a test suite is assigned to the job). |
|
Status |
The status of the job. |
|
Priority |
The priority of the job. |
|
Assignee |
The person responsible for this job. |
|
Start |
The earliest point in time this job can be executed by a tester. |
|
Due Date |
The point in time when the execution of the job has to be completed at the latest. |
|
Test Cases |
The total number of test cases of this job or its subjobs. |
|
Test Case / Test Suite |
The test case or test-suite assigned to this job. |
|
System under Test |
The system under test which should be used when executing this job. |
|
Test Environment |
The test environment which should be used when executing this job. |
|
Estimated Duration |
The estimated duration needed to complete this job. |
|
Progress |
The progress rate shows how many test cases which are covered by this job have been executed, regardless the result. |
|
Success |
The success rate shows how many of the test cases which are covered by this job have been successfully executed in the latest test run. |
|
Total Time spent |
The time spent on the test execution. This value results from the sum of the execution times from the work log. |
|
Latest Executor |
The user who executed the job most recently. |
|
Latest Test Runs |
This graph displays the accumulated test case results of the latest test runs for this job in descending order. |
|
Execution Time |
This graph shows the minimum, average and maximum execution times for this job. |
|
Latest Test Runs |
This table shows the latest completed test runs for this job. |
|
Note |
|---|---|
|
By default, this table shows only up to five entries. Pressing the button opens up the results tab in which all test runs are listed. |
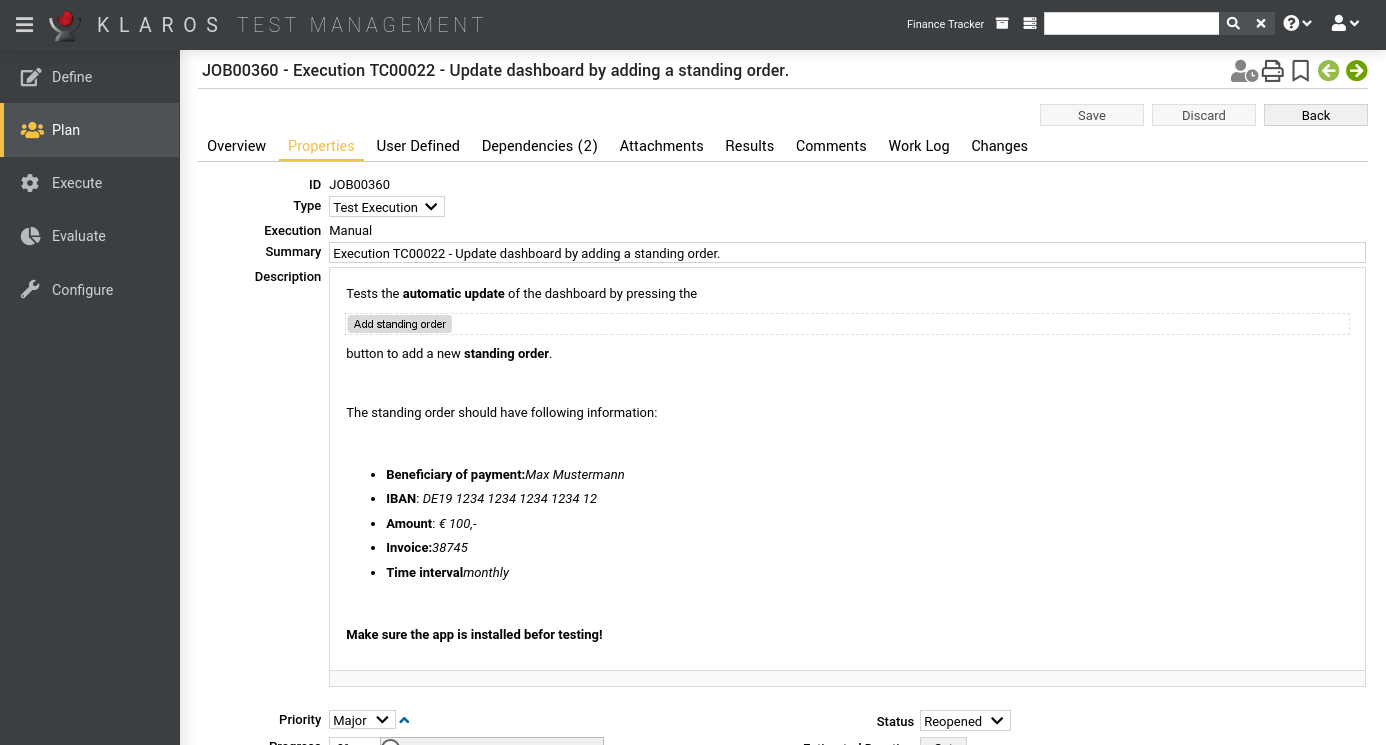
In the Properties tab, the following attributes can be changed:
|
Type |
The job type ( Test Execution - Automated, Test Execution - Manual, Review or Task(if neither a test case nor a test suite is assigned to the job). |
|
Summary |
The summary of the job. |
|
Description |
The detailed description of the job. |
|
Priority |
The priority of the job. Possible values are, in ascending order of severity, Trivial, Minor, Major, Critical and Blocker. |
|
Status |
The status of the job. Possible values are New, In Progress, Resolved, Closed, Reopened and Rejected. |
|
Progress |
The current percentage of completion of the job. |
|
Estimated Duration |
The estimated time in days, hours, minutes and seconds (Format: Days HH:MM:SS) that the job will take. |
|
Start Date |
The earliest time at which this job can be performed by a tester. |
|
Due Date |
The time at which the execution of the job must be completed at the latest. |
|
Assignee |
The user responsible for the job. |
|
Iteration |
The iteration to which this job is assigned. A job can only be in one iteration at a time. Changing the iteration is possible at any time. |
|
Test Case |
The test case to be executed in this job. A job can contain either a test case or a test-suite. This field is not available if the job contains subjobs or is of the type Task. |
|
Test Suite |
The test suite to be executed with this job. A job can contain either a test case or a test suite. This field is not available if the job contains subjobs or is of type Task. |
|
System under Test |
The system under test for which this job should be executed. |
|
Test Environment |
The test environment in which this job should be executed. |
A test case or test suite can be assigned to a job, provided that the job does not contain any subjobs. A click on the icon opens a dialog in which a test case or test suite can be selected. Only one item can be selected at the same time. Clicking the icon removes the element from the job.
You can create your own fields to meet individual requirements. For further information please refer to Section 5.2.3.2.4, “User Defined Properties”.
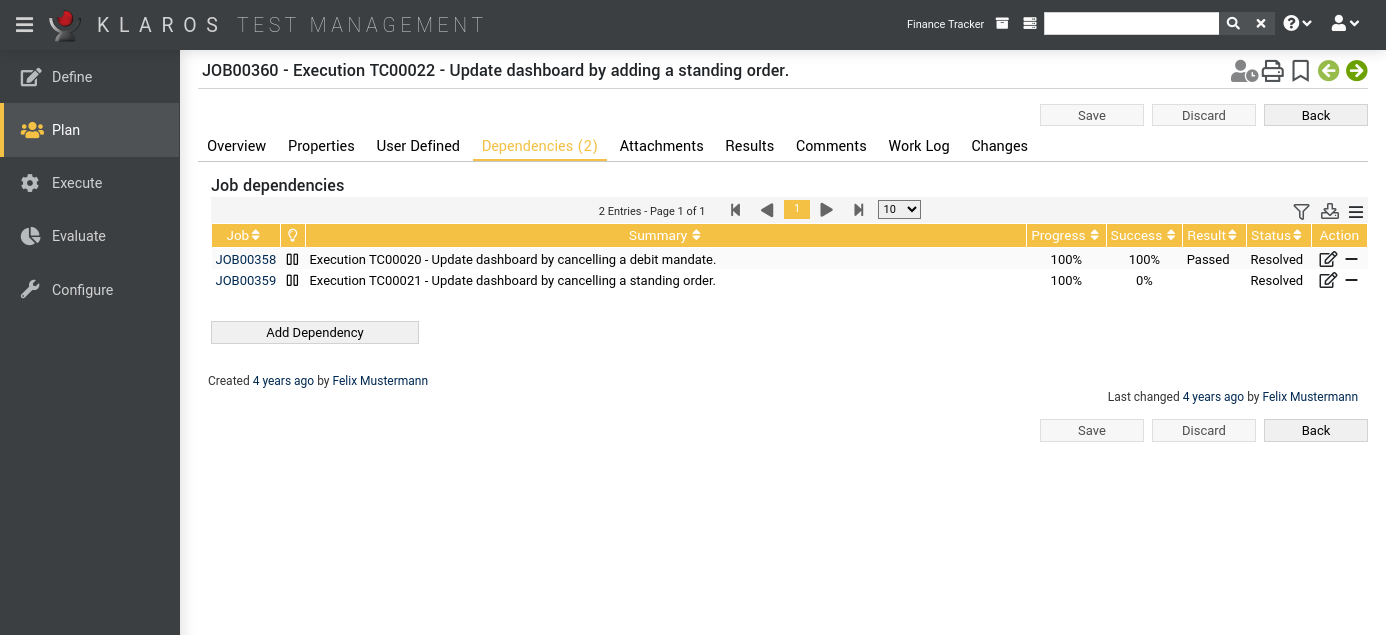
In the Dependencies view, dependencies can be defined between jobs so that certain jobs can only be executed when previously defined conditions are met. For each job, any number of dependencies can be defined to one or more other jobs that must be fulfilled before the job can be executed. In this view you will find an overview of all prerequisite and dependent jobs of the currently selected jobs.
Dependency Criteria
|
Job |
The prerequisite job. |
|
Progress |
The minimum progress rate of the prerequisite job (0-100%). |
|
Success |
The minimum success rate of the prerequisite job (0-100%). |
|
Latest Result |
The latest result of the prerequisite job ( Passed, Failed, Error, Inconclusive, Skipped or Unknown). Multiple values can be selected. |
|
Status |
The status of the prerequisite job. Possible values are New, In Progress, Resolved, Closed, Reopened and Rejected. |
If a job cannot be executed because the dependency criteria of its prerequisite jobs are not fulfilled, the icon is displayed instead of the execute icon.
You can add any files as attachments to a job. For more information, see Section 5.2.3.2.6, “Attachments”.
The results tab is further divided into a Test Runs, Test Case Results and a Test Suite Results tab, showing the test results related to this job as described in Section 5.2.3.2.7, “Test Runs and Results”.
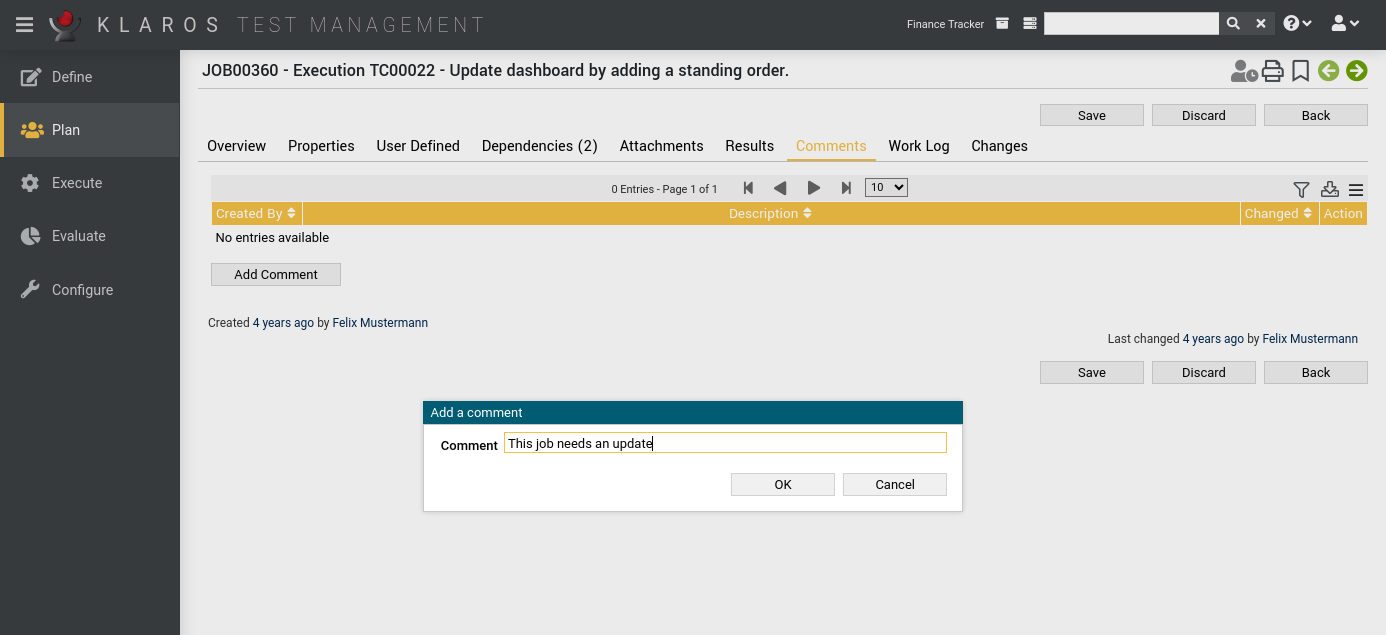
After clicking the button, comments can be added here.
The text entered in this dialog will be saved as a comment on the job once the button is clicked and saved. To modify the comment, use the icon, to remove it, click the icon.
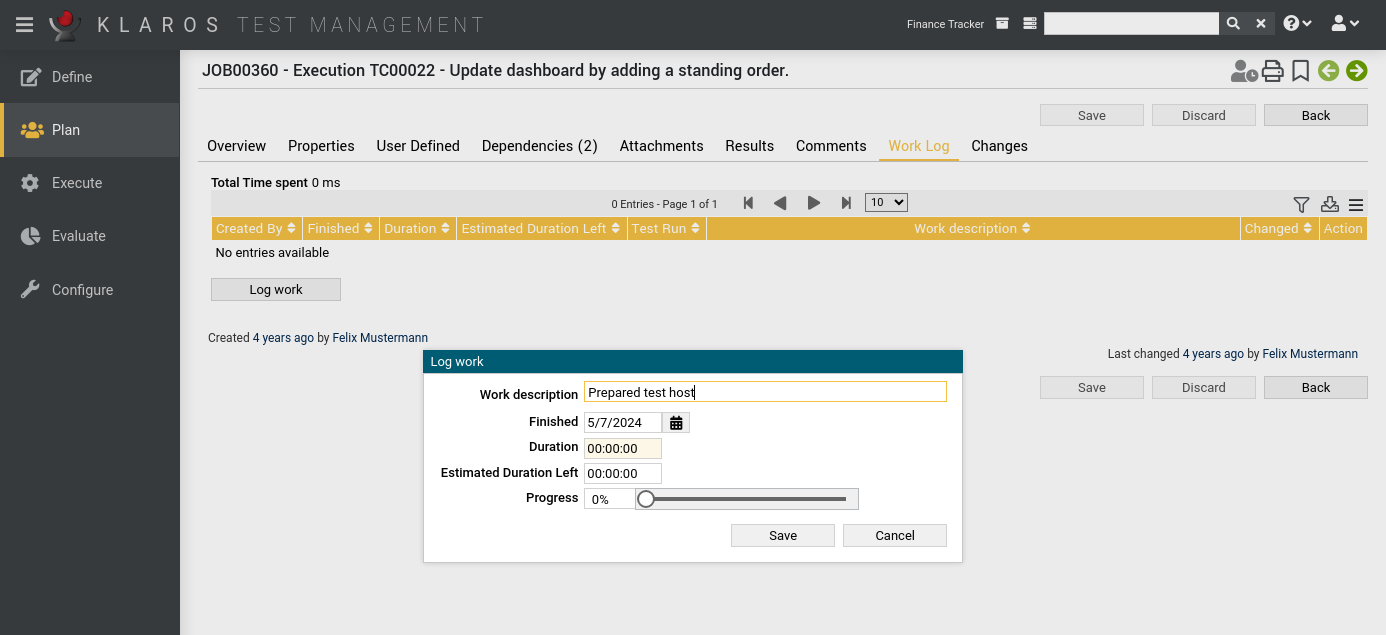
Each test run related to this job is displayed in the Work log tab. It is also possible to add your own additional work logs to the job. To do this, click on the button. A dialog for entering the details will then be displayed.
A duration must be entered in the Duration field in order for the activity to be logged. Then click to save your logged work. To modify a work log entry, use the icon to remove it, click the icon.
The page Changes shows the change history for this job.
For a detailed description of the Changes view, see Section 5.2.3.2.8, “Change History”.
|
|
|
|
| 6.8. Test Suites |  |
7.2. Jobs from Test Cases |