Table of Contents
In this step-by-step guide we show you how to write a test case, assign test steps to it, execute the test case and view the evaluation.
Four objects must be created to execute a manual test case:
-
The project in which all other objects are saved.
-
One or more test environments in which the test case is to be executed, such as operating systems or browser variants.
-
The test system, (also test object, system under test, test object)
-
The test case itself with its process description, which is divided into individual test steps.
-> -> -> -> -> ->
We start with the creation of the project. Projects are the units that combine all test-related objects into a specific test project. In our example a time recording software is to be tested.
-> -> -> Description: "Test time recording software"
Select the Activate this project function to the far left of the Project ID or to the left of the Action column. The selected project now appears - as long as it is selected - in the project selection at the top right.
Next, the test environment is created. In Klaros-Testmanagement a test environment summarizes the definition of external circumstances that can influence the test result. This could be the operating system, a physical environment, the version of a customer system or, as in ourExample, the web browser.
-> -> -> Description: "Chrome" ->
Now we need the test system. Other terms are also used for this: system to be tested, test system, system under test, test object. This refers to the identification of the system/object to be tested. Here we use the version number of the time recording software.
-> -> -> Version: "Clockify Version 2.45 2.45" ->
Now the actual test case with the detailed test instructions is still missing.
-> -> -> Name: "Record Time" -> Execution: Manual ->
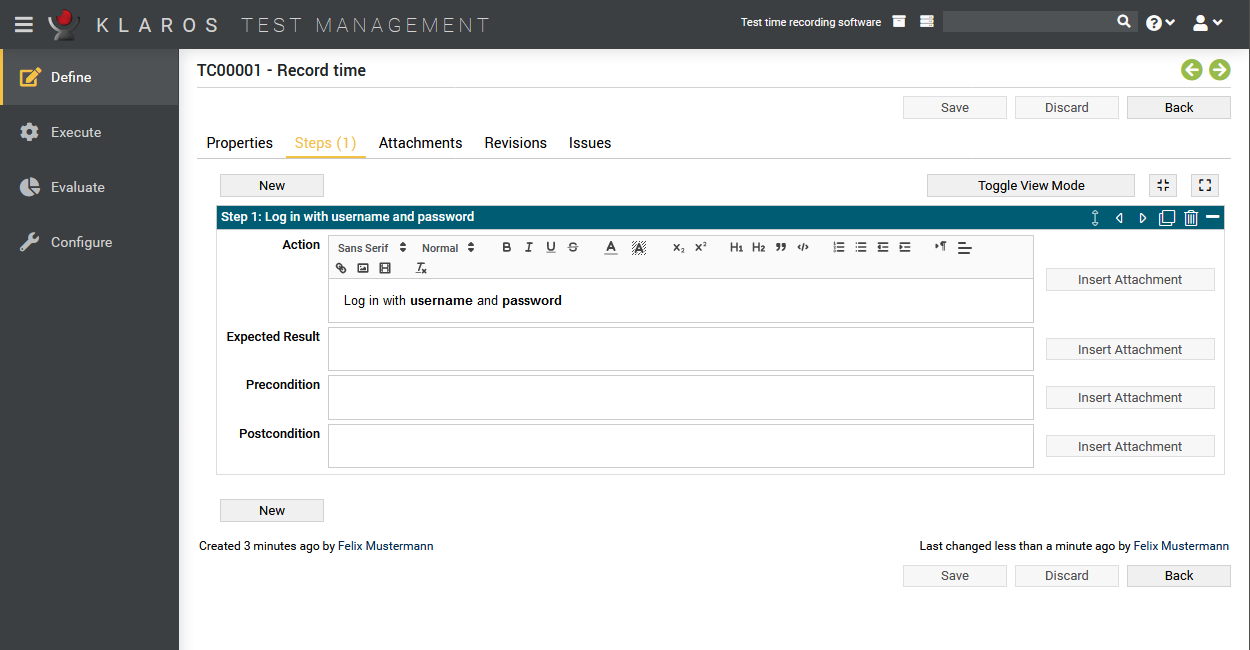
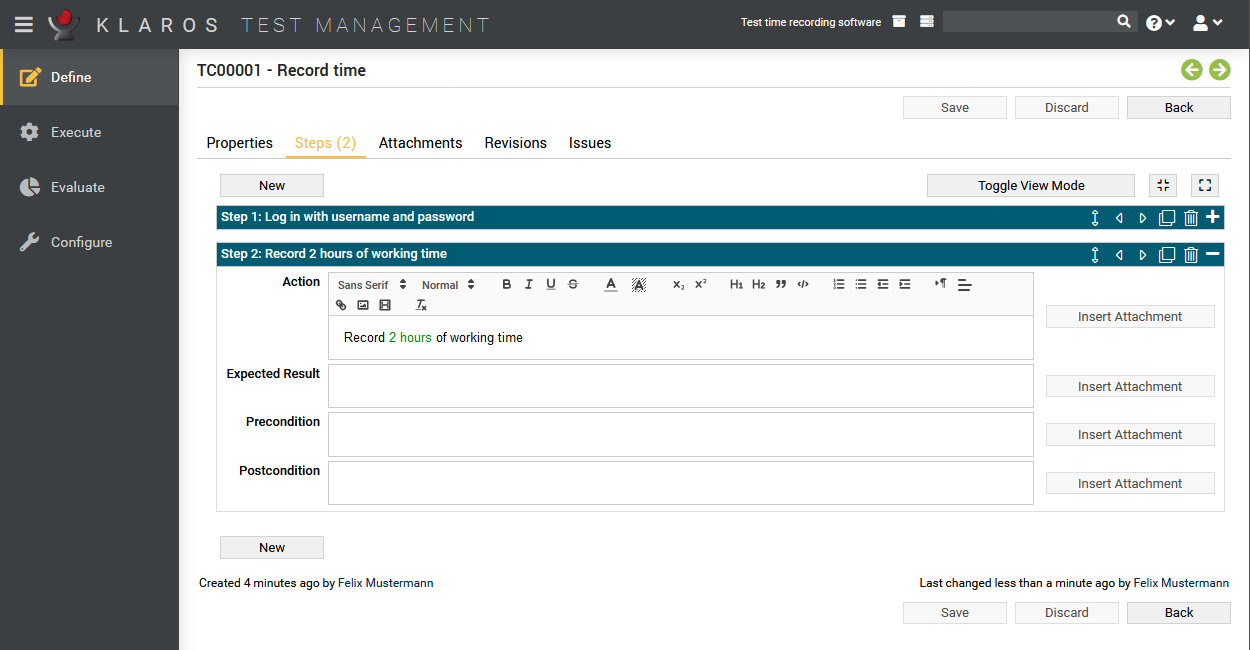
At least one test step must be created so that the tester knows which work steps to perform. We insert two steps here.
Now click on the edit icon ("Edit this test case") in the column Action and you will get to the "Overview" page of the test case. Here we select the tab .
-> -> Action "Login with Username and Password" ->
-> Action "Record 2 hours working time" ->
![[Note]](images/note.png) |
Note |
|---|---|
|
With Change view mode a compressed tab view is displayed. This is especially useful for many test steps. |
The "Record time" test case in the "Test time recording system" project now contains its minimum specifications and can be executed. For this purpose we switch to the section.
In the Community Edition, you can go directly to the submenu item . In the Enterprise Edition select from the side menu.
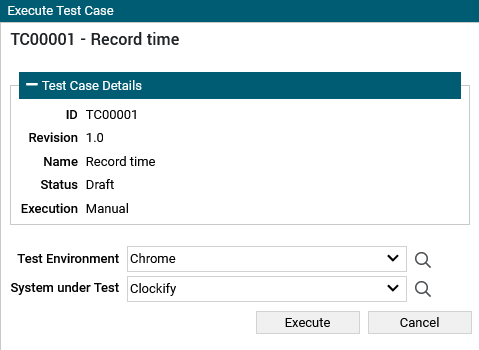
-> -> Action: Execute -> A dialog opens -> Entries can be checked -> -> A new browser window (testrunner) opens.
![[Note]](images/note.png) |
Note |
|---|---|
|
A separate window for executing the test case now opens. Please make sure that your browser allows popup windows to be opened. |
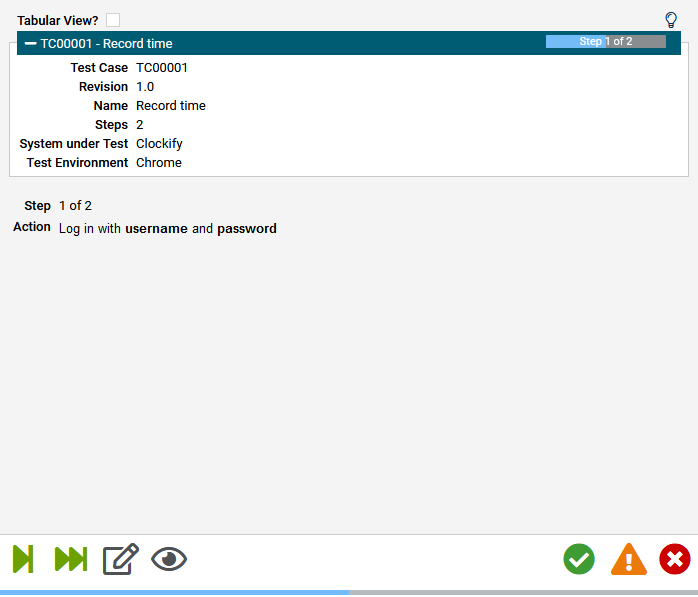
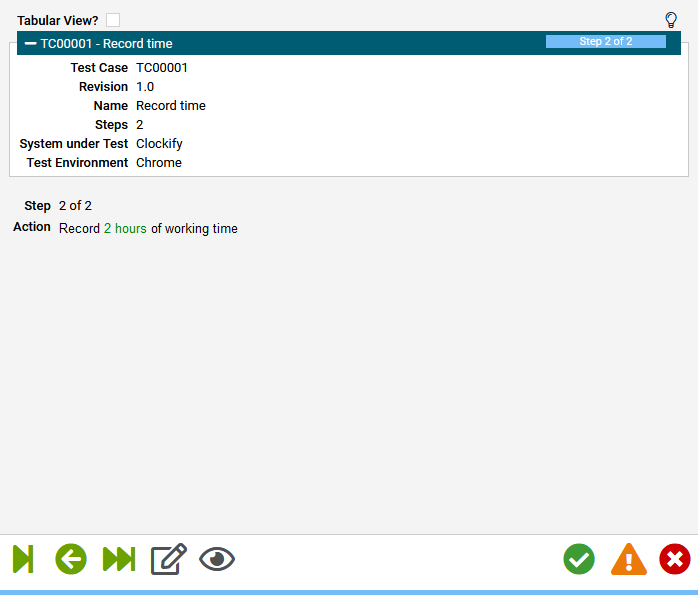
The tester is now guided step by step through the test case while the results are automatically recorded. For a better overview, two possible representations can be shown here can be selected: "Detailed" and "Tabular". If required, the application window can now be minimized to leave the screen free for executing the test steps.
Step 1 - Click
Step 2 - Click
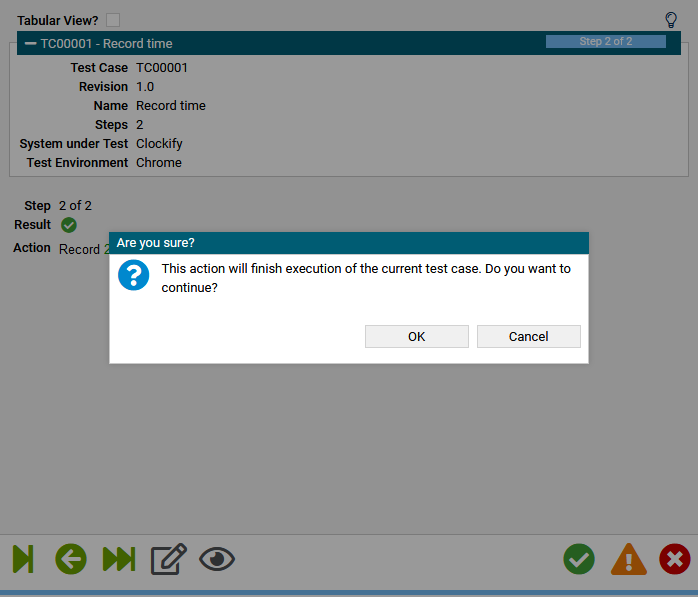
Click to confirm
Before the test case execution is finished, additional information can be added or binaries can be attached to the test case result.
Now we open the application window again. After clicking on the execution of the test case is terminated and you will now see the current results.
-> -> Switch to the application window.
For this we select the area -> and get to the overview page of all test case results. In our example, only one result exists. Clicking on the plus icon in the turquoise bar displays further information. In the example, however, no test case attributes have been created yet, so most of the fields are empty.
Now select in the column Action the magnifying glass symbol to get to the detail page "Test Case Results".
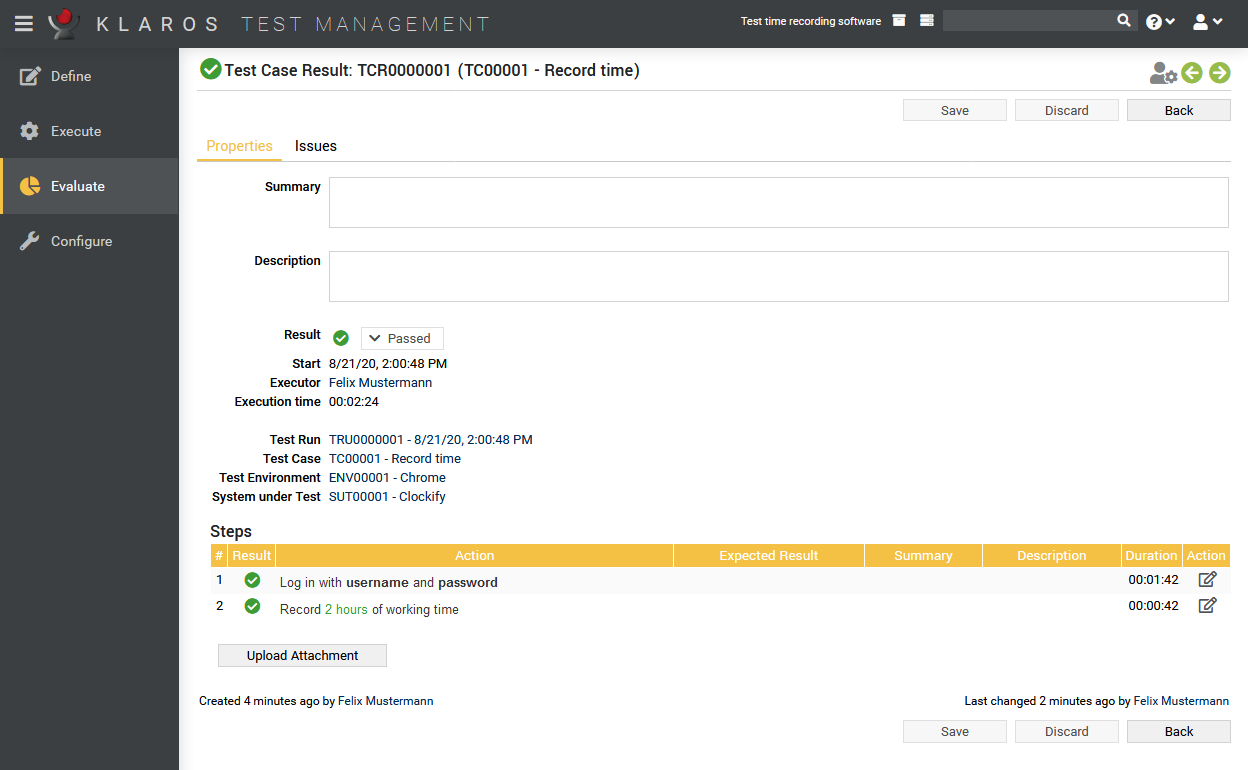
All test case results of the selected test case are displayed here. Since the test case was executed only once, only one result is listed here. A further click on the magnifying glass symbol takes you to the detail page of the test case result.
If it should become necessary that the test step result is changed again, this is possible in the table below. The test case result is permanently marked as changed using a light bulb symbol. The changes are also logged in the " Changes tab.
In the action column, an attachment can still be uploaded if needed.
![[Important]](images/important.png) |
Alternative |
|---|---|
|
Alternatively, the result can also be displayed by clicking on the number "1" in the overview view under the column "Results". You return to the area -> -> . Here you select the magnifying glass symbol and return to the . |
Clicking on the bookmark symbol in the upper action bar creates a permanently valid URL for this test result. This will be copied directly to the clipboard and can be sent to team members.
A click on the print symbol creates an optimized view of the test result and can be printed directly from the browser.
The first test case has now been successfully created, executed and evaluated. Its result can be sent as a link or printed as a document.


