| 3.3. Installation | ||
|---|---|---|

|
Chapter 3. Installation |  |
| 3.3. Installation | ||
|---|---|---|
|
|
Chapter 3. Installation | |
Under Microsoft Windows the installer is invoked by running the binary Klaros-Testmanagement-<version>-Setup.exe.
Under Linux the installer can be started by running the binary Klaros-Testmanagement-<version>-Setup.bin in a user shell.
The following screens show each step involved in installing Klaros-Testmanagement.
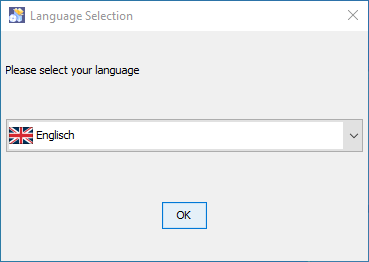
Upon startup the installer is requesting the language used throughout the following installation procedure.
Currently both English and German languages are available.
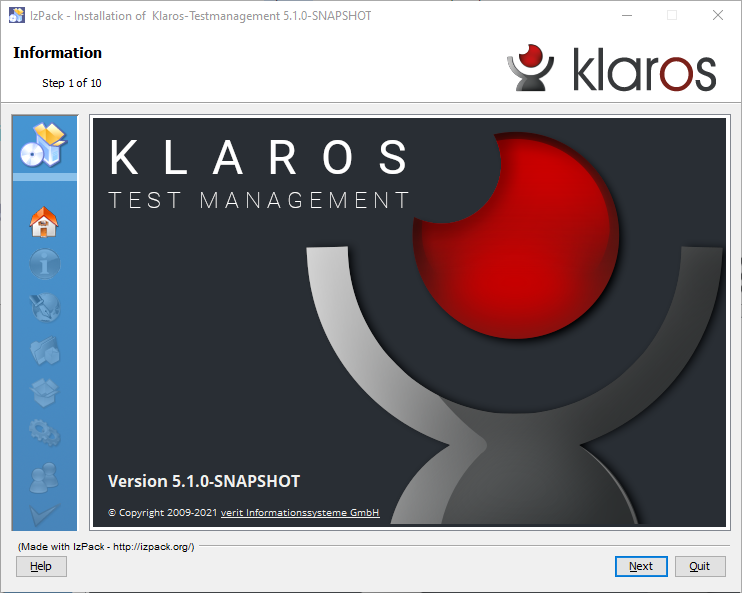
The initial step shows a c to the user ( Figure 3.2).
The installation may be aborted by clicking the button. Clicking proceeds with the installation.
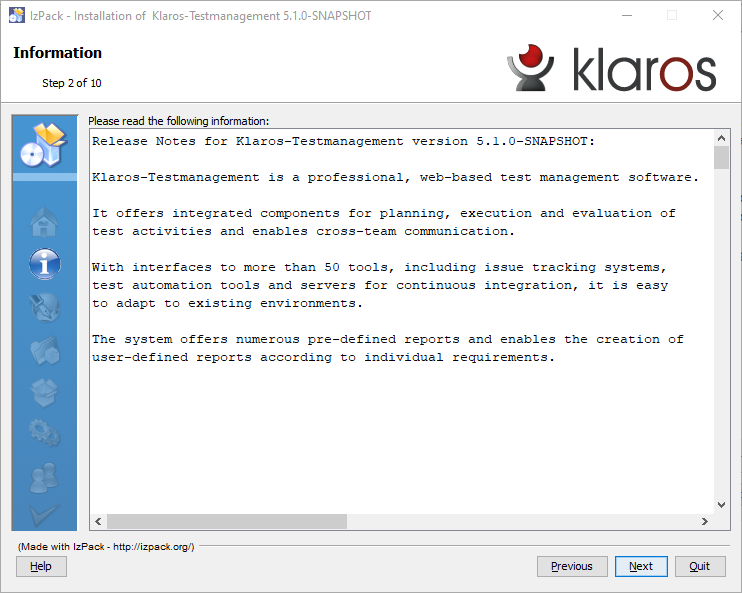
The second step shows information about the product and the revision history, listing the fixed issues and the newly added features ( Figure 3.3).
The installation may be aborted by clicking the button. Clicking goes back to the Welcome step and clicking proceeds with the installation.
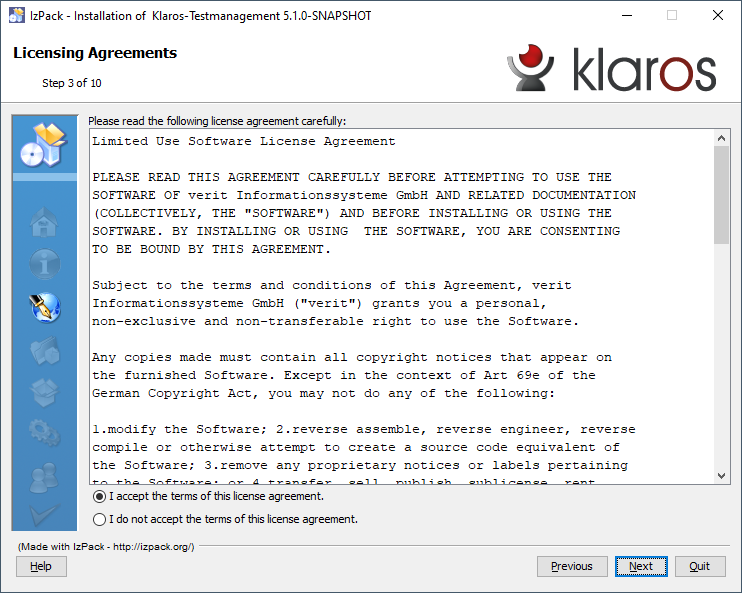
The third step shows information about the license agreement for Klaros-Testmanagement. The license must be accepted to continue the installation. ( Figure 3.4).
The installation may be aborted by clicking the button. Clicking goes back to the Information step and clicking proceeds with the installation.
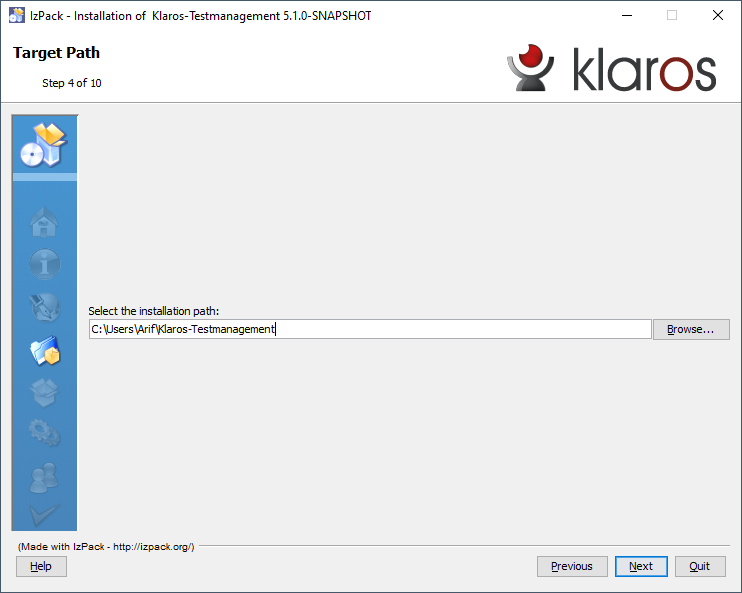
The fourth step requests the target path where Klaros-Testmanagement will be installed. The user can use the button to search for the specific path in the local file system ( Figure 3.5).
![[Important]](images/important.png) |
Install Folder Location |
|---|---|
|
It is highly recommended using the suggested install location and not the Windows Programs folder. By default, Klaros-Testmanagement will not be able to start if installed there, as the Tomcat application server requires write access to the installation folder in order to deploy the web application. This is blocked by Microsoft Windows User Account Control (UAC). If you wish to install Klaros-Testmanagement in this location, UAC must be disabled. |
The installation may be aborted by clicking the button. Clicking goes back to the Licensing Agreement dialog and clicking proceeds with the installation.
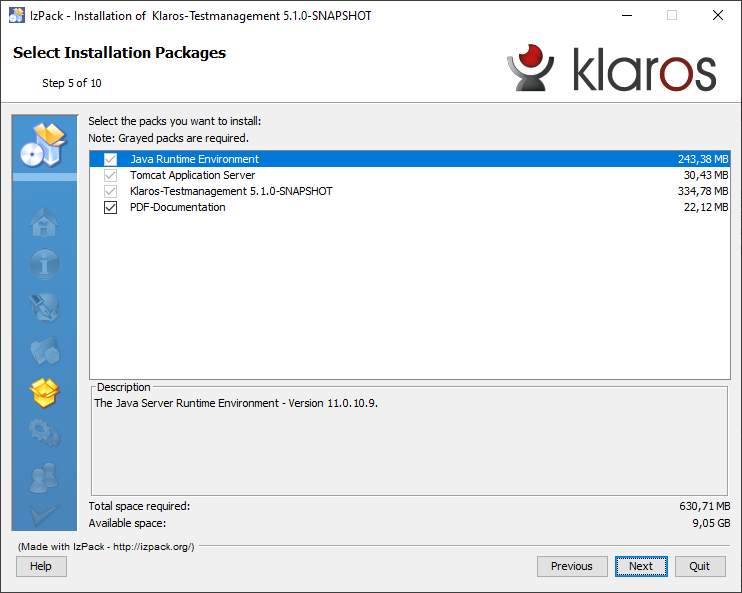
The fifth step allows selecting optional packages that are installed with Klaros-Testmanagement.
The installation may be aborted by clicking the button. Clicking goes back to the Target Path dialog, clicking proceeds with the installation.
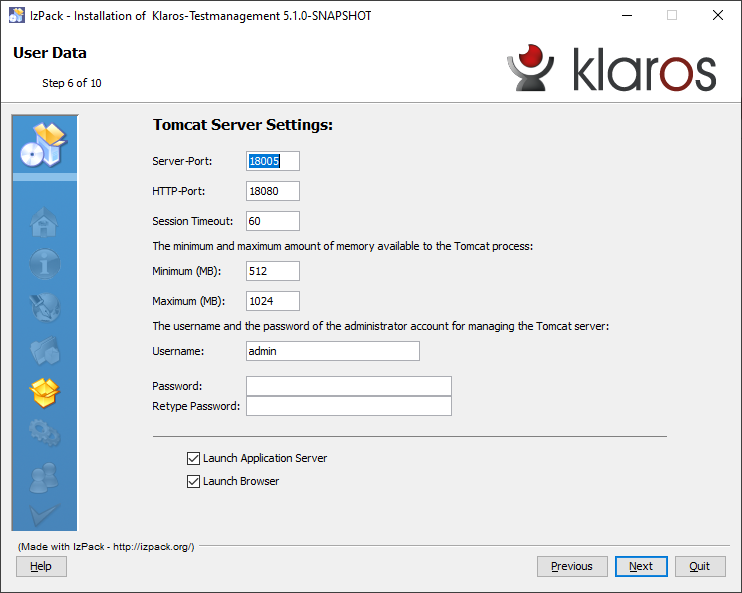
In the sixth step the settings for the installed Tomcat application server can be changed.
It is possible to set the ports used by Tomcat (Server-Port and HTTP-Port), the minimum and maximum amount of memory available to the Tomcat process as well as the user name and password of the Tomcat application server administrator.
In addition it is possible to control the startup of the application during the installation. If the Launch Application Server checkmark is set, the application server will be launched automatically during the installation process. If the Launch Browser checkmark is set, a native web browser instance will be redirected to the application login page. Both of these actions will be performed during the Section 3.3.9, “Step 8: Perform External Processes” phase.
The installation may be aborted by clicking the button. Clicking the button goes back to the Select Installation Packages step and clicking button proceeds with the installation.
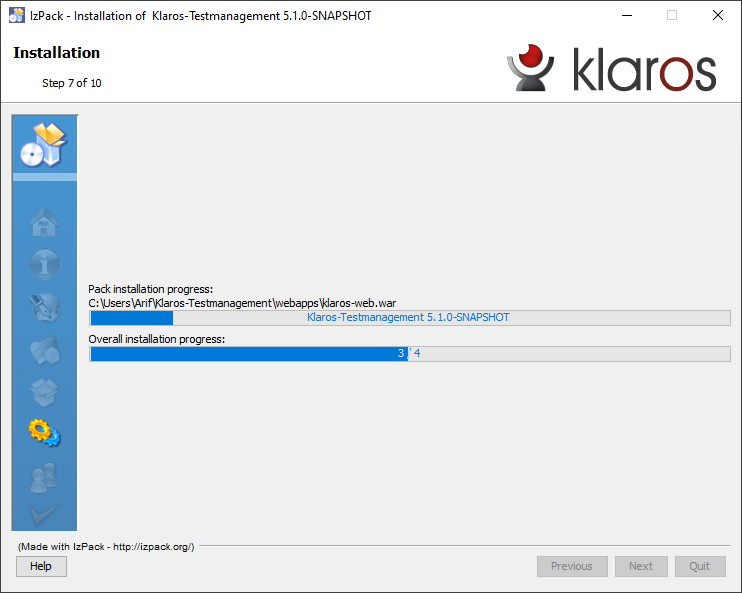
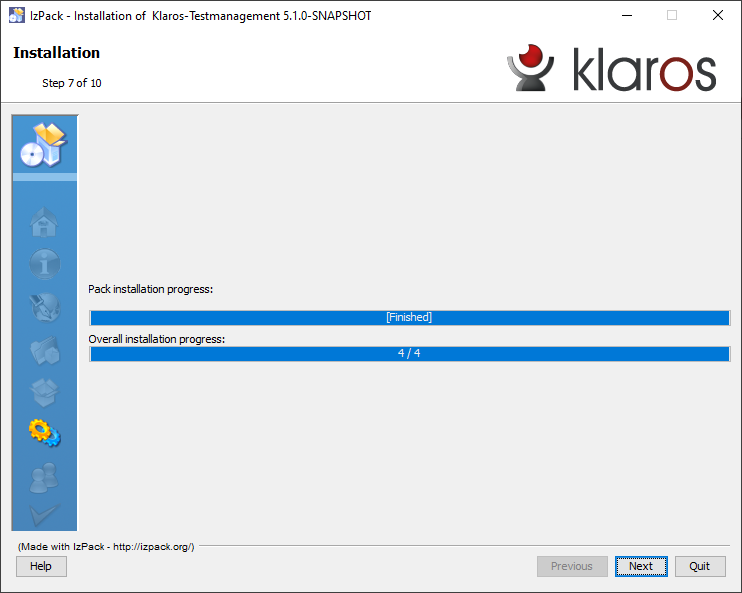
The seventh step starts the installation of Klaros-Testmanagement and shows the installation progress. The following screenshots show the Installation in Progress Screen and the Installation finished screen ( Figure 3.8).
The installation may be aborted by clicking the button. Clicking proceeds with the installation.
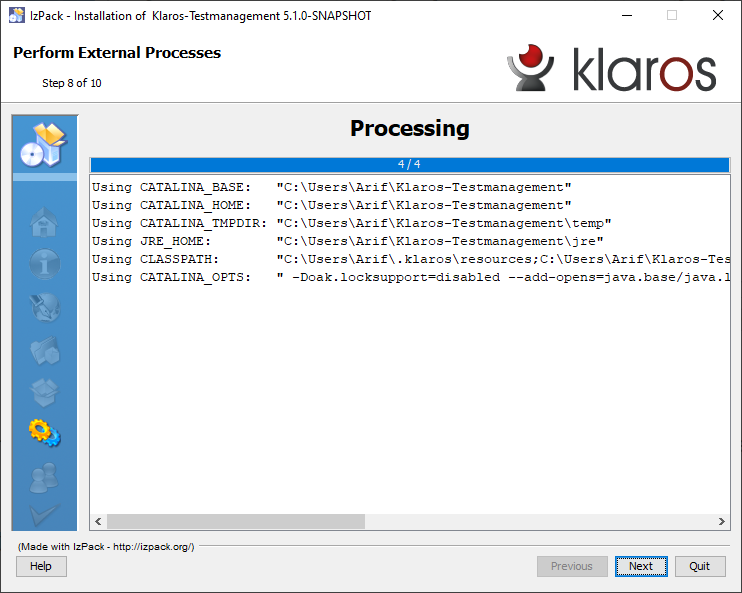
The optional eighth step performs external processes such as setting the environment variables and starting the Tomcat application server.
The installation may be aborted by clicking the button. Clicking proceeds with the installation.
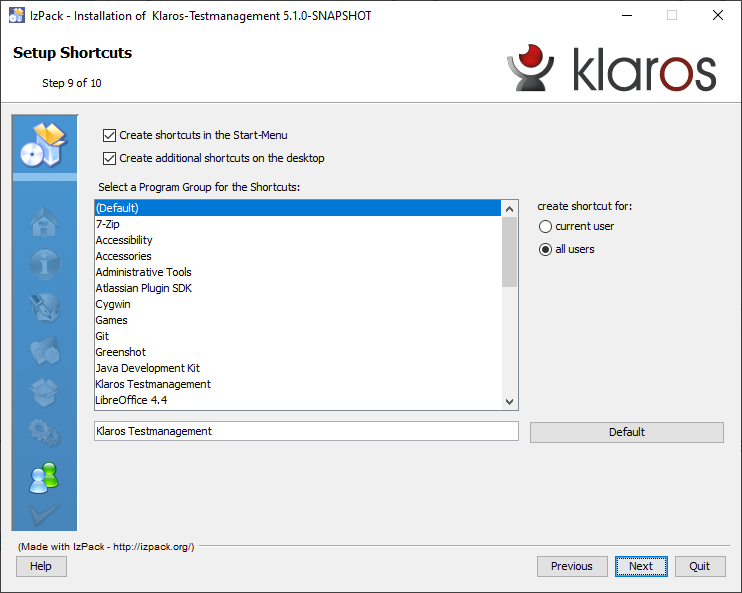
The ninth step allows to set the options for shortcuts. The installer can create shortcuts in the Start-Menu and on the desktop ( Figure 3.11).
This step looks different on Linux installations but has the same functionality.
The installation may be aborted by clicking the button. Clicking goes back to the Perform External Processes step and clicking proceeds with the installation.
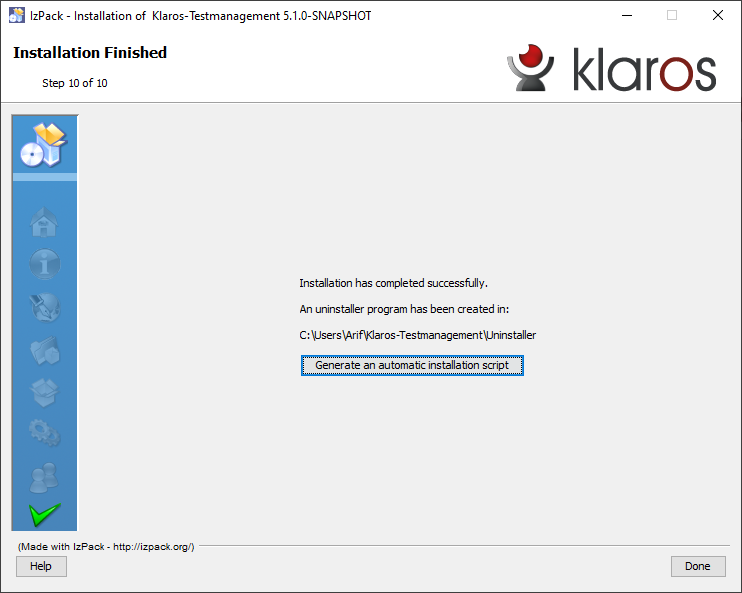
The last step notifies the user that Klaros-Testmanagement was installed successfully and shows the path to the to the uninstall program ( Figure 3.12).
The button saves a complete script of the installation with the selected user choices, so that the same installation could be repeated unattended or on other machines.
The installation can be completed by clicking the button.
|
|
 |
|
| 3.2. System Prerequisites |  |
3.4. Console-based Installation |